If you are experiencing very slow performance in Windows 11 even though you have decent RAM like 8 GBs or more. Then, most probably issue is with your Harddisk. To check it you can press Ctrl+Alt+Del and then open Task Manager. There you can find which software uses what amount of RAM, CPU, Disk or Network.
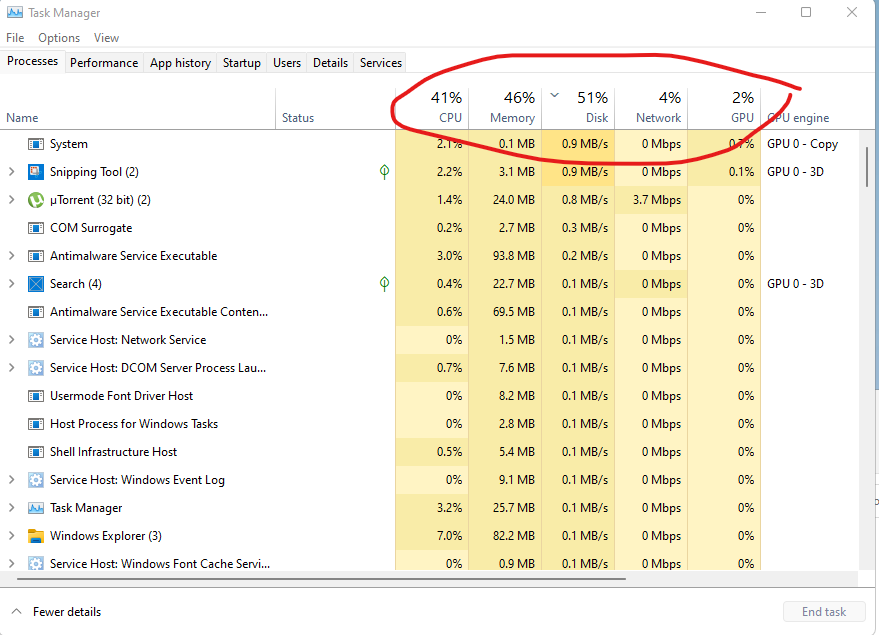
Now if there is 100% disk usage then here are some simple trick which can help to boost Windows 11 performance.
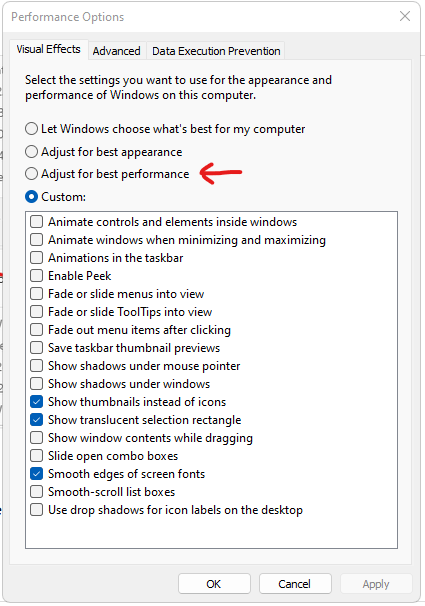
1. Change Windows Settings from Best Appearence to Best Performance
1. Open Windows Explorer, and right click on This PC or My PC icon and click on properties to open system settings as shown below.
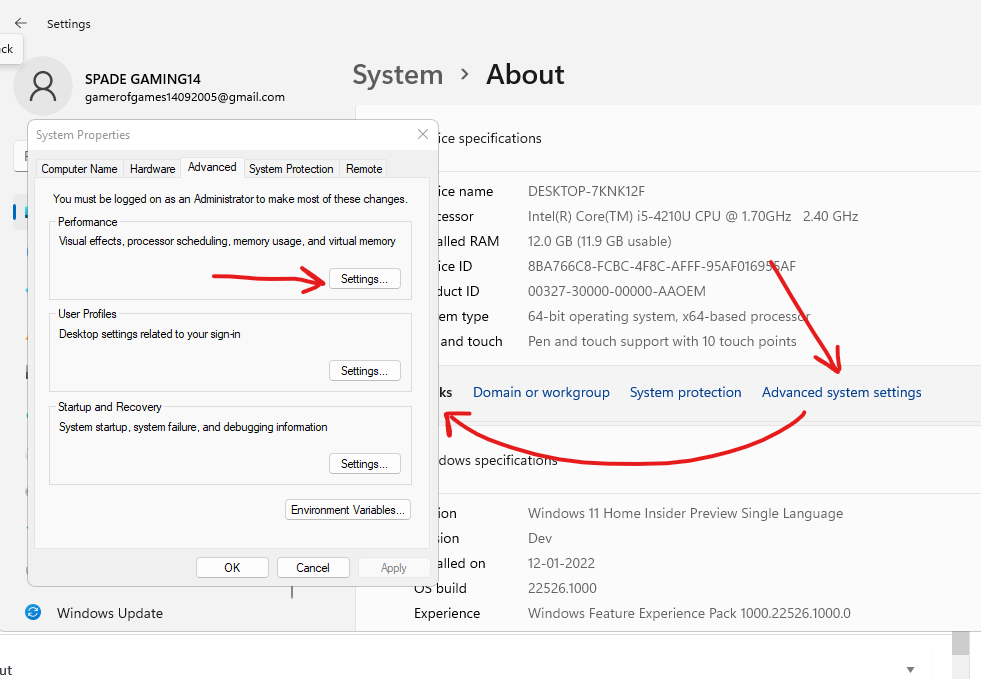
2. Next click on Advanced syestem settings to open System Properties. From Advanced Tab click on Settings in Performance section.
3. From the next window, choose Adjust for best performance instead of Let Windows choose what’s best for my computer. However, you should check the options as shown in the below image to have image thumbnails and fonts look better.
2. Disable Windows Search for Improved Disk Performance
Next tip you can permanently disable Windows Search and Indexing.
- Press WIN+R
- Type services.msc, then click OK
- In the Services window that opens find Windows Search and double-click to open In Windows Search Properties
- Find Startup type and select Disabled
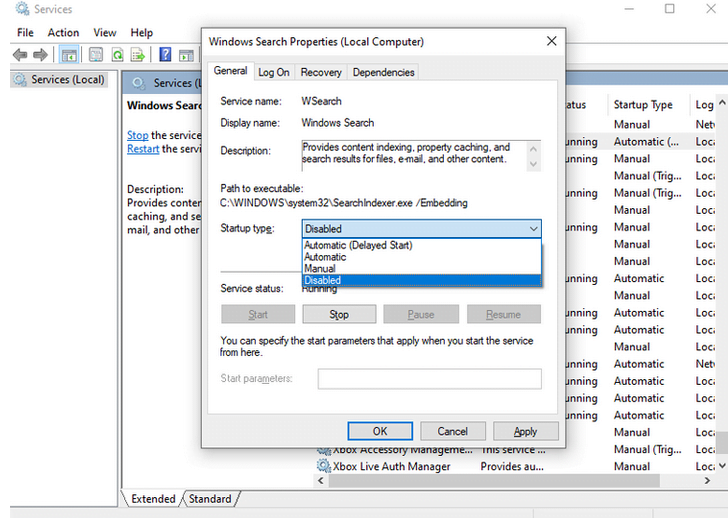
Click OK to save your changes.
A few moments after disabling Windows Search, your Windows 10 performance should improve considerably. However there are some more tips you can follow.
3. Disable SysMain to Fix 100% Disk Usage in Windows 11
Another Windows 11 feature identified as a potential cause of the 100% disk usage issue is the superfetch service. Since Windows 10 1809 (the 2018 Windows 10 October Update) this has been renamed to “SysMain.”
To prevent this service from causing the disk usage issue, open another Windows PowerShell (Admin) and enter:
net.exe stop sysmain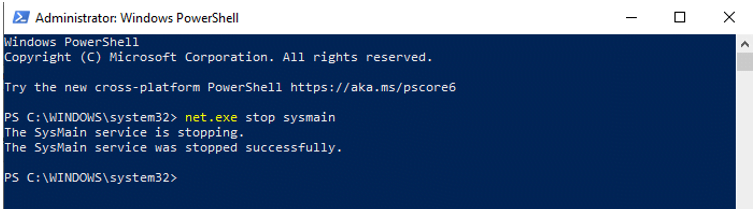
Again, wait a few moments to check whether this has had any effect on your computer’s performance.
4. Resolve PCI-Express Firmware Bug
Some drivers don’t run quite as they should in Windows 11. One that has been discovered to be causing 100% HDD use is the StorAHCI.sys driver, which has a firmware bug. StorAHCI.sys intended for storage devices connected to the PC or laptop motherboard via Advanced Host Controller Interface PCI-Express.
To find out if this is the problem and rule it out:
- Right-click Start and choose Device Manager
- Expand IDE ATA/ATAPI Controllers
- Double-click the AHCI Controller entry
- In the Driver tab select Driver Details
If the driver listed as C:\Windows\system32\DRIVERS\storahci.sys, you could be affected by this bug. Next:
- Close the driver details box
- In the Details tab select Device instance path from the drop-down menu
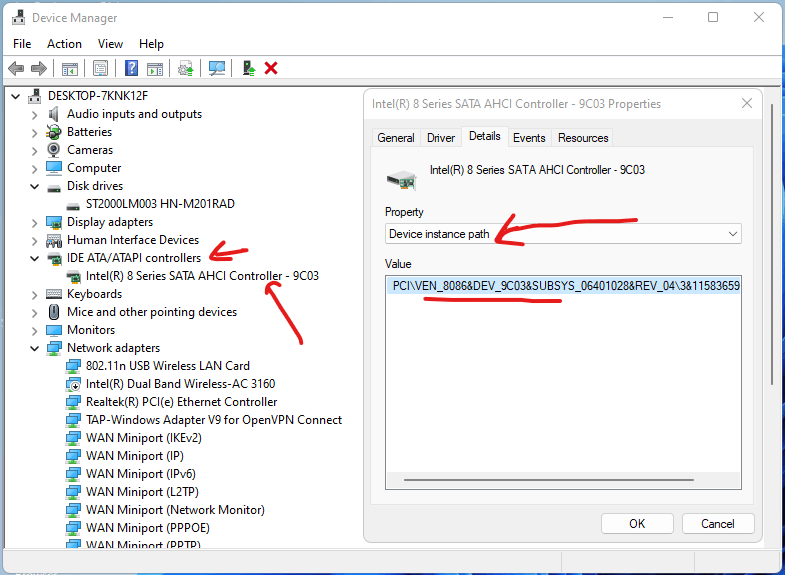
- Right-click the value, then Copy.
- Launch Notepad and Paste the contents
- Next, press WIN+R and type regedit, and click OK
- Find HKEY_LOCAL_MACHINE\System\ CurrentControlSet\Enum\PCI\ and use the pasted string from Notepad to open the correct AHCI Controller, followed by the random number.
Here, expand Device Parameters\Interrupt Management\ MessageSignaledInterruptProperties and you should see MSISupported listed in the right-hand pane. Double-click this, then change the Value data: to 0.
Click OK to confirm and follow the instructions to restart Windows.
Hopefully these all tricks will solver your problem.