In this tutorial, we will cover how to make text fit perfectly along a path in CorelDRAW. Whether you’re designing logos, emblems, or any artwork where text needs to follow a circular or curved path, this guide will show you how to do it with precision. We’ll explore two methods to achieve a clean and accurate fit, avoiding common issues like uneven stretching or misalignment.

Steps to Fit Text to a Path in CorelDRAW:
1. Create a Circle as Your Path:
- Start by selecting the Ellipse tool and drawing a circle.
- Hold the Ctrl key while dragging to ensure your circle is perfectly round. You can adjust the size to your needs, but for this example, we’ll use a circle with a diameter of 40 inches.
- Make a duplicate of this circle by pressing Ctrl + D and position it in the center for future reference.
2. Method 1: Text Directly on Path (Quick Method):
- Select the Text tool and type the text you want to curve along the path.
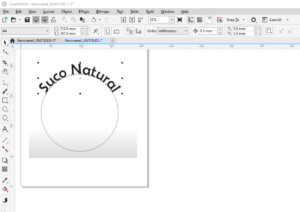
- With the text selected, go to Text in the top menu and choose Fit Text to Path.
- Click on the circle to apply the text along the curve.
- Use the Shape tool to adjust the text placement by dragging it along the path. However, this method can sometimes stretch the letters unevenly if you’re not careful, making it more difficult to achieve a precise fit.
3. Method 2: Precision Text Fit with Virtual Segment Delete:
- For a more precise method, we will split the circle in half, ensuring the text fits exactly where you want it without distortion.
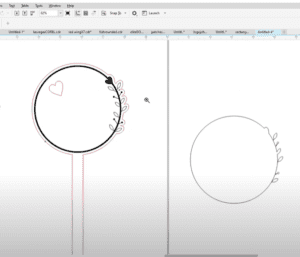
- Select the circle and use the Virtual Segment Delete tool to cut away half of the circle. This leaves you with a semicircle that will serve as the new path for your text.
4. Using the Curve Properties:
- With the remaining semicircle selected, go to Windows > Dockers > Properties. Here, you can fine-tune the curve properties to ensure it fits your design.
- Under Curve Properties, you’ll see the exact length of the curve displayed. For example, if the curve length is 33.64 units, take note of this value for later adjustments.
5. Duplicate and Rotate the Path:
- To mirror and balance your design, duplicate the semicircle using Ctrl + D.
- With the duplicate selected, go to the rotation settings and rotate it by 45 degrees (or any desired angle).
- If needed, you can mirror the shape by flipping it horizontally to create a symmetrical design.
6. Fine-Tune the Angle and Size:
- If the rotation angle doesn’t fit as expected, you can experiment with different angles (such as 60 degrees) by adjusting the rotation value and duplicating the mirrored path until you’re satisfied with the alignment.
7. Delete Unnecessary Lines:
- After duplicating and rotating, use the Virtual Segment Delete tool again to remove any excess parts of the circle that are no longer needed for your text path.
8. Apply the Text to the New Path:
- Now that the path is refined, select the Text tool and type your desired text.
- Go to Text > Fit Text to Path and place the text on the curved path. The text should fit neatly along the path without any stretching or misalignment issues.
- If your design requires additional elements (like leaves or ornaments around the text), repeat the process for other sections of the circle, ensuring each section aligns perfectly.
9. Adjust Curve Length for Perfect Fit:
- To make sure the text fits perfectly along the curve, return to the Properties Docker and check the curve length. Adjust the text size and position accordingly, so it fits precisely within the specified curve length, such as 22.43 units.
10. Final Touches:
- Once everything is aligned and looking perfect, you can add additional decorations, borders, or customize the text further.
- Group all the elements together by selecting everything and pressing Ctrl + G. This will keep your design intact and easy to move or resize.
Conclusion:
By following these steps, you can achieve a perfectly fitted text along a curved path in CorelDRAW. While the first method is quick and easy, the second method offers more precision and control, allowing you to tailor your design exactly to your needs. Whether you’re creating logos, medals, or any artwork with text on a curve, this technique will ensure a professional and polished result.


