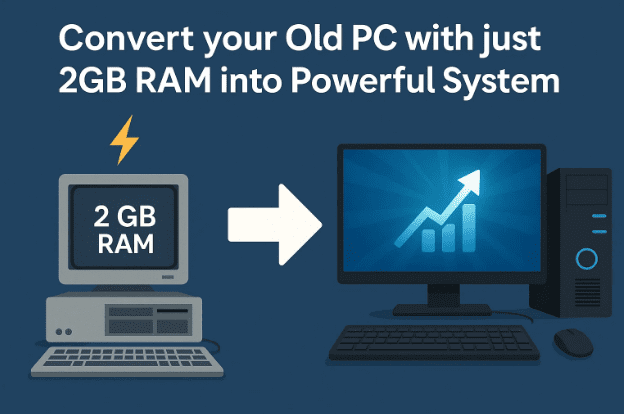
Do you have an old computer gathering dust in your home because it struggles to run Windows or other modern operating systems? Don’t rush to throw it away just yet. With the right lightweight operating system, even a machine with only 2GB of RAM can become useful again.
In this guide, I’ll show you how to breathe new life into your old PC by installing PrimeOS — an Android-based operating system designed for desktops and laptops. Once installed, you’ll be able to run Android apps, stream TV, browse the web, and even use the Play Store like on a smartphone.
Grab a cup of coffee, and let’s go step by step.
1. Why Choose PrimeOS for Old PCs?
Before we jump into the installation, let’s take a moment to understand why PrimeOS is a great option.
- Lightweight: Unlike Windows 10 or 11, which require 4GB–8GB RAM to run smoothly, PrimeOS can function with as little as 2GB RAM.
- Android-based: You can access millions of apps from the Google Play Store — games, streaming apps, social media, productivity tools, you name it.
- Modern Interface: PrimeOS feels like a mix between Android and Windows. It has a taskbar, a start-menu-style launcher, and windowed multitasking.
- Driver-Free: Most drivers (Wi-Fi, camera, sound) work out of the box. No need to hunt down missing drivers.
- Breathes Life into Old PCs: Computers from 2004 onward with 64-bit processors can handle PrimeOS easily. Even older ones with 1–2GB RAM can run a “Classic” version.
So instead of discarding your PC, you can turn it into a mini media center, a web browsing station, or even a lightweight work computer.
2. What You’ll Need Before Starting
To get started, you need a few basic things. Don’t worry — nothing expensive.
- A USB flash drive: Minimum 4GB (8GB recommended). USB 2.0 works, but USB 3.0 will make installation faster.
- An old PC or laptop: At least 2GB of RAM, ideally with a dual-core processor or better.
- Internet connection: For downloading PrimeOS and Rufus, and later for setting up Play Store apps.
- Backup reminder: Any files on the USB stick will be erased during setup, so back them up first.
⚠️ Disclaimer: Installing or booting from PrimeOS won’t damage your computer if done correctly, but if you choose the install to hard drive option, it can erase your existing operating system. Always back up important data from your PC before proceeding.
3. Downloading PrimeOS Safely
Now that we’re prepared, let’s grab the operating system itself.
- Open your browser and go to the official PrimeOS site: https://primeos.in
- Look for the Downloads section.
- Choose the correct version:
- PrimeOS Mainline (64-bit): For most computers made after 2004.
- PrimeOS Classic: For very old machines with only 1–2GB RAM.
- Select the ISO image format.
Once you click download, your browser will save the ISO file (around 1GB). Place it in a folder you can easily access, like Documents or Downloads.
👉 Tip: If your computer is older than 15 years, test with the “Classic” version. But in most cases, the standard 64-bit will work fine.
4. Downloading Rufus to Create a Bootable USB
To use PrimeOS, you need to write its ISO image onto your USB stick in a way that makes it bootable. That’s where Rufus comes in.


- Go to the official Rufus website: https://rufus.ie
- Scroll down and download the latest version (around 2MB in size).
- Run the program directly — it doesn’t even need installation.
Rufus is lightweight but powerful. It’s the go-to tool for creating bootable USB drives for Windows, Linux, and in this case, PrimeOS.
5. Creating a Bootable PrimeOS USB Drive
This is where we bring everything together.
- Insert your USB drive into your computer.
- Launch Rufus. It should automatically detect your USB stick.
- In the Boot selection field, click Select and choose the PrimeOS ISO file you downloaded.
- Choose a partition scheme:
- MBR: Works best for older PCs (BIOS).
- GPT: Works on newer PCs (UEFI).
Since we’re focusing on old PCs, choose MBR.
- Keep other settings at default and click Start.
- Accept the warning that all data on the USB will be erased.
The process usually takes under 10 minutes with USB 3.0. When done, eject the USB safely.
6. Booting from USB via BIOS/Boot Menu
Now comes the exciting part — running PrimeOS!
- Insert the USB into the old PC.
- Restart and enter the BIOS or Boot Menu:
- On HP laptops: Press Esc at startup, then F9.
- On Dell: Usually F12.
- On Lenovo: Often F2 or F12.
- On Acer: Try F12.
👉 Tip: If you don’t know your model’s key, Google “boot menu key + your brand”.
- From the Boot Menu, select your USB drive and press Enter.
You’ll now see the PrimeOS boot options.
7. Running PrimeOS in Live Mode (Without Installing)
One great feature of PrimeOS is that you can test it before committing.
- First Option (Live Mode): Run directly from USB without touching your hard drive.
- Third Option (Install): Permanently install to your hard drive.
For now, let’s pick Live Mode. This lets you try out PrimeOS safely. If you like it, you can install later.
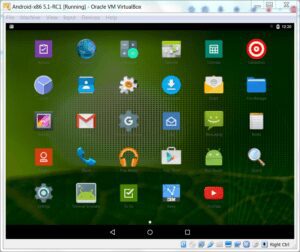
The system will load within 3–5 minutes, depending on your PC. And just like that, you’ll be greeted with a modern Android-like desktop interface.
8. Installing PrimeOS on Your Hard Drive (Optional)
If you want to replace your old Windows installation or dual-boot, you can choose the Install option.
⚠️ Warning: Installing to your hard drive can overwrite your existing data. Always back up before proceeding.
The installer will ask you:
- Which disk partition to use.
- Whether to format it (recommended for a clean install).
- To confirm installation.
Once done, you’ll be able to boot into PrimeOS without needing the USB stick.
9. Configuring PrimeOS for the First Time
When PrimeOS boots for the first time:
- Set up your username.
- Select your time zone.
- Accept the license terms.
After setup, you’ll arrive at the desktop. You’ll see a taskbar at the bottom, similar to Windows, and a start menu with apps.
10. Using Play Store to Install Apps
The best part of PrimeOS is the built-in Google Play Store.
- Connect to Wi-Fi (or Ethernet).
- Open the Play Store.
- Sign in with your Google account.
- Install apps like:
- YouTube (for videos).
- Google Chrome (browser).
- Spotify (music).
- Zoom/Meet (video calls).
- Games like Subway Surfers or PUBG Lite.
Even if your old PC couldn’t handle modern Chrome on Windows, it will work smoothly here.
11. Performance Tips for Old PCs
- Use lightweight apps when possible.
- Don’t install too many apps — keep it minimal for better speed.
- Enable performance mode from PrimeOS settings if available.
- If your PC has only 2GB RAM, avoid multitasking too heavily.
12. Frequently Asked Questions
Q1: Will PrimeOS delete my old Windows installation?
Only if you choose the “Install” option. Running from USB in Live Mode won’t affect your hard drive.
Q2: Can I use PrimeOS on a PC with only 1GB RAM?
Yes, but you’ll need the PrimeOS Classic edition.
Q3: Does PrimeOS support gaming?
Yes! Many Android games run smoothly. Performance depends on your hardware, though.
Q4: Can I go back to Windows later?
Yes, if you didn’t erase your old system. Otherwise, you can always reinstall Windows with a bootable USB.
13. Final Thoughts
In under 30 minutes, you can turn an “obsolete” computer into a functional Android-powered workstation. Whether for watching videos, browsing, or light productivity, PrimeOS is a brilliant way to extend the life of your hardware.
Instead of spending money on a new machine, why not give this a try? Test it first in Live Mode, and if you’re satisfied, install it permanently.
With just a USB drive and a little patience, your old PC can feel new again.
Tags
primeos, install primeos, revive old pc, run android on pc, primeos usb, lightweight operating system, android for pc, bootable usb tutorial, primeos live mode, primeos installation
Hashtags
#PrimeOS #OldPCRevival #AndroidOnPC #LightweightOS #TechGuide #BootableUSB