Purchasing a new mini PC is exciting, but before diving into usage, there are essential steps to ensure optimal performance, security, and customization. In this guide, we’ll walk through the initial setup, hardware inspection, Windows reinstallation, driver management, and performance testing for your new mini PC.
Unboxing and Initial Inspection
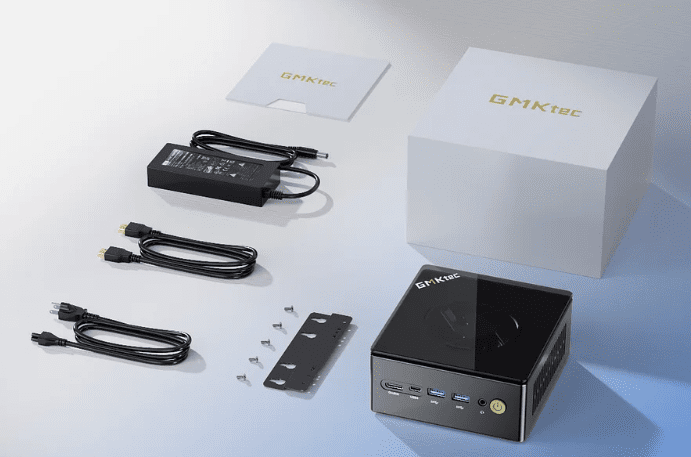
When you receive your mini PC, the first step is to unbox and verify all included components. For example, the GMKtec NucBox K8 Plus (featuring an AMD Ryzen 7 8845HS processor) comes with:
- The mini PC unit
- Power adapter & brick
- VESA mount (for monitor attachment)
- Warranty card
- HDMI cable
Action Steps:
- Check for Physical Damage – Inspect the unit for any shipping damage.
- Verify Components – Ensure all accessories listed in the manual are present.
Accessing and Upgrading Internal Hardware
Most mini PCs allow easy access to internal components for upgrades. Here’s how to check and upgrade hardware:
Opening the Mini PC
- Top Panel Removal – Some models (like the NucBox K8 Plus) have a twist-to-open top panel secured by plastic clips.
- Bottom Panel Access – Others may require removing rubber feet and unscrewing the base.
Upgradable Components
- RAM – The NucBox K8 Plus supports up to 96GB DDR5-5600MHz (dual-channel SODIMM).
- Storage – It has two M.2 2280 NVMe slots, each supporting up to 4TB.
- If your model includes a 1TB Crucial P3 Plus SSD, consider upgrading for more storage.
- Cooling System – Some mini PCs have removable fans for easy cleaning.
Pro Tip: Always ground yourself before handling internal components to avoid static damage.
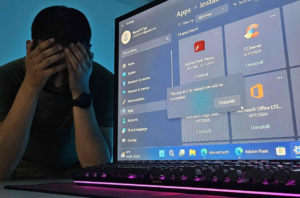
Reinstalling Windows for a Clean Setup
Many mini PCs come with pre-installed Windows, but a fresh install ensures:
✔ Removal of bloatware
✔ Better security (eliminates potential malware risks)
✔ Customized settings
Steps to Reinstall Windows
- Create a Bootable USB
- Download Windows 11 Media Creation Tool from Microsoft’s official website.
- Use Ventoy (for multi-ISO booting) or Rufus (for standard USB creation).
- Boot from USB & Install Windows
- Enter BIOS (usually by pressing F2/DEL at startup).
- Disable Secure Boot (if using Ventoy).
- Select the USB drive as the boot device.
- Clean Installation Process
- Delete existing partitions (except the USB drive).
- Install Windows on the unallocated space.
- Skip Microsoft account setup (if preferred) to create a local account.
- Post-Installation Checks
- Verify Windows activation (should auto-activate via hardware ID).
- Check Device Manager for missing drivers.
Installing Missing Drivers
Since mini PCs from brands like GMKtec may not have official driver support pages, here’s how to get all necessary drivers:
Method 1: Windows Update
- Connect to the internet (Wi-Fi/Ethernet).
- Go to Settings > Windows Update and install all available updates.
Method 2: Snappy Driver Installer Origin (SDIO)
If Windows Update doesn’t fetch all drivers:
- Download SDIO from their official site.
- Run in Expert Mode > Download Indexes Only.
- Select all missing drivers and click Install.
Note: Some drivers (like Ethernet) may require manual installation if no internet connection is available initially.
Performance Testing & Benchmarking
Before finalizing setup, test your mini PC’s performance:
1. SSD Speed Test
- Use CrystalDiskMark to check read/write speeds.
- Example: A Crucial P3 Plus NVMe SSD should deliver ~5000MB/s read & ~3500MB/s write.
2. CPU & GPU Stress Test
- CPU-Z – Checks CPU performance (e.g., Ryzen 7 8845HS scores: Single-core ~700, Multi-core ~6500).
- Cinebench/Geekbench – For benchmarking.
- Temperature Monitoring – Use HWMonitor to ensure CPU temps stay under 95°C under load.
3. Graphics Performance
- The AMD Radeon 780M (integrated GPU) should handle:
- 1080p gaming (low-medium settings)
- 4K video playback
Final Setup & Optimization
After verifying hardware and software:


- Install Essential Software (Chrome, Office, etc.).
- Create a System Backup (using Macrium Reflect or Windows Backup).
- Optimize Settings (disable startup apps, adjust power plans).
Frequently Asked Questions (FAQ)
Q: Will reinstalling Windows void my warranty?
A: No, reinstalling Windows does not void hardware warranties.
Q: What if my mini PC doesn’t auto-activate Windows?
A: Contact the manufacturer—activation keys are often embedded in the BIOS.
Q: Can I upgrade RAM and storage later?
A: Yes, most mini PCs allow RAM and SSD upgrades. Check your model’s specs first.
Q: How do I clean the cooling system?
A: Use compressed air to remove dust from vents and fans.
Final Thoughts
Setting up a new mini PC correctly ensures longevity, security, and peak performance. By following these steps—hardware inspection, clean Windows install, driver management, and performance testing—you’ll have a smooth and optimized experience.
#MiniPC #TechGuide #WindowsInstall #HardwareUpgrade #Ryzen7 #GMKtec #NucBoxK8Plus #PCSetup #TechTips
Tags: Mini PC setup, Windows reinstallation, AMD Ryzen mini PC, GMKtec NucBox, SSD upgrade, driver installation, PC benchmarking
Disclaimer: This guide is based on personal experience. Always check manufacturer guidelines before modifying hardware. Some links may be affiliate-supported.


