Do you cringe when you hear your recorded voice? You’re not alone. Most people dislike how they sound on tape. But when even others tell you your audio sounds bad — that’s your cue to upgrade your audio game.
The good news is: You don’t need expensive gear or premium software to sound professional. In this detailed guide, we’ll walk you through how to:
- Record clean audio at home
- Use free tools to professionally edit your sound
- Turn basic audio into crisp, studio-level voice recordings
🎙️ Step 1: Don’t Chase the Mic — Master Your Environment First
Yes, having a decent mic helps. But the mic alone is not the magic — your environment plays a much bigger role.
What I Use (And Recommend)
Out of all my mics, including:
- BOYA BY-M1 (~₹850) BUY ON AMAZON: https://amzn.to/3I4GiSs
- Maono AU-03 (~₹2500) BUY ON AMAZON https://amzn.to/4npw0fI
- DigiTech DMW-103 (~₹3000) BUY ON AMAZON https://amzn.to/4nnkrpt
- Hollyland Lark M2 (~₹10,000+) BUY ON AMAZON https://amzn.to/4nlxXd8
The BOYA BY-M1 is the most consistent performer for voiceovers — clear, budget-friendly, and reliable.
Pro Tips for Recording Setup:
- Turn off fans and AC — your mic picks them up.
- Politely ask others around you to stay quiet while recording.
- Speak slightly louder to improve signal-to-noise ratio.
- Avoid echo: Small rooms cause audio to bounce back. Use sound dampening materials like:
- Foam panels
- Pillows, blankets, or even a sofa behind the mic
🎧 Step 2: Mic Position & Speaking Technique
Microphone type matters for positioning:
- Omnidirectional mics (like BOYA) pick sound from all sides.
- Unidirectional mics (like shotgun or lav mics) capture from one direction only.
Positioning Guidelines:
- Keep 6–8 inches between your mouth and the mic.
- Slightly angle the mic so sound doesn’t directly “explode” into it.
- Use a pop filter or a clean sock to reduce plosive sounds if you’re on a tight budget.
- Fix the mic in one place — moving it around causes audio fluctuations.
Bonus Tip:
Before starting your actual dialogue, record 5–6 seconds of silence. This is called room tone, and it’s essential for removing background noise later.
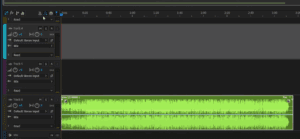
🛠️ Step 3: Edit Audio Like a Pro — Using Free Software (Audacity)
We’ll use Audacity — a free, open-source audio editor that’s powerful and beginner-friendly.
Download Link:
👉 https://www.audacityteam.org/
🧹 Step 4: Noise Reduction
1. Select your recorded room tone section
2. Go to: Effect > Noise Removal & Repair > Noise Reduction
3. Click: Get Noise Profile
4. Now select your entire audio
5. Repeat: Effect > Noise Reduction and press OK
✅ This isolates and removes the background noise from your full recording.


🔊 Step 5: Add Bass for Warmth
1. Go to: Effect > EQ & Filters > Filter Curve EQ
2. In presets, choose: Bass Boost
3. Apply to entire audio
This adds richness and depth to your voice, making it sound more professional.
🎶 Step 6: Add Treble for Crispness
1. Go to: Filter Curve EQ again
2. This time, select: Treble Boost
3. Apply
This sharpens high frequencies so your voice sounds clean and not muffled.
📉 Step 7: Cut Out Low-End Rumble (Low Roll-Off for Speech)
This removes unnecessary low frequencies like wind, mic rumbles, or subtle hums.
1. Go to: Filter Curve EQ
2. Choose preset: Low Roll-Off for Speech
3. Apply
📊 Step 8: Use Compressor for Balanced Volume
Compression makes sure your voice has consistent volume throughout.
1. Go to: Effect > Compressor
2. Leave default settings or tweak slightly
3. Apply
✅ Quiet parts are boosted, loud parts are reduced — a must for podcasts and YouTube.
🔁 Step 9: Normalize (Optional but Recommended)
Normalization sets a uniform loudness level — especially useful when combining multiple recordings.
1. Go to: Effect > Normalize
2. Set Peak Amplitude to -0.0 dB
3. Click OK
🔄 Final Output: Before vs. After
The difference in audio clarity before and after editing is massive.
| Step | Description |
|---|---|
| Before | Low clarity, background noise, unbalanced tone |
| After | Clean, crisp, warm, and professional voice audio |
❓ FAQs
Q: Do I need an expensive microphone to sound professional?
A: Not at all. With proper setup and post-editing, even a budget mic like BOYA BY-M1 can deliver high-quality results.
Q: Why is my room tone important?
A: It captures your environment’s base noise so that you can remove it cleanly during editing.
Q: Is Audacity really free?
A: Yes. It’s 100% free, open-source, and supported on Windows, macOS, and Linux.
Q: Should I always normalize my audio?
A: Not always, but it’s useful when editing multiple clips or combining tracks from different sources.
🔚 Final Thoughts
Audio quality can make or break your content. Even if your visuals are perfect, poor sound turns viewers away. But with the right mic technique, a quiet space, and free editing tools like Audacity, you can produce studio-quality voiceovers from your bedroom.
Small tweaks — like using room tone, boosting bass/treble, and compressing audio — can dramatically elevate your content.
🏷️ Tags:
audio editing, how to record good audio, audacity tutorial, podcast setup, voiceover tips, beginner audio editing, free audio editor, improve mic quality, how to use audacity, mic technique
📣 Hashtags:
#AudioEditing #Audacity #VoiceOverTips #SoundDesign #FreeAudioTools #PodcastTips #ContentCreator #MicSetup #YouTubeAudio #AudioProduction
Let us know if you’d like a follow-up tutorial on mastering noise gates, background music balance, or mixing multi-track podcasts!


