If you’ve ever recorded audio and found it dull, noisy, or just plain flat, don’t worry—Audacity, a free and open-source audio editing software, has powerful features that can transform raw recordings into crisp, studio-like sound. In this detailed guide, you’ll learn how to enhance your voice recordings using Audacity with practical steps and recommended settings.

🎧 What is Audacity?
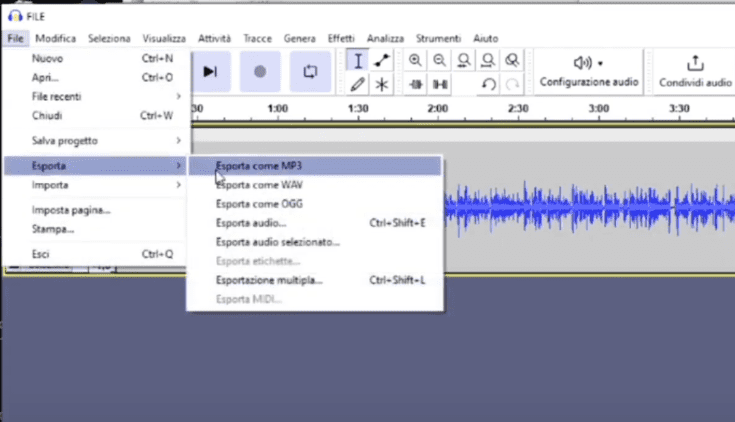
Audacity is a free digital audio editor available for Windows, macOS, and Linux. It offers features like recording, editing, noise reduction, effects, and more—making it one of the most accessible tools for podcasters, YouTubers, voice-over artists, and musicians.
🛠️ Step-by-Step Guide to Polish Your Audio in Audacity
✅ Step 1: Setup Audacity Correctly
- Set Project Rate to 48000 Hz
- Look at the bottom-left of Audacity.
- Set the Project Rate to 48000 Hz (recommended for general voice recording).
- Some platforms like ACX require 44100 Hz, but 48000 Hz offers better clarity.
- Add a New Stereo Track
- Go to Tracks > Add New > Stereo Track.
- Set Format and Rate for the Track
- Click the little dropdown arrow next to the track title.
- Go to Format > 32-bit float.
- Go to Rate > 48000 Hz.
🎙 Step 2: Record with Silence Buffer
Before speaking:
- Leave 3–4 seconds of silence at the beginning of your recording. This helps with accurate noise reduction later.
- Do the same at the end of your recording.
Press the red Record button, speak clearly, then hit Space or Stop when finished.
🔊 Step 3: Normalize Your Audio
- Select the entire track (
Ctrl + A). - Go to Effect > Normalize.
- Use the following settings:
- ✅ Remove DC offset: Checked
- ✅ Normalize peak amplitude to: -1.0 dB
- ❌ Normalize stereo channels independently: Unchecked
- Click Apply.
📉 Step 4: Apply Compression
- With the track still selected, go to Effect > Compressor.
- Enter these settings:
- Threshold: -18 dB
- Noise Floor: -40 dB
- Ratio: 2.5:1
- Attack Time: 1.80 seconds
- Release Time: 11.1 seconds
- ✅ Make-up gain for 0 dB after compressing: Checked
- Click Apply.
🎚 Step 5: Add EQ – Treble & Bass Boost
- Go to Effect > Filter Curve EQ.
- Click Manage > Factory Presets > Treble Boost.
- Click Apply.
Repeat the process:
- Go to Effect > Filter Curve EQ
- Choose Bass Boost
- Click Apply
This enhances clarity and depth in your voice.
📈 Step 6: Normalize Again
Repeat the Normalize effect using the same settings from Step 3 to balance the audio post-EQ.
🔇 Step 7: Reduce Background Noise
- Select 3–4 seconds of silence from the beginning.
- Go to Effect > Noise Reduction.
- Click Get Noise Profile.
Then:
- Select the entire track (
Ctrl + A). - Go back to Effect > Noise Reduction.
- Use these settings:
- Noise Reduction (dB): 12
- Sensitivity: 12.5
- Frequency Smoothing (bands): 7
- Select Reduce (not Residue)
- Click OK.
🎧 You should now hear a cleaner, more professional sound.
⚠️ Important Notes on Noise Reduction
- While Audacity’s noise reduction works well, overuse can cause artifacts—a metallic or distorted sound.
- For heavy background noise, consider professional tools like iZotope RX (paid software).
🎤 Alternate Tools for Audio Recording
While Audacity is great for post-production, if you prefer real-time filters, you can explore:
- OBS Studio – for real-time audio filters during recordings.
- External audio plugins (VSTs) for additional effects.
📝 Final Thoughts
This guide provides a powerful but simple workflow to improve your voice recordings. While every voice and environment is different, these steps offer a reliable starting point. Feel free to tweak the settings as needed for your specific recording space and microphone.
⚠️ Disclaimer
This guide is for educational and personal use only. Please ensure any voice or music content you edit is your own or you have the right to process it.
🔖 Tags
audacity tutorial, audio editing, voice enhancement, studio audio quality, normalize audio, remove noise audacity, audio compression, filter curve EQ, podcast recording, audacity noise reduction
📢 Hashtags
#Audacity #VoiceEnhancement #StudioQualityAudio #AudioEditing #FreeAudioEditor #NoiseReduction #NormalizeAudio #PodcastTools #AudioTutorial #EQBoost
By following these steps, you can make your audio sound sharper, richer, and more professional—perfect for podcasts, YouTube, voice-overs, and beyond.


