Adding text to a circular path or any custom path is a useful and creative feature in CorelDRAW that can enhance your designs, whether for logos, labels, or decorative elements. This blog post will walk you through the steps to achieve this effect, along with tips for customization and alignment.

Step-by-Step Guide
1. Create a Circular Path
- Select the Ellipse Tool from the toolbox.
- Hold down the
Ctrlkey while dragging to create a perfect circle. Release the key after completing the shape. - You can resize or reposition the circle as needed.
2. Prepare Your Text
- Type your desired text using the Text Tool.
- Copy the text using
Ctrl + Cso it’s ready to be placed on the path.
3. Attach Text to the Circle
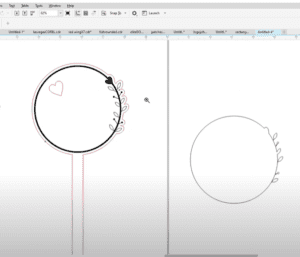
- Click on the circle near its edge using the Text Tool.
- Hover until you see the “Edge” or “Borda” option appear.
- Paste your text using
Ctrl + V. The text will align itself to the path automatically.
4. Customize the Text on Path
- Adjust the font, size, and color as required.
- Use the Pick Tool to move the text along the path. A small red circle near the text lets you drag and position it.
5. Advanced Formatting Options
- Spacing Between Letters: Use the Shape Tool to adjust the spacing between the letters for a cleaner appearance.
- Distance from the Path: Adjust the text’s position relative to the path by dragging it closer or further away.
- Reversing Text Orientation: Use the mirroring options to flip the text horizontally or vertically if needed.
6. Adding Another Line of Text
- Create a duplicate of the circle or draw a new one for the second line of text.
- Repeat the above steps for attaching and formatting text.
- Ensure alignment by using guidelines from the ruler to maintain symmetry.
7. Final Adjustments
- Once the text position and formatting are finalized, you can remove the circle if it’s only needed for placement.
- To do this, select the circle using
Ctrl+ click and delete it.
- To do this, select the circle using
- For permanent placement, convert the text to curves, ensuring the path dependency is removed.
8. Using Custom Paths
- Create a unique path using the Pen Tool or any shape.
- Repeat the same process to attach text, ensuring the text follows the contour of your path.
Pro Tips
- Always keep the path as a backup until the design is finalized for easier adjustments.
- Use the Alignment Guides to ensure your text is perfectly aligned for a polished look.
- Experiment with different fonts and sizes to find the best fit for your design.
Applications
- Logos: Add text around a logo for branding purposes.
- Labels: Use this technique for decorative borders on product labels.
- Art Projects: Enhance custom shapes with meaningful text.
By following these steps, you can leverage the versatility of CorelDRAW to create captivating designs with text paths. Whether you’re a beginner or an advanced user, this technique is a great addition to your design toolkit.
Tags
CorelDRAW, text on path, text on circle, CorelDRAW tutorial, design tips, logo design, circular text, text effects, CorelDRAW tools, graphic design basics
Hashtags
#CorelDRAW #TextOnPath #CircularText #GraphicDesign #LogoDesign #CorelDRAWTips #DesignTutorial
