Introduction
In Adobe InDesign, the ability to customize the starting page number of a document is crucial for creating professional layouts, especially for books, catalogs, or reports. This detailed guide will show you how to adjust the starting page number in your InDesign project. Follow these steps for precise control over your page numbering.

Step 1: Open the Pages Panel
- Access the Pages Panel
- Open your document in Adobe InDesign.
- Navigate to the Pages Panel by selecting Window > Pages from the top menu.
- Alternatively, use the shortcut
F12to open the panel.
- View the Document Layout
- The Pages Panel displays all the pages in your document. This view helps you understand the current sequence and layout.
Step 2: Setting Up for a Page Number Change
- Check Facing Pages
- If your document mimics a book layout, ensure that Facing Pages is enabled.
- To activate it, go to File > Document Setup, and check the Facing Pages option.
- Determine the Starting Page
- Identify the page where you want the numbering to begin. For example, if you want the numbering to start on the second page, plan accordingly.
Step 3: Change the Starting Page Number
- Open Numbering and Section Options
- In the Pages Panel, right-click (or click the menu icon in the top-right corner).
- Select Numbering and Section Options from the dropdown menu.
- Set the New Starting Page Number
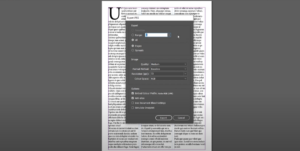
- In the dialog box that appears, check the option Start Page Numbering At.
- Enter the desired starting page number in the field provided (e.g., type “2” to start numbering from the second page).
- Apply Changes
- Click OK to confirm your changes.
- The document’s numbering will now reflect the new starting point.
Step 4: Verify the Changes
- Review the Pages
- Check the Pages Panel to ensure the numbering updates are applied correctly.
- If the first page is no longer needed, confirm that it’s removed from the layout.
- Experiment with Other Numbers
- Repeat the steps to start numbering at a higher number, such as 10.
- This flexibility is especially useful for documents with multiple sections or chapters.
Step 5: Reset to Automatic Numbering
- Revert to Default Settings
- To reset to automatic page numbering, revisit Numbering and Section Options.
- Select Automatic Page Numbering and click OK.
- Check the Layout
- Ensure the document returns to its original numbering sequence.
Tips and Notes
- This process works for both Facing Pages and non-facing pages.
- Always review your numbering changes before finalizing a document to ensure consistency across sections.
- Adjusting page numbering is especially helpful when combining multiple documents into a single project.
Conclusion
Changing the page number start in Adobe InDesign is a straightforward process that offers significant control over your document’s layout. By following these steps, you can customize your project to meet professional standards. Bookmark this article as a reference for future projects, and explore the many possibilities InDesign offers for advanced page management.
#AdobeInDesign #PageNumbering #InDesignTutorial #FacingPages #GraphicDesign #DesignTips #DocumentSetup #CreativeSuite


