Every time you open Google Chrome, you’re greeted with the familiar Google homepage — a clean search box in the center and, lately, a long list of Discover articles below it. These articles are meant to show you personalized news and recommendations based on your activity and interests.
However, for many users, this “personalized feed” feels more distracting than helpful. You may prefer a simple, clean search page without all the news clutter — or you may have privacy concerns about Google tracking your browsing interests.
In this detailed guide, we’ll go step by step through the process of disabling the Google Discover feed on Chrome’s homepage, turning off personalization features, and even hiding some extra cards that clutter the new tab page.
By the end, your Chrome homepage will be neat, distraction-free, and privacy-focused.
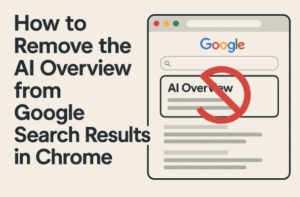
1. What Is the Google Discover Feed?
Let’s start with a quick refresher.
When you open Google Chrome, especially on the default Google.com homepage, you often see a list of trending stories or recommended articles under the search bar.
This section is called the Discover Feed, and it uses your browsing history, location, and account activity to show “personalized” suggestions.
For example, if you’ve recently searched for laptops, you might see articles about “Best laptops for students in 2025” or “Upcoming Chromebook features.”
While this can be useful for some, others find it:
- Distracting, because it fills the clean search page with irrelevant content.
- Privacy-invasive, since it relies on personal search data and web activity.
- Repetitive, showing the same topics over and over again.
So, if you’re one of those who prefer a clutter-free homepage, it’s time to turn it off.
2. Why You Might Want to Disable It
Before we dive into the settings, let’s understand why disabling Discover makes sense for many users.
When you open Chrome to get work done or research something, the last thing you need is a wall of news stories trying to grab your attention. The Discover feed can eat into your focus time, especially if you find yourself clicking unrelated links before you even start your task.
Also, since the feed is powered by Google’s activity tracking, it continuously learns about your behavior. Turning it off helps improve privacy, reduces data collection, and ensures your homepage stays clean and professional.


Now that we’ve set the context, let’s move on to the actual steps to disable it.
3. Step 1: Open Google Preferences
The first step is to access Google’s preference settings, where your personalization options are stored.
- Open your Chrome browser and visit:
👉 https://www.google.com/preferences - You’ll be taken to the Search Settings page.
- Scroll down until you find the section titled “Search personalization.”
This section controls how Google tailors your search experience based on your activity data.
Before changing anything, take a quick look at the current settings. Some users already have personalization partially turned off — especially if their Web & App Activity is disabled.
4. Step 2: Turn Off Search Personalization
Here’s where the real magic happens.
When you locate the “Search personalization” section, you’ll see a toggle switch labeled Personalized Search.
- If it’s turned on, Google uses your past searches, clicked results, and browsing patterns to adjust what you see — including your Discover feed.
- To disable this, click the slider to turn it off.
Once you toggle it off, Google will stop showing personalized Discover results on your homepage.
This change ensures that even when you sign back in or reopen Chrome, the feed doesn’t reappear.
You’ll see a small note that says something like:
“You won’t get a full personalization experience because your Web & App Activity setting is off.”
That’s exactly what we want.
Let’s move on to the next step to make sure your browsing history isn’t feeding back into Discover.
5. Step 3: Manage Search History and Activity
Turning off personalization is great, but Google’s broader tracking settings may still store your activity data. Let’s fix that too.
- From the same page, look for a link labeled “Search History” or directly go to your My Activity page:
👉 https://myactivity.google.com - Here, review what data Google saves — such as search terms, voice inputs, and visited websites.
- To turn it off, find the Web & App Activity section and toggle it off.
- Confirm your choice when prompted.
By disabling this, you’re telling Google not to log your searches or use them to suggest new content.
From now on, your homepage should load cleanly — just the Google logo and search box.
🧩 Tip: You can still perform searches as usual; they simply won’t be used to personalize future results or Discover suggestions.
6. Step 4: Clean Up the Chrome Homepage
Now that we’ve disabled Discover and search personalization, there’s one more area to tidy up — the Chrome homepage layout.
When you open Chrome, you might notice a “Customize Chrome” button (usually at the bottom-right corner of the page). This is where you can control what appears on the homepage.
Follow these steps:
- Click the Customize Chrome button.
- Navigate to Cards or Shortcuts settings.
- Turn off options you don’t need, such as:
- Shortcuts – those small boxes showing frequently visited sites.
- Cards – personalized info snippets like “Continue where you left off.”
- Background suggestions – optional cards showing recent tabs or recommendations.
By unchecking these, your homepage becomes minimalistic and loads faster too.
7. Step 5: Disable Shortcuts, Cards, and Tabs
If you don’t see the “Customize Chrome” button, don’t worry. There’s another way to access the same settings.
- Click the three-dot menu (⋮) at the top-right corner of Chrome.
- Go to More Tools → Customize Chrome.
- Inside this menu, look for the same toggles to disable Shortcuts, Cards, and Recently Closed Tabs.
Turning these off ensures that Chrome opens cleanly every time without distractions or “resume browsing” pop-ups.
⚡ Quick Tip: If you only want a blank page when opening Chrome, you can also go to
Settings → On Startup → Open a specific page,
and set it toabout:blankfor a completely empty start.
At this point, your Google homepage and Chrome startup screen should look neat — just the search box and nothing else.
8. Troubleshooting and Notes
Sometimes, even after turning off Discover and personalization, you might still see article suggestions. Don’t panic — this is usually because Google updates its layout periodically.
Here’s what you can do:
- Clear browser cache and cookies after changing settings.
- Sign out and sign back in to refresh your preferences.
- Restart Chrome to make sure new configurations apply.
- If Google moves the personalization setting, simply search within your preferences page for “Discover” or “Personalization.”
It’s also worth noting that Chrome for Android and Chrome for iOS may handle Discover differently. On mobile, the Discover feed appears under the New Tab page, and you can disable it via:
Chrome Menu → Settings → Discover → Turn Off.
9. FAQs
Q1. Why does the Discover feed keep coming back after I disable it?
Sometimes, Chrome resets certain flags after updates. Revisit Google Preferences and make sure personalization remains turned off. Also, log into your account before adjusting settings.
Q2. Can I hide Discover only on desktop but keep it on mobile?
Yes. Each device manages its Discover settings independently. You can keep it active on your phone while disabling it on desktop Chrome.
Q3. Does turning off personalization affect my search results?
Not significantly. You’ll still get relevant results based on your query, but they won’t be tailored to your personal history or behavior.
Q4. What happens if I clear cookies or browsing data?
You may need to revisit preferences once to ensure your Discover and personalization settings stay off.
Q5. Is there a faster shortcut to reach the preferences page?
Yes. You can directly type google.com/preferences in the address bar or bookmark it for easy access.
10. Disclaimer
The settings mentioned in this article are accurate as of October 2025.
Google occasionally updates its interface or renames options, so the exact menu labels might vary in future versions of Chrome.
Always verify settings under Search personalization or Customize Chrome if things look different.
Tags:
google discover, chrome settings, disable discover feed, chrome homepage, google personalization, chrome privacy, search settings, google preferences, chrome tips
Hashtags:
#GoogleChrome #DiscoverFeed #ChromeTips #PrivacySettings #GooglePreferences #BrowserCustomization #DisableDiscover #ChromeHomepage #InternetPrivacy


Thank you so much for this article – my Chrome homepage just started showing the Discover feeds and cluttering up my screen. At the same time it closed all my many browser tabs without saving them in History. So I have just spent a lot of time trying to work out how to disable it. I am ADHD diagnosed so the last thing I need is more distracting homepage clutter.
I was unable to find the Customize Chrome button, as my default search engine had somehow switched to Yahoo. After changing this to Google it came up and I followed the steps in your article. So relieved to have got there finally – thank you!
p.s. Any thoughts on whether to use Bookmarks in the toolbar or Shortcuts in the main screen area? Are they equivalent, other than just a different look?
Hi, thanks for ur comment and here are my thought on this.
Bookmarks on the toolbar are the traditional, browser-level bookmarks.
They sync across your devices, can be organized into folders, and give you quick one-click access while you’re browsing. They’re reliable, lightweight, and always visible if the toolbar is enabled.
Shortcuts on the Chrome new-tab page, on the other hand, are more like visual tiles meant just for the homepage.
They don’t have folders, they don’t sync the same way across devices, and they’re limited to a small number. Their main purpose is simply to make the new-tab screen look cleaner and give quick access to a few frequent sites.
So functionally, bookmarks offer more control and flexibility, while shortcuts are mostly cosmetic and limited. Most people who want speed and organization prefer the Bookmarks Bar, while shortcuts are best for a minimal new-tab layout.
Both work fine — but they’re not identical beyond the appearance.
If you want simplicity: shortcuts.
If you want power and organization: bookmarks on the toolbar.
Hope that helps!