In this tutorial, we will walk through the process of creating a festive design using CorelDRAW’s versatile tools. Whether you’re making holiday-themed graphics or experimenting with shapes, CorelDRAW allows for a lot of creativity with the help of tools like the Smart Fill tool, the Contour tool, and more.
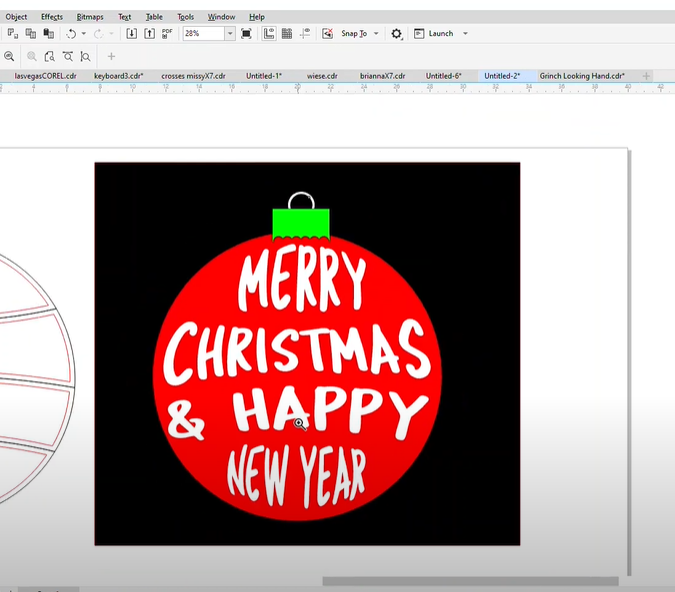
Follow these steps to create a beautiful and professional-looking holiday design, complete with text, shapes, and custom effects.
Steps to Create a Festive Design in CorelDRAW:
1. Prepare the Text and Shapes:
- Begin by preparing the text you want to include in your design. Ensure each line is broken into separate text elements if necessary for individual manipulation.
- Now, draw an ellipse (circle) by selecting the Ellipse tool. Hold down the Ctrl key to ensure it’s a perfect circle. Then, press P to center it on the page.
2. Curve the Lines Using the Three-Point Curve Tool:
- Select the Three-Point Curve tool to add a gentle curve to the design.
- Once the curve is added, use the plus key (+) to duplicate the line. Mirror the curve and position it as needed in your design.
3. Use the Smart Fill Tool:
- After curving the lines, use the Smart Fill tool to fill in the shapes created by the overlapping lines and ellipses.
- Select each area and apply the fill, and then nudge them slightly as required to adjust the layout.
4. Separate the Text and Add Contours:
- To ensure there’s space between the words, click on the text elements. Right-click to create an outline around the text.
- Next, go to Effects and select Contour. Apply an inward contour with a value of 3 to each text element. This will create a layered effect.
5. Using the Envelope Tool for Custom Text Shaping:
- With your contoured text selected, go to Effects and choose the Envelope tool. Here, you can modify the shape of your text to fit the design.
- You can choose the Putty option in the Envelope tool for a smooth, organic shape. Experiment with different options to get the look you prefer.
6. Adjust the Design with Smart Fill and Envelope Tool:
- If you need to add more curves, use the Three-Point Curve tool again. Adjust and shape the text or other elements, then use the Smart Fill tool to refine areas.
- After finalizing the shape, you can nudge the text and shapes into place.
7. Add Finishing Touches with Blends and Effects:
- To give the design a polished look, you can add more effects. Create small shapes like ellipses or rectangles to decorate the design. Use the Blend tool to duplicate the shapes and align them evenly.
- For example, create multiple blended circles around the edges to enhance the holiday theme.
8. Create a Border or Ring Around the Design:
- Draw another ellipse for the outer border, then adjust its thickness by converting it into an object. You can remove unnecessary portions using the Virtual Segment Delete tool, ensuring that the ring is perfectly positioned around your design.
9. Color and Finalize Your Design:
- Use the Smart Fill tool to color the design with your desired palette. For example, fill the background with red and turn the text white for a classic holiday look.
- Make sure all elements are properly layered by adjusting the order through Object > Order > Front of Page.
10. Optional Effects for Extra Details:
- If you want to add more dimension to your design, create shadows, highlights, or even glimmering effects using rectangles or small shapes. Blend them subtly into the design for a touch of holiday magic.
With these steps, you’ll have a beautiful festive design ready for print or digital use. The Smart Fill, Contour, and Envelope tools offer a lot of flexibility for creativity, so feel free to explore different looks and arrangements.
#CorelDRAW #GraphicDesign #DesignTips #HolidayDesign #VectorArt #SmartFillTool #ContourTool #EnvelopeTool #CreativeDesign #CorelDRAWTutorial
Visited 52 times, 1 visit(s) today
