If you’re facing issues with Wi-Fi not showing up or not connecting on your Windows 10 or Windows 11 PC, this guide provides a step-by-step troubleshooting process to help resolve the problem. From simple restarts to advanced command-line fixes and system restore options, follow the procedures below in sequence for the best chance of success.
🛠 Step 1: Restart Your Windows System
Often, temporary glitches can be fixed by simply restarting your PC.
Steps:
- Click the Start Menu.
- Select the Power icon.
- Click Restart.
- Once your PC restarts, check if the Wi-Fi is now visible or connects properly.
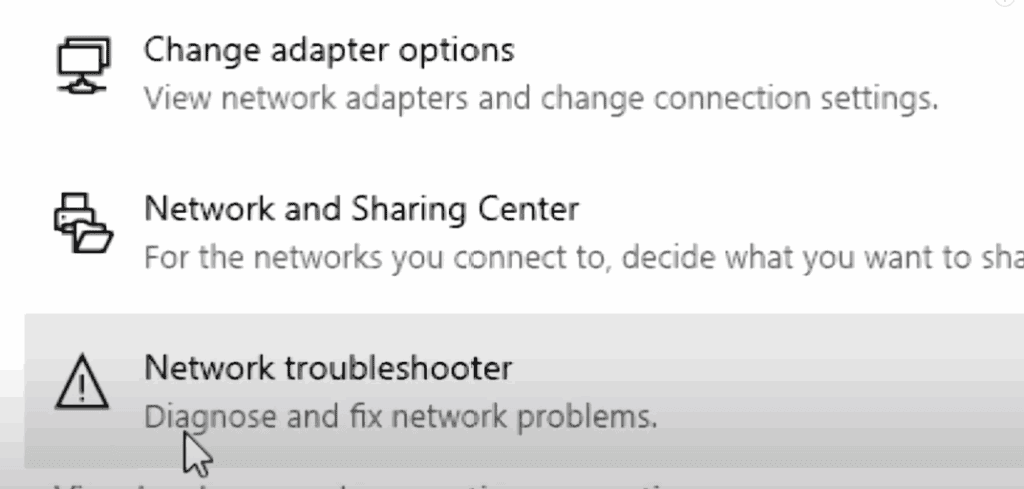
🛠 Step 2: Use the Built-In Network Troubleshooter
If a restart doesn’t work, let Windows diagnose and fix the network issue.
Steps:
- Go to Start > Settings.
- Navigate to Network & Internet.
- Scroll down and click Network Troubleshooter under “Advanced network settings”.
- Let Windows diagnose and fix any detected issues.
- Restart your system and test Wi-Fi connectivity again.
🛠 Step 3: Perform a Network Reset
A network reset reinstalls all network adapters and resets network settings to default.
Steps:
- Go to Settings > Network & Internet.
- Scroll down and click Network Reset.
- Click on Reset Now.
- Confirm the reset and allow your PC to restart.
- Reconnect to Wi-Fi after reboot.
🛠 Step 4: Restart the Radio Management Service and Flush DNS
This method involves using Windows Services and the Command Prompt to reset network-related configurations.
A. Restart Radio Management Service
- Press
Windows + R, typeservices.msc, and hit Enter. - In the list, press R to scroll to services starting with “R”.
- Find Radio Management Service, right-click, and click Restart.
B. Flush DNS and Renew IP Address
- Press Start, type
cmd. - Right-click Command Prompt and choose Run as administrator.
- In the terminal, type these commands one by one:
ipconfig /release
ipconfig /flushdns
ipconfig /renew
netsh int ip set dns
netsh winsock reset
- After running all the commands, type
exitand press Enter. - Restart your computer.
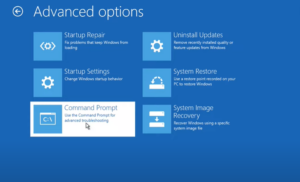
🛠 Step 5: Perform a System Restore (Final Fix)
If none of the above solutions work, restoring your system to an earlier date may help—especially if the issue started recently.
Steps:
- Open Control Panel via Start Menu.
- Set “View by” to Large icons (top-right).
- Click on Recovery > Open System Restore.
- Choose a restore point that predates the Wi-Fi issue.
- Select your system drive (usually
C:), and click Finish to start the restore. - Wait patiently—it may take 10 minutes to 1 hour.
⚠ Note: System Restore won’t affect your personal files but will remove apps and drivers installed after the restore point.


✅ Conclusion
Each of these five steps addresses a different possible cause of Wi-Fi issues on Windows. Start from the top and proceed step-by-step. Usually, most Wi-Fi problems are resolved within the first three solutions, but if not, the final system restore method is quite effective.
🔖 Tags:
wifi fix, windows 11 wifi problem, network troubleshooting, network reset, flush dns, system restore, windows 10 wifi issue, network adapter, netsh command
📢 Hashtags:
#wifiissue #windows11 #networkreset #systemrestore #windows10 #techsupport #netsh #cmdcommands
🔗 Helpful Resources:
🔐 Disclaimer:
This guide is provided for informational purposes. Performing system-level operations such as DNS flush or system restore should be done with care. Always ensure you have backups of important data before making major system changes.


