Adobe InDesign is a powerful tool for creating print and digital designs, offering a wide array of tools to help designers achieve their creative visions. In this article, we’ll explore every tool available in InDesign, breaking them down by their functions, shortcut keys, and practical applications. Whether you’re a beginner or an experienced user, this guide will ensure you understand the purpose and functionality of every tool.

1. Selection Tool (Shortcut: V)
The Selection Tool is used to select and move objects around the page. It allows resizing and rotating objects effortlessly. It is represented by a mouse cursor icon.
2. Direct Selection Tool (Shortcut: A)
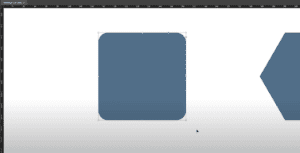
This tool is designed for manipulating paths and anchor points within vector objects. While similar to the Selection Tool, it provides more precision, allowing you to edit the shape’s structure. Note that the Direct Selection Tool in InDesign does not offer corner rounding like in Illustrator.
3. Page Tool (Shortcut: Shift+P)
The Page Tool is ideal for adjusting the size and orientation of individual pages in your document.
4. Gap Tool (Shortcut: U)
Use the Gap Tool to modify the spacing between objects, text, or images. It’s a helpful feature for maintaining even layouts.
5. Content Collector and Content Place Tools (Shortcut: B)
The Content Collector Tool enables you to copy elements to a “conveyor belt” for use across multiple documents. Switching to the Content Place Tool allows you to paste these items into other locations or documents.
6. Type Tool (Shortcut: T)
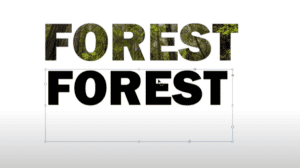
The Type Tool is essential for adding and editing text. Create text frames to contain your content, resize frames to fit your text, and flow text across pages seamlessly.
7. Line Tool (Shortcut: \)
This tool allows you to draw straight lines in various orientations, perfect for creating visual dividers or graphic accents.
8. Pen Tool (Shortcut: P)
The Pen Tool is one of the most versatile tools in InDesign, allowing you to create straight or curved paths. You can also adjust anchor points and handles to refine your designs.
9. Pencil, Smooth, and Erase Tools (Shortcut: N for Pencil)
- Pencil Tool: Draws freehand shapes.
- Smooth Tool: Refines paths by reducing anchor points.
- Erase Tool: Splits shapes into separate paths.
10. Frame Tools (Rectangle, Ellipse, Polygon) (Shortcut: F)
Frame tools create placeholders for images or graphics. The X inside the frames acts as a visual guide. For simple shapes without placeholders, use the regular Rectangle (Shortcut: M), Ellipse (Shortcut: L), or Polygon Tools.
11. Scissor Tool
This tool cuts paths and divides shapes into separate sections.
12. Transform Tools (Rotate, Scale, Free Transform, Shear)
- Rotate (Shortcut: R): Rotates objects around a pivot point.
- Scale (Shortcut: S): Adjusts the size of objects.
- Free Transform (Shortcut: E): Combines rotation, scaling, and skewing.
- Shear (Shortcut: O): Skews objects for creative effects.
13. Gradient and Gradient Feather Tools (Shortcut: G, Shift+G)
- Gradient Tool: Creates linear or radial gradients within shapes.
- Gradient Feather Tool: Gradually fades objects into transparency.
14. Eye Dropper Tool
Transfers colors and styles from one object to another.
15. Hand Tool (Shortcut: H)
Move around your artboard quickly by dragging. You can also use the spacebar for this function.
16. Zoom Tool (Shortcut: Z)
Magnify your workspace to focus on finer details.
17. Fill and Stroke (Shortcut: X)
Switch between applying fill or stroke colors to your objects. Default colors can be restored, and you can swap fill and stroke with Shift+X.
18. Color Theme Tool (Shortcut: Shift+I)
Extract colors from graphics and generate palettes for cohesive designs.
19. Note Tool
Add annotations for collaboration or future reference.
20. Preview Tool (Shortcut: W)
Switch between Normal and Preview modes to see your design as it will appear in the final output. Additional options include Bleed, Slug, and Presentation modes.
Final Thoughts
Mastering the tools in Adobe InDesign will significantly enhance your design capabilities. Each tool is tailored to specific tasks, from managing text and graphics to refining layouts and adding creative effects. Keep experimenting with these features to discover their full potential.
#AdobeInDesign #GraphicDesign #InDesignTutorial #DesignTools #InDesignBasics #LearnInDesign #DesignTips
