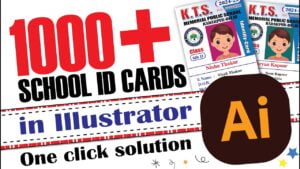
Creating a school ID card might seem daunting, but with Adobe Illustrator, it can be a breeze. Whether you’re designing for a small school or managing large-scale printing, this tutorial will guide you through every step, ensuring a professional and polished result. From setting up your document to adding design elements like text, backgrounds, and gradients, we’ll cover everything you need to know.
Step 1: Setting Up Your Document
Start by opening Adobe Illustrator and creating a new document. Choose an appropriate size for your ID card. Typically, a school ID card measures 3.375 x 2.125 inches. Be sure to include a bleed of 0.125 inches to ensure that your design extends to the edge of the card after trimming.
Step 2: Adding the Background
A well-designed background sets the tone for your ID card. You can choose a solid color, a gradient, or even a pattern. For a modern look, try experimenting with gradients. Use the Gradient tool in Illustrator to create a smooth transition between colors.
Step 3: Inserting Text
Text is a crucial component of any ID card. Begin by selecting the Type tool and clicking on the area where you want to insert the text. Enter the student’s name, school name, ID number, and other relevant details. Remember to choose legible fonts and maintain consistency in font sizes and styles throughout the card.
Step 4: Adding the School Logo
A school ID card isn’t complete without the school logo. To add the logo, go to File > Place and select the logo file from your computer. Position the logo appropriately on the card. You can resize it by clicking and dragging the corners while holding down the Shift key to maintain its proportions.
Step 5: Design Tips for a Professional Look
- Alignment: Ensure all elements are properly aligned. Use the Align panel to distribute elements evenly.
- Spacing: Maintain consistent spacing between elements to avoid a cluttered look.
- Contrast: Use contrasting colors for text and background to ensure readability.
Step 6: Finalizing Your Design
Once you’re satisfied with your design, it’s time to finalize it. Double-check all the details, including spelling, alignment, and color choices. Save your work in Illustrator format (AI) for future editing and export it as a PDF for printing.
Download School Id Card
Conclusion
By following these steps, you can create a professional-looking school ID card in Adobe Illustrator. This tutorial is perfect for beginners and intermediate users alike, providing the foundational skills needed to design ID cards efficiently.
Watch the Video Tutorial
For a more detailed walkthrough, check out the video tutorial that accompanies this blog post. It provides visual guidance and additional tips to ensure your ID card design turns out perfect.
#schoolidcard #adobeillustrator #graphicdesign #idcarddesign #illustratortutorial #designingtips #studentidcard #branding


