CorelDRAW is a powerful design tool used by professionals and beginners alike, but are you using it to its fullest potential? In this article, we’ll explore 20 productivity tips that will help you speed up your workflow and take full advantage of CorelDRAW’s features. These tips are courtesy of CorelDRAW master Ariel Garaza Diaz, and are designed for both Windows and Mac users.
1. Create a Page Frame with the Rectangle Tool
Most users know you can double-click the Rectangle Tool icon to create a page frame around your design, but here’s a less-known trick: Select one or more objects, hold Shift, and double-click the Rectangle Tool icon. This will create a rectangle around the selected objects.
- Tip: The page frame is always at the bottom layer, and the rectangle around selected objects will be placed on top.
2. Duplicate Objects Quickly
There are several ways to duplicate objects in CorelDRAW:
- Use Ctrl + D on Windows or Cmd + D on Mac to duplicate an object with preset distances.
- For more control, press Alt + F7 on Windows or Cmd + T on Mac to open the Transform Docker, allowing you to make one or more rotated, scaled, or skewed copies.
- You can also drag an object with the right mouse button to create a copy.
3. Use Mirrored Copies
To make a mirrored copy of an object:
- Select the object, use the Pick Tool, and drag a side handle while holding Ctrl (Windows) or Cmd (Mac). To create a mirrored copy, press the right mouse button while holding down the left.
4. Rotate in Increments
While rotating objects, hold Ctrl (Windows) or Cmd (Mac) to rotate in 15-degree increments. You can change these increments by navigating to Tools > Options > CorelDRAW > Edit Page.
5. Select Objects in Groups
If an object is inside a group or nested groups, it can be hard to select. Hold Ctrl (Windows) or Cmd (Mac) while clicking to drill down and select the object. The handles will change from squares to circles, indicating you’re selecting within the group.
6. Use Marquee Selection with the Alt Key
In crowded designs, selecting multiple objects can be tricky. Hold the Alt key while dragging a marquee around objects to select everything that the marquee touches, not just what’s enclosed.
7. Zoom Shortcuts
Zooming in and out can be streamlined using these shortcuts:
- Use the scroll wheel to zoom in or out based on where your cursor is.
- Press F2 (Windows) or Cmd + 2 (Mac) to activate the Zoom Tool.
- Press F3 to zoom out, or double-click the Zoom Tool to zoom to all objects.
8. Edit PowerClip Contents
You can easily adjust PowerClip content by Ctrl-clicking (Windows) or Cmd-clicking (Mac) the PowerClip to enter edit mode. When done, click outside the clip to finish.
9. Reset Toolbars to Default
If you’ve accidentally moved or removed a toolbar, hold F8 (Windows) or Shift (Mac) while launching CorelDRAW to reset the workspace to factory defaults. Remember, this will erase any customizations.
10. Select All Nodes
Double-click the Shape Tool icon to select all nodes on an object, allowing you to change them all at once (e.g., to make them smooth or symmetrical).


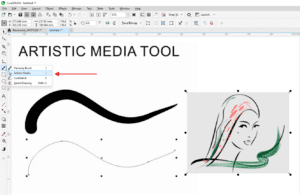
11. Create Zigzag and Wavy Lines
For zigzag lines:
- Use the Freehand or Two-Point Line Tool, then add nodes using the Shape Tool and adjust them with the Ctrl key.
For wavy lines:
- Double-click the Shape Tool icon to select all nodes, convert them to curves, and make them smooth.
12. Break and Combine Text
For artistic text, Ctrl + K (Windows) or Cmd + K (Mac) breaks text into separate objects, and Ctrl + L recombines them. You can also break paragraph text into separate words or characters using the same commands.
13. Format Text Size Quickly
To change text size:
- Ctrl + 6 enlarges text and Ctrl + 4 reduces it (Windows). For Mac, the shortcuts are Cmd + 6 and Cmd + 4.
14. Copy Attributes Between Objects
You can copy properties like fill or outline by selecting objects, right-clicking, and choosing Copy Properties From. Alternatively, use the Attributes Eyedropper tool.
15. Combine and Weld Objects
To combine or weld multiple objects:
- Select them in the order you want them combined. The first object selected determines the resulting attributes.
16. Trim Objects
The Trim tool works based on the order objects are selected. The last object selected will trim the previous objects. This allows for precise control when trimming shapes.
17. Create Barcodes
To create a barcode, choose Object > Insert Barcode and follow the steps in the wizard. The resulting barcode can be edited by converting it into vector objects.
18. Export Custom Workspaces
If you’ve customized your workspace, you can save it by choosing Tools > Options > Workspaces and exporting your settings as a CDWS file.
19. Use the PowerClip Outline
When adjusting PowerClip content, the outline of the clip is shown in blue. This helps in making precise adjustments inside the PowerClip.
20. Undo Mistakes with Text Shortcuts
When recombining text, use Ctrl + Z (Windows) or Cmd + Z (Mac) to undo mistakes and recombine text in the correct order.