The Eyedropper Tool in Adobe InDesign is a powerful feature that helps designers extract colors from images or other design elements to create cohesive and visually appealing projects. This guide will walk you through various tricks and techniques for using the Eyedropper Tool and its advanced functionalities, including the Color Theme Tool.

Why Use the Eyedropper Tool?
The Eyedropper Tool is essential for maintaining color harmony in your designs. By sampling colors directly from your project, you can create consistent themes and add custom swatches to your palette.
Steps to Use the Eyedropper Tool
1. Sample a Color from the Background
- Open your InDesign project.
- If you have text or elements on a colorful background, ensure they are ready for editing.
- Select the Eyedropper Tool by pressing
Ior clicking the icon in the toolbar. - Click on a color from the background (e.g., a pink or purple shade).
- The sampled color appears as the fill color in the toolbar.
2. Remove Unwanted Strokes
- If the selected element has a stroke you don’t need (e.g., black), remove it:
- Select the Stroke Color box.
- Click None to remove the stroke.
3. Create a Rectangle for Reference
- Use the Rectangle Tool to draw a rectangle and fill it with the sampled color.
- This serves as a visual reference for the color you just selected.
4. Add the Color to Your Swatches
- Go to the Swatches panel and click the New Swatch button.
- Name the swatch for better organization (e.g., “Pink from Background”).
Creating a Color Palette from Background Colors
1. Sample Multiple Colors
- Copy the original rectangle by holding Alt + Shift and dragging.
- Repeat the sampling process to pick additional colors (e.g., purple, greenish hues, or darker pinks).
2. Add All Colors as Swatches
- For each new color, repeat the process:
- Use the Eyedropper Tool to sample.
- Add the color to the swatches panel.
3. Organize Swatches into Groups
- Hold Shift and select all the newly added swatches.
- Click New Color Group in the Swatches panel.
- Name the group (e.g., “Mountain Colors”).
- All selected colors will be neatly grouped in a folder for easy access.
Using the Color Theme Tool for Automatic Color Selection
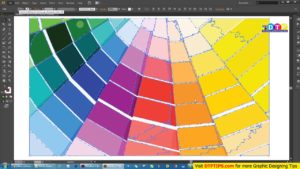
The Color Theme Tool, an advanced feature of the Eyedropper Tool, allows you to automatically create color themes from an image.
Steps to Use the Color Theme Tool
- Access the Tool:
- Long-press on the Eyedropper Tool in the toolbar.
- Select the Color Theme Tool from the dropdown menu.
- Sample Colors from an Image:
- Click on any part of an image in your project.
- InDesign will automatically generate a set of colors based on the image.
- Choose a Color Theme:
- Explore different color combinations such as Bright, Dark, or Colorful.
- Pick the theme that best fits your design.
- Add to Swatches:
- Click Add This Theme to Swatches.
- The selected theme will be added as a new swatch group.
Tips for Efficient Color Management
- Use Descriptive Names: Always name your swatches and groups based on their source or purpose (e.g., “Sunset Palette”).
- Experiment with Variations: Try different color schemes from the Color Theme Tool to explore new design possibilities.
- Keep Organized: Regularly group and label your swatches for quicker access during projects.
Conclusion
The Eyedropper Tool and Color Theme Tool in Adobe InDesign are indispensable for designers who want to create professional, cohesive designs. By following these steps, you can easily sample colors, add them as swatches, and organize them into palettes. This ensures a streamlined workflow and visually consistent projects.
#adobeindesign #eyedroppertool #colorthemetool #designworkflow #graphicdesign #indesigntutorial #colormanagement #designpalettes
