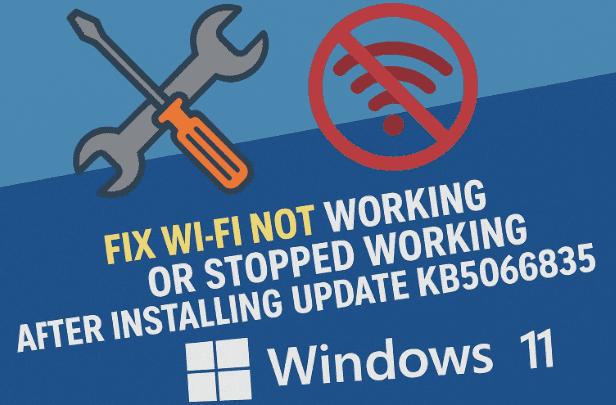
When Microsoft releases a new Windows 11 update, it’s meant to improve stability and security. However, the October 2025 cumulative update KB5066835 has unexpectedly caused Wi-Fi problems for many users — connections drop, networks vanish, or the Wi-Fi option itself disappears from the taskbar.
If your internet stopped working right after installing this update, don’t worry. This detailed guide will walk you through every proven method to restore your Wi-Fi — from updating drivers to uninstalling the update itself if necessary.
1. 🔍 Understanding the Problem
Windows update KB5066835 is a cumulative patch released for Windows 11 22H2 and 23H2 builds. While it brings bug fixes and security improvements, some users noticed that their Wi-Fi stopped functioning immediately after installation.
This happens because the update sometimes introduces driver conflicts — especially with Intel AX200/201, Qualcomm, or Realtek adapters. In rare cases, the update temporarily disables the wireless interface or replaces a working driver with an incompatible one.
So before jumping to conclusions, we’ll start by inspecting your network adapter and gradually apply safe fixes.
2. ⚙️ Step 1: Check Your Wi-Fi Adapter in Device Manager
Let’s begin with the simplest diagnostic.
- Press Windows + X and select Device Manager.
- Expand the category Network Adapters.
- Look for your wireless device — it will have names like Intel Wi-Fi 6 AX200, Realtek 8821CE Wireless, or Qualcomm Atheros QCA9377.
If you see a small yellow warning triangle, that means the driver is having issues. Sometimes, the adapter might even disappear from the list — which usually means it’s been disabled or uninstalled.
👉 Tip: If the adapter is missing, click View > Show Hidden Devices. It may reappear faded out.
Once confirmed, let’s move to the next step.
3. 🔄 Step 2: Update or Roll Back the Wi-Fi Driver
Driver incompatibility is the most common reason for Wi-Fi failure after KB5066835. The update may have installed a newer (or older) driver that doesn’t work properly.
Here’s how to fix it:


- In Device Manager, right-click your Wi-Fi adapter.
- Choose Update Driver.
- Select Browse my computer for drivers → Let me pick from a list of available drivers.
- You’ll see one or more versions listed.
- Try the latest version first.
- If that fails, repeat the steps and pick an older version.
- Click Next and wait for Windows to install it.
Once installed, reconnect to your Wi-Fi network. If prompted for the password, re-enter it and test the connection.
4. 🧹 Step 3: Uninstall and Reinstall the Adapter
If updating doesn’t help, the next fix is to reinstall the network driver entirely.
⚠️ Important: Before uninstalling, ensure you know your Wi-Fi password. After removal, Windows will forget saved networks.
Steps:
- In Device Manager, right-click the same Wi-Fi adapter.
- Select Uninstall Device → check Delete the driver software for this device (if shown).
- Click Uninstall.
- Once done, click the Scan for hardware changes icon at the top toolbar.
- The adapter should reappear automatically.
Reconnect to your Wi-Fi and enter your password again. If it connects successfully, you’re done. If not, proceed.
5. 🔁 Step 4: Restart and Rescan for Hardware Changes
Sometimes the “Scan for hardware changes” option doesn’t fully reload the driver. A simple reboot can finalize the re-installation.
- After uninstalling the Wi-Fi device, restart your PC instead of rescanning.
- During startup, Windows automatically reinstalls the correct driver.
- Once booted, go to Settings > Network & Internet > Wi-Fi and reconnect to your network.
If Wi-Fi still fails after reboot, the issue likely lies with the KB5066835 update itself — so let’s look at uninstalling it.
6. 🗑️ Step 5: Uninstall the Problematic Update KB5066835
Since the problem began right after the update, rolling it back is a valid option.
⚠️ Note: Uninstalling Windows updates is generally not recommended, as it may remove security fixes. Do this only if Wi-Fi is completely unusable.
Steps:
- Open Settings > Windows Update > Update History.
- Scroll down and select Uninstall Updates.
- Locate KB5066835 in the list.
- Click Uninstall → confirm.
- Allow the process to complete and then restart your PC.
After reboot, Wi-Fi should function normally again. Once confirmed, you can prevent the update from auto-installing until Microsoft patches it.
7. ⏸️ Step 6: Pause Automatic Updates to Prevent Re-installation
Once the update is removed, Windows may try to re-install it in the next cycle. To stop that temporarily:
- Go to Settings > Windows Update.
- Turn off the option Get the latest updates as soon as they’re available.
- Under Pause Updates, choose 1 Week, 2 Weeks, or longer.
This prevents KB5066835 from returning until Microsoft fixes the Wi-Fi driver issue.
Later, when you’re confident the issue is resolved, click Resume Updates to stay current with security patches.
8. 🧰 Extra Fix 1: Run the Windows Network Troubleshooter
Windows 11 includes built-in troubleshooters that can automatically detect and repair connectivity issues.
- Go to Settings > System > Troubleshoot > Other Troubleshooters.
- Click Run next to Network Adapter.
- Follow the on-screen instructions.
If the troubleshooter suggests a fix (for example, resetting the adapter or re-enabling Wi-Fi), apply it and test again.
9. 🔄 Extra Fix 2: Use the “Network Reset” Option
If none of the above worked, a full network reset can help. It reinstalls all network drivers and restores factory default network settings.
Steps:
- Open Settings > Network & Internet > Advanced Network Settings.
- Scroll to Network Reset.
- Click Reset Now and confirm.
- Restart your computer.
All saved Wi-Fi networks will be erased, so have your passwords handy. After reboot, reconnect to Wi-Fi and check.
10. 🖥️ Extra Fix 3: Repair Network via Command Prompt
For advanced users, command-line tools can quickly rebuild network configurations corrupted by updates.
- Press Windows + S, type cmd, and click Run as Administrator.
- Enter the following commands one by one, pressing Enter after each:
netsh winsock reset
netsh int ip reset
ipconfig /release
ipconfig /renew
ipconfig /flushdns
- Restart your PC once all commands finish.
These commands reset your TCP/IP stack, renew IP leases, and clear DNS caches — resolving most hidden conflicts caused by updates.
11. ⚡ Extra Fix 4: Check the WLAN AutoConfig Service
Sometimes Windows services controlling Wi-Fi get disabled during updates.
- Press Windows + R, type
services.msc, and hit Enter. - Scroll down to WLAN AutoConfig.
- Double-click it and ensure:
- Startup type: Automatic
- Service status: Running
- If not, click Start, then Apply → OK.
Now try connecting to your Wi-Fi again.
12. 💡 FAQs — Common Questions Answered
Q1. Why did KB5066835 break my Wi-Fi?
Because the update sometimes pushes incompatible or incomplete network drivers, particularly for Intel and Realtek chipsets.
Q2. Is it safe to uninstall the update?
Yes, but temporarily. Make sure to re-enable updates later for critical patches.
Q3. I don’t see KB5066835 in the list — what now?
The update may have been integrated into a newer cumulative patch. In that case, try reinstalling the network driver or performing a network reset.
Q4. My Ethernet (LAN) works fine but Wi-Fi doesn’t. Why?
That indicates the hardware is okay — the problem lies in the wireless driver or its configuration.
Q5. Should I use third-party driver update tools?
It’s better to download drivers directly from your laptop or motherboard manufacturer’s website to avoid potential malware or mismatched versions.
13. ✅ Final Thoughts
Wi-Fi problems after Windows updates are frustrating but usually fixable. The KB5066835 issue stems from driver conflicts rather than hardware failure.
By carefully following these steps — updating or reinstalling the driver, uninstalling the update if necessary, and performing a network reset — you can restore full connectivity without needing professional help.
If none of these methods help, it may be worth downloading the latest official driver from your PC manufacturer’s support site (Dell, HP, Lenovo, ASUS, Acer, etc.) and installing it manually.
You can also visit Microsoft’s official Windows 11 update page:
🔗 https://support.microsoft.com/windowsupdate
⚠️ Disclaimer
Perform these steps carefully. Uninstalling updates or resetting network settings may temporarily remove saved configurations. Always keep your Wi-Fi password and driver backup before proceeding. This article is for educational purposes and assumes standard consumer systems.
#wifi #windows11 #kb5066835 #networkfix #microsoftupdate #deviceManager #windowsupdate #troubleshooting


