If you’ve ever tried upgrading to Windows 11 and saw that frustrating message — “This PC doesn’t meet Windows 11 system requirements” — don’t worry. You’re not alone. Many older but powerful computers are unfairly locked out due to TPM 2.0, Secure Boot, or unsupported CPUs.
But here’s the good news: you can install and run Windows 11 smoothly on any unsupported PC, safely and without complicated registry hacks.
In this detailed guide, you’ll learn how to use a small free tool called FlyOOBE, developed by BuiltByBel on GitHub, which automatically bypasses all system requirements for Windows 11 installation.
This step-by-step tutorial explains every part of the process — from downloading the official Windows 11 ISO to verifying your installation — all while keeping your files and apps intact.

🧩 1. Why Windows 11 Blocks Unsupported PCs
Microsoft designed Windows 11 to meet higher security standards by enforcing the use of TPM 2.0, Secure Boot, and newer CPU architectures. These measures enhance encryption and reduce malware risks.
However, they also exclude millions of devices that still run perfectly fine. Even high-end Intel 7th-gen and AMD Ryzen 1000 series processors are considered “unsupported.”
That’s where FlyOOBE comes in — a clean, safe workaround that tricks the Windows installer into running as if it were a server setup, effectively bypassing CPU and TPM checks without any registry edits or illegal modifications.
🧠 2. Before You Begin (Important Pre-Checks)
Before you start the installation, let’s prepare your system to ensure a smooth process.
Step 1 – Check Compatibility Using PC Health Check
Download Microsoft’s official PC Health Check tool:
👉 Get PC Health Check App
Once installed, run it and click Check now.
You’ll likely see one of the following errors:
- “TPM 2.0 is not detected”
- “Secure Boot is not enabled”
- “This processor isn’t supported”
All of these issues will be bypassed using FlyOOBE.
Step 2 – Backup Important Files
Although this method keeps your data safe, always back up your essential files first.
Use an external drive, cloud backup, or Windows File History.


Step 3 – Ensure Sufficient Storage and Power
You’ll need:
- At least 8 GB of free space on your system drive
- A stable power source (especially for laptops)
- Internet temporarily disabled (optional, for a faster setup)
Once that’s ready, let’s move to the next step — downloading the ISO.
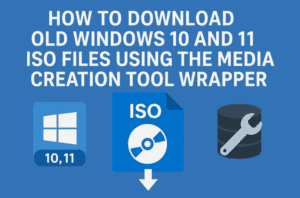
💾 3. Download the Official Windows 11 ISO
We’ll only use official Microsoft sources — no third-party sites or modified images.
Step 1 – Visit Microsoft’s ISO Page
Go to:
👉 Download Windows 11 Disk Image (ISO)
Step 2 – Choose the Right Edition
Scroll down until you see “Download Windows 11 Disk Image (ISO)”.
From the dropdown, select:
Windows 11 (multi-edition ISO) → click Confirm.
Step 3 – Choose Product Language
Next, select your language.
You must choose the same language as your current Windows 10 installation — otherwise, you may face activation or upgrade issues.
We’ll show you how to check that next.
🌐 4. Find Your Current Windows Language
This step ensures you download the matching ISO language.
- Click the Start menu and type PowerShell.
- Right-click → Run as Administrator.
- Enter this command:
dism /online /get-intl - Look for:
Default system UI language : en-USThat means your system language is English (United States).
Now, go back to Microsoft’s page and select the same one — e.g., “English (United States)” — and click Confirm.
Step 4 – Download the 64-bit ISO
Finally, click 64-bit Download.
The ISO is around 5.4 GB, so depending on your internet speed, it may take several minutes to an hour.
Once downloaded, move the file to a convenient location like your Desktop.
🧰 5. Download and Install FlyOOBE from GitHub
Now comes the most important part — getting the bypass tool.
What Is FlyOOBE?
FlyOOBE is a free and open-source utility by BuiltByBel (creator of many trusted Windows tools like “ThisIsWin11”).
It helps you bypass Windows 11 installation checks by automatically modifying setup behavior without touching your registry manually.
Step 1 – Visit the Official GitHub Page
Step 2 – Download the Latest Release
- Scroll down to the Releases section on the right.
- Click on the latest version (e.g., FlyOOBE 1.5 New).
- Under Assets, click Download FlyOOBE.zip.
⚠️ Note: Your browser might show a “suspicious file” warning because it’s unsigned freeware.
Simply click Keep or Download anyway — this file is safe and open-source.
Step 3 – Extract the ZIP
Once downloaded:
- Right-click on the ZIP file → Extract All.
- Choose a folder (e.g., Desktop).
- Inside the extracted folder, you’ll see FlyOOBE.exe.
🪄 6. Run FlyOOBE to Start the Installation
It’s time to launch the tool and connect your ISO.
Step 1 – Run as Administrator
Right-click FlyOOBE.exe → choose Run as administrator.
If Windows warns “Windows protected your PC,” click:
More Info → Run anyway.
The FlyOOBE dashboard will appear:
“Drag and drop your Windows 11 ISO to upgrade unsupported PCs.”
Step 2 – Select Your ISO File
- Below the message, click the dropdown menu.
- Choose Select ISO from local computer.
- Browse to where you saved your Windows 11 ISO file.
- Select it and click Open.
FlyOOBE will automatically begin checking and preparing the setup:
- Mounts your ISO image
- Skips CPU, TPM, and Secure Boot checks
- Prepares the Windows setup using a Server method
Once the setup screen appears, your upgrade process has officially begun!
🧩 7. Bypassing CPU, TPM, and Secure Boot Checks
This part happens automatically through FlyOOBE’s background process.
Here’s what’s happening under the hood:
- TPM 2.0 and Secure Boot Bypass:
The tool injects a temporary command-line override, letting the installer think it’s running a Windows Server setup (which doesn’t enforce these checks). - CPU Check Bypass:
It modifies the setup initialization parameters so any CPU model passes validation. - Safe and Reversible:
No permanent registry or BIOS modifications are made — once installation is complete, these temporary settings are removed automatically.
That means you’re upgrading Windows the same way Microsoft’s setup would, just skipping unnecessary compatibility filters.
⚙️ 8. Final Installation Steps
You’ll now see the official Windows setup window.
Step 1 – Disable Updates During Setup
Click on Change how Setup downloads updates.
Select Not right now → click Next.
This avoids delays and ensures a smoother installation.
Step 2 – Accept the License Terms
Click Accept to continue.
Step 3 – Choose What to Keep
When prompted:
- Choose Keep personal files and apps
(so you don’t lose your existing software or documents).
Click Next.
Step 4 – Begin Installation
Click Install.
Windows will start upgrading your system. This may take 20–40 minutes, depending on your drive speed. Your PC will restart several times — don’t interrupt it.
✅ 9. Verify Your Files and Upgrade Success
After the final reboot, you’ll land on your Windows 11 desktop — even if your device was officially unsupported!
You’ll notice:
- All your apps, files, and settings remain intact.
- Windows looks and feels brand new.
- You can access Windows Update and install patches normally.
Step 1 – Check Version
Press Win + R, type:
winver
You should see:
Windows 11 Version 23H2 or 25H2
Step 2 – Confirm System Info
Right-click Start → System → scroll down to verify your edition (Home or Pro) and hardware specs.
If everything looks correct — congratulations!
You’ve successfully installed Windows 11 on unsupported hardware using FlyOOBE.
💬 10. Frequently Asked Questions
Q1: Is FlyOOBE safe to use?
Yes. It’s open-source, developed by BuiltByBel (a trusted developer), and does not permanently modify Windows system files.
Q2: Will I lose my personal data?
No, as long as you select Keep personal files and apps during installation. Still, it’s always wise to back up first.
Q3: Will Windows Update work after installation?
Yes. You’ll continue receiving cumulative and security updates normally.
Q4: What if I see “Setup couldn’t verify this PC”?
That means the bypass didn’t apply correctly. Re-run FlyOOBE as administrator and select the ISO again.
Q5: Does this activate Windows 11?
Your activation status remains the same as Windows 10. If your Windows 10 was activated, Windows 11 will auto-activate after installation.
Q6: Can I go back to Windows 10?
Yes — within 10 days of upgrade, go to Settings → System → Recovery → Go Back.
Q7: What if I’m using an older Core 2 Duo or unsupported AMD CPU?
FlyOOBE can bypass most hardware restrictions. However, if your CPU lacks required instruction sets (like SSE4.2), installation may fail. In that case, try a lighter Windows variant or use the “Tips to Fix” installer method.
⚠️ 11. Disclaimers and Final Tips
- Official ISO Only: Always use the official Microsoft ISO for security.
- FlyOOBE is freeware: Download only from the official GitHub repository.
- No registry edits required: This method doesn’t modify your BIOS or registry permanently.
- For testing and educational use: Installing Windows 11 on unsupported hardware isn’t officially supported by Microsoft, so proceed at your own risk.
- Performance Note: On older HDDs, Windows 11 may feel slow. Upgrading to an SSD will make a massive difference.
- Re-enable antivirus after install: If you disabled any antivirus or Secure Boot temporarily, you can safely turn them back on once installation completes.
🧩 Final Thoughts
We’ve reached the end of this tutorial — and so far, we’ve done a pretty good job. You now know exactly how to bypass all Windows 11 installation blocks using one simple utility.
The process is clean, fast, and reversible, and best of all — it works flawlessly even on PCs that Microsoft has abandoned.
If your old computer still performs well, give it a new life with Windows 11.
🏁 Tags and Hashtags
Tags: Windows 11 Installation, Unsupported PC, TPM Bypass, Secure Boot Bypass, FlyOOBE, Windows 11 ISO, GitHub Tools, Windows Upgrade, Windows 11 25H2
Hashtags: #Windows11 #FlyOOBE #UnsupportedPC #WindowsUpgrade #Microsoft #TPMBYPASS #SecureBoot #GitHub #Windows11ISO #TechTips #DTPTips


