If you’ve recently upgraded to Windows 11, you’ve probably noticed something missing compared to older versions like Windows 10: the ability to move the taskbar. In Windows 10, you could easily dock your taskbar at the top or sides of the screen. Unfortunately, Microsoft has removed that flexibility in Windows 11.
For many users, this limitation can feel frustrating. What if you want quick access to shortcuts on the top or side of your screen? Or maybe you’d like to organize your icons into a separate area, away from your main taskbar?
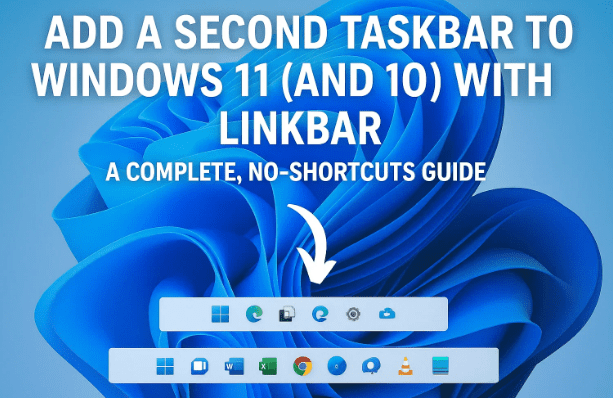
Thankfully, there’s a simple solution: Linkbar. This lightweight utility lets you create a customizable secondary taskbar anywhere on your screen. You can place it on the top, bottom, left, or right, and fill it with shortcuts, folders, or separators for neat organization.
In this article, we’ll walk step by step through:
- What Linkbar is and how it works
- How to download and set it up
- Creating and managing your first Linkbar
- Adding shortcuts, folders, and separators
- Customizing the appearance (colors, alignment, transparency, etc.)
- Making Linkbar run at startup
- Practical tips and limitations you should know
By the end, you’ll be able to create your own personalized secondary taskbar that matches your workflow perfectly.
👉 You can download Linkbar from its official SourceForge page here: Linkbar Download.
📌 1. What is Linkbar?
Before diving into the steps, let’s take a moment to understand what Linkbar is.
Linkbar is a free, open-source tool designed to add additional taskbar-like panels to your Windows desktop. Think of it as a docking area where you can quickly access shortcuts and folders. Unlike the native Windows taskbar, which is tightly controlled by Microsoft, Linkbar gives you flexibility:
- Place it anywhere (top, bottom, left, or right).
- Add unlimited shortcuts and folders.
- Organize them with separators.
- Customize its look with themes, colors, and transparency.
It runs as a portable app, which means you don’t need to install it permanently on your system. You just download the ZIP file, extract it, and run the executable.
This makes it especially handy for those who want customization without heavy installations or registry edits.
📥 2. Downloading and Setting Up Linkbar
Now that you know what Linkbar does, let’s set it up.


First, head to the official download page: Linkbar on SourceForge.
Once you’ve downloaded the ZIP file, follow these steps:
- Extract the ZIP File
- Right-click the downloaded ZIP and select Extract All.
- Choose a location, like your Documents or Downloads folder.
- Locate the Executable
- Inside the extracted folder, you’ll see a couple of files.
- Run the
Linkbar64.exeif you’re on a 64-bit system (most modern PCs are). - If you’re on a 32-bit system, use the 32-bit version instead.
- Portable Use
- Linkbar doesn’t require installation. It will run directly as soon as you open the executable.
- This also means you can keep it on a USB stick and carry it between PCs if needed.
So far so good—we’ve got Linkbar up and running. Next, let’s create our first secondary taskbar.
⚙️ 3. Creating Your First Linkbar
When you launch Linkbar for the first time, it will ask you where to store its working files. This folder is important because it holds all the shortcuts and settings for your Linkbar.
Here’s how to set it up:
- Choose whether you want the Linkbar to be available for all users on the computer or just for your current user account.
- Pick a folder location. For simplicity, you can create a folder called Linkbar inside your Documents.
- Click Create.
That’s it—you now have a secondary taskbar visible on your screen! By default, it will appear at the top.
🖱️ 4. Adding Shortcuts, Folders, and Separators
A taskbar is only useful if it holds your most-used apps. Linkbar allows you to add shortcuts in several ways.
Let’s walk through them:
Adding a Shortcut
- Right-click anywhere on the Linkbar.
- Select New Shortcut.
- Follow the familiar Windows shortcut wizard to point to any app, file, or URL.
Alternatively, you can drag and drop icons directly from your desktop or Start Menu onto the Linkbar.
Adding a Folder
You can also drag folders into Linkbar. This creates a direct shortcut to open them quickly. For example, you might drag your Downloads folder for instant access.
Adding a Separator
Want to organize icons into groups? Use a separator:
- Right-click the Linkbar.
- Choose New Separator.
- A vertical or horizontal line will appear, helping you keep things tidy.
This is especially handy if you want to group shortcuts—like browsers in one section, productivity apps in another, and media tools elsewhere.
🎨 5. Customizing the Look and Feel
Here’s where Linkbar shines—it’s not just about adding shortcuts, but also about making it look the way you want.
Right-click on your Linkbar and open Settings. Here are the key customization options:
Position
- Place the Linkbar on Top, Bottom, Left, or Right of your screen.
- You can even layer it above your regular Windows taskbar if you want both.
Alignment
- Align icons Left, Center, or Right.
- Useful if you prefer symmetry or a more Mac-like dock feel.
Colors & Themes
- Choose Light, Dark, or Accent themes.
- Or pick a custom background color.
- Adjust transparency to make it blend into your wallpaper.
Icon Settings
- Resize icons for small, medium, or large display.
- Choose whether to show text labels under them.
- Change text color to match your theme.
Separators
- Customize width and style.
- Replace lines with blank spaces for minimalist spacing.
Behavior
- Enable Auto-hide (like the Windows taskbar).
- Keep it always on top of windows.
- Enable or disable tooltips when hovering over icons.
With these settings, you can really make Linkbar blend into your desktop style—or stand out if you prefer bold visuals.
🔄 6. Managing and Removing Items
Every shortcut you add is stored in the working folder you created earlier. This makes managing them simple.
- To remove an icon: Right-click it on the Linkbar and choose Delete.
- Alternatively: Open the working folder in File Explorer and delete the shortcut there.
- The Linkbar will update automatically.
This means your Linkbar is essentially a mirror of that folder. If you clean the folder, the bar cleans itself.
🚀 7. Running Linkbar at Startup
By default, Linkbar doesn’t automatically run when you restart your computer. But there’s a workaround:
- Create a shortcut of
Linkbar64.exe(right-click > Create shortcut). - Press Win + R, type
shell:startup, and press Enter. - A Startup folder will open. Drag the shortcut here.
From now on, Linkbar will launch automatically whenever you log in.
If you’d rather keep your PC lean, you can skip this and just run Linkbar manually when you need it.
🛠️ 8. Limitations and Tips
No software is perfect, and Linkbar does have a few limitations:
- Shared shortcuts: If you create multiple Linkbars (e.g., top and side), they’ll share the same icons. You can’t have completely separate sets.
- Manual startup setup: As mentioned, you need to configure it for auto-start.
- Basic visuals: While customizable, it doesn’t offer advanced animations or dock-style effects like RocketDock or Nexus.
That said, for most users who just want extra space for shortcuts, it does the job beautifully.
❓ Frequently Asked Questions (FAQs)
Q1: Can I use Linkbar on Windows 10 or Windows 7?
Yes. Linkbar is compatible with multiple Windows versions, including Windows 7, 8, 10, and 11.
Q2: Does Linkbar replace the default Windows taskbar?
No. It works alongside your main taskbar. You can use both at the same time.
Q3: Is Linkbar safe to use?
Yes. It’s open-source and widely used. As always, download it only from its official SourceForge page to avoid tampered versions.
Q4: Can I have different Linkbars for different monitors?
Yes, you can place Linkbars on multiple screens. However, remember that they’ll share the same shortcut folder.
Q5: Does Linkbar use a lot of system resources?
Not at all. It’s lightweight and runs quietly in the background without slowing down your PC.
📝 Conclusion
Windows 11 may have taken away the flexibility to move your taskbar, but that doesn’t mean you’re stuck. With Linkbar, you can create your own secondary, fully customizable taskbar wherever you want.
From adding shortcuts and folders to changing colors and transparency, Linkbar gives you the freedom Microsoft forgot. And with its simple portable nature, it won’t clutter your system.
So if you’re looking to boost your productivity and reclaim desktop flexibility, give Linkbar a try.
⚠️ Disclaimer
This article is for informational purposes only. Linkbar is a third-party tool not developed by Microsoft. Always download software from its official source and use at your own discretion.
Tags
Windows 11 customization, Linkbar tutorial, secondary taskbar Windows, Windows productivity tools, Windows desktop shortcuts, taskbar alternatives
Hashtags
#Windows11 #Customization #Productivity #Taskbar #Linkbar


