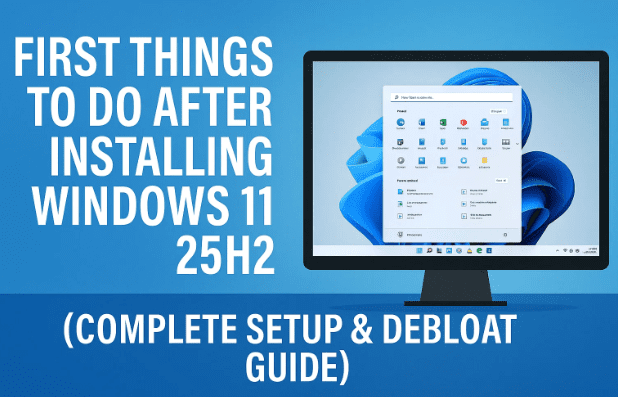
So, you’ve just installed Windows 11 25H2 or upgraded from an older version — and now you’re wondering what to do first.
Well, congratulations! You’ve got the latest version of Microsoft’s operating system… but also, a ton of bloatware, telemetry, ads, and unwanted features like Copilot and Recall that you probably didn’t ask for.
The good news? In this guide, you’ll learn exactly how to clean, optimize, and configure Windows 11 25H2 for speed, privacy, and a better overall experience.
We’ll use a free tool called WinToys to make the process fast and user-friendly — along with a few built-in Windows tweaks for safety and performance.
Let’s begin by understanding what’s changed in 25H2 before diving into setup steps.
1️⃣ What’s New (and Not So Great) in Windows 11 25H2
Microsoft’s 25H2 update introduced several new “AI-powered” components — Copilot, Recall, and deeper Microsoft account integration. While these features are innovative, they also come with:
- Increased background resource usage (telemetry, Recall indexing)
- Cloud-based dependency for AI suggestions
- Privacy concerns — Recall captures snapshots of activity history
- More bundled apps than ever before
So before you start customizing wallpapers or themes, the first step is to get rid of the bloat and regain control over your PC.
2️⃣ Safety First — Create a System Restore Point
Before making any system-level changes, you must create a restore point. Think of it as your “undo button” if anything goes wrong later.
Here’s how to do it:
- Click the Search icon on the taskbar and type System Restore.
- Select Create a Restore Point from the results.
- Choose your C: Drive and click Configure.
- Enable Turn on system protection.
- Allocate 2–5% of disk space for restore points.
- Click Apply → OK.
- Now click Create, name it something like Before Tweaks, and press Create again.
Windows will save a full snapshot of your configuration. If anything breaks, you can easily roll back to this clean state using the same menu.
💡 Tip: Always create a restore point before using registry editors, debloat scripts, or tweaking apps like WinToys.
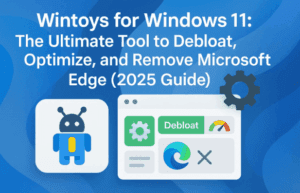
3️⃣ Download & Install WinToys — Your All-in-One Tweaking Tool
Next, we’ll use WinToys, a free Microsoft Store app that simplifies complex Windows adjustments.
Steps to install:
- Open the Microsoft Store.
- Search for WinToys.
- Click Get → Install.
- Once installed, launch the app.
This tool will let you quickly:


- Uninstall built-in apps (even system-locked ones)
- Disable ads, telemetry, and background tracking
- Adjust privacy and system settings
- Change performance and startup options
- Manage UI customization — all in one window
⚠️ Disclaimer:
Tweaking system apps or uninstalling components is safe when done correctly, but always understand what each setting does. This article is for educational purposes, and any changes you apply are at your own discretion.
4️⃣ Step 1 – Disable Ads and Data Collection
Windows 11 integrates advertisements into several system areas — Start menu suggestions, Settings banners, and even File Explorer. Let’s switch them all off.
Using WinToys:
- Open WinToys.
- From the left-hand sidebar, in tweaks, click Ads.
- Toggle off:
- Tailored Ad Experience
- Advertising ID
- Personalized Recommendations
Each toggle disables a background process that tracks user habits and sends them to Microsoft’s servers for ad targeting.
Once this is done, you’ll no longer see suggested apps or “recommended content” in various Windows panels.
Let’s move to privacy next — it’s one of the most critical sections.
5️⃣ Step 2 – Strengthen Privacy Settings
By default, Windows 11 shares diagnostic data, location info, and app usage statistics with Microsoft. Here’s how to stop it.
Steps:
- In WinToys, open the Privacy tab.
- Turn off:
- Location Access
- Telemetry
- Customer Experience Improvement Program
- App Diagnostics
- Feedback Requests
This reduces unnecessary background data collection and ensures your PC isn’t constantly sending anonymous “usage patterns” back to Redmond.
💬 Why This Matters:
Disabling telemetry doesn’t affect updates or core functionality. It simply prevents non-essential analytics and reduces CPU background load.
6️⃣ Step 3 – Remove Pre-Installed Bloatware
Now for the satisfying part — removing all those unwanted Microsoft apps that clog your Start menu.
- In WinToys, click Apps.
- You’ll see a long list of pre-installed applications such as:
- Copilot
- Teams (Personal)
- Feedback Hub
- Movies & TV
- Microsoft News
- Cortana (if still present)
- Xbox Game Bar (optional)
- Tips
- Select any app you don’t use and click Uninstall.
WinToys can even remove stubborn system apps that don’t appear in the normal “Apps & Features” list.
🧠 Note: Some people like keeping Photos or Notepad, but if you prefer alternatives (like IrfanView or Notepad++), you can safely remove them here.
When you’re done, your system will feel lighter, load faster, and start up quicker.
7️⃣ Step 4 – Replace Microsoft Edge (Optional but Recommended)
Microsoft Edge is deeply integrated into Windows, but many users prefer Chrome, Firefox, or Brave for better extension support and privacy.
Here’s what to do:
- Install an alternate browser first (e.g., Google Chrome or Mozilla Firefox).
- Open Settings → Apps → Default Apps.
- Search for “Edge” and change each web-related file type (like
.html,.pdf,.htm) to open with your new browser. - Return to WinToys → Apps and uninstall Microsoft Edge (if your region allows it).
💡 If you live in the EU, Microsoft now officially allows Edge to be removed easily. For other regions, WinToys’ method works fine too.
This gives you a cleaner browsing experience and stops Edge from launching background update services.
8️⃣ Step 5 – Optimize System Tweaks and Performance Settings
Once your bloat is gone, let’s tune performance to get the most out of your PC.
Open WinToys → Tweaks → System and enable the following:
- ✅ End Task Shortcut – adds “End task” to the right-click menu for frozen apps.
- ✅ Disable Mouse Acceleration – improves accuracy in games or design work.
- ✅ Ultimate Performance Mode – enables the hidden power plan for high-end PCs.
- ✅ Disable Background Apps – stops unused apps from consuming memory.
- ✅ Turn Off Search Indexing (optional) – useful for SSDs where indexing provides minimal benefit.
After applying these, restart your PC once to ensure all settings take effect.
9️⃣ Step 6 – Tidy Up the File Explorer & Desktop
Windows 11’s File Explorer and Start menu are cluttered by default, with Quick Access sections, “Gallery,” and cloud integration you may not need.
In WinToys → File Explorer, you can:
- Show file extensions (important for identifying file types)
- Show hidden files (for advanced users)
- Disable “Gallery” and “Home” views
- Set default view to This PC instead of “Quick Access”
- Enable Classic Layout if you prefer a simpler interface
Let’s move to your desktop cleanup — nearly done!
🔟 Step 7 – Customize Taskbar and Start Menu
Once you restart, your desktop may still show unnecessary widgets and search boxes. Let’s fix that manually:
- Right-click on the Taskbar → Taskbar Settings.
- Turn off:
- Search (or set to Icon only)
- Task View
- Widgets
- Chat
- Optional: move taskbar icons to the Left alignment if you prefer classic Windows layout.
Now go to Personalization → Start and turn off:
- Show recently added apps
- Show recommendations for tips, shortcuts, and new apps
- Show recently opened items
Your taskbar and Start menu will look minimal, functional, and distraction-free.
11️⃣ Step 8 – Turn Off Recall & Copilot (AI Features)
Windows 11 25H2 introduced Recall, an AI-driven activity tracker that takes continuous screenshots of your sessions. While intended to help users “find anything,” it’s widely criticized for potential privacy risks.
Disable Recall:
- Open Group Policy Editor (
gpedit.msc). - Navigate to:
Computer Configuration → Administrative Templates → Windows Components → Windows AI - Double-click Allow Recall → set to Disabled → Apply → OK.
Disable Copilot:
- In Group Policy, go to:
User Configuration → Administrative Templates → Windows Components → Windows Copilot - Double-click Turn off Windows Copilot → set to Enabled → Apply → OK.
Now neither feature will activate or appear in your system. This helps protect your privacy and frees background resources.
12️⃣ Step 9 – Clean Registry Entries (Optional Advanced Step)
If you want to go further and remove residual icons like the Copilot button or File Explorer “Home,” you can use simple registry edits.
Example to remove Copilot from Taskbar:
- Press Windows + R, type
regedit, and press Enter. - Navigate to:
HKEY_CURRENT_USER\Software\Microsoft\Windows\CurrentVersion\Explorer\Advanced - Find (or create) a DWORD (32-bit) value named:
ShowCopilotButton - Set its value to 0.
- Restart your PC.
This removes the icon entirely, giving you an even cleaner desktop.
⚠️ Registry Warning:
Always back up your registry before making changes (File → Export). Mistakes here can cause errors, though this particular edit is low-risk.
13️⃣ Step 10 – Final Cleanup & Restart
You’ve done a lot — uninstalled apps, disabled tracking, tuned performance, and customized your interface. Before finishing, let’s ensure the system is clean:
- Run Disk Cleanup (
cleanmgr) and remove temporary files. - Empty the Recycle Bin.
- Restart your computer one last time.
After reboot, you should notice:
✅ Faster startup
✅ Less background CPU usage
✅ No ad pop-ups or suggestions
✅ Streamlined desktop with no Copilot or Recall
✅ More disk space and better responsiveness
14️⃣ Bonus: Maintain Your Clean Windows Setup
To keep your system optimized long-term:
- Run Windows Update manually once a month (to avoid forced restarts).
- Avoid installing unnecessary store apps.
- Back up your restore point every few weeks.
- Consider using O&O ShutUp10++ for ongoing privacy management (https://www.oo-software.com/en/shutup10).
❓ FAQ – Common Questions About Windows 11 25H2 Tweaks
Q1. Is WinToys safe to use?
Yes. It’s a verified app from the Microsoft Store, meaning it’s been checked for malware and uses system APIs safely.
Q2. Can I reinstall any uninstalled Microsoft apps later?
Absolutely. Just open the Microsoft Store and search for the app name (like “Photos” or “Notepad”) to reinstall.
Q3. Does disabling telemetry break updates?
No. Windows Update will still function normally; you’re only disabling optional data reporting.
Q4. Can I use these tweaks on Windows 10?
Most of them (privacy, debloat, and performance) work on Windows 10, though Recall and Copilot settings are exclusive to Windows 11 25H2.
Q5. What happens if I uninstall Edge but want it back?
Just download the Edge installer from Microsoft’s website — it will reinstall like any other browser.
🎯 Final Thoughts
So far, we’ve done a great job walking through all the essential steps after installing Windows 11 25H2 — from creating a restore point to uninstalling junk, tightening privacy, disabling AI tracking, and optimizing performance.
The result?
A system that’s faster, cleaner, and completely under your control.
Windows 11 is still a solid OS once you tame its defaults. Spend those 10–15 minutes setting it up properly, and you’ll enjoy a snappy, private, and clutter-free PC for months to come.
Tags: Windows 11 25H2, WinToys, debloat Windows, Windows 11 privacy, disable Copilot, disable Recall, uninstall bloatware, Windows optimization, performance tweaks, Windows setup
Hashtags: #Windows11 #WinToys #DebloatWindows #WindowsTweaks #PCOptimization #WindowsPrivacy #DisableCopilot #CleanWindows


