If you’ve ever tried recording your computer screen, you know how frustrating it can be to find a free screen recorder that doesn’t slap a watermark on your video or limit you to 5 minutes. Many tools promise to be “free,” but the catch comes later — low frame rate, poor audio sync, or hidden paywalls.
That’s why today we’ll explore four of the best screen recording tools that actually deliver on their promise. These apps are lightweight, free forever, and perfect even for low-end PCs. Whether you’re making tutorials, recording gameplay, or capturing bug demos, these tools will handle it all smoothly — and without costing you a single rupee or dollar.
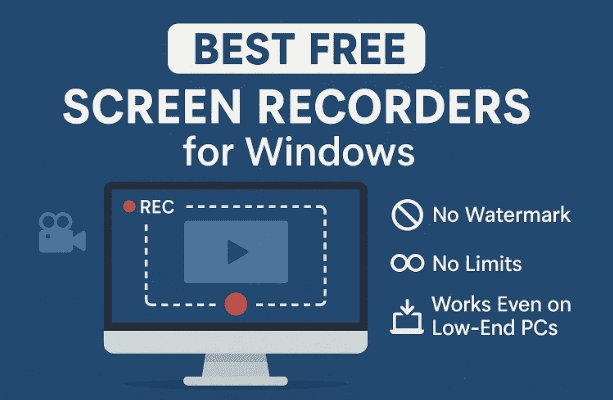
🎬 1. Introduction: What Makes a Screen Recorder Truly Free
Before jumping into the tools, let’s understand what separates a good screen recorder from a frustrating one.
Most “free” tools lock premium features behind paywalls or watermark your videos unless you upgrade. But a genuinely free recorder should meet these criteria:
- ✅ No watermark
- ✅ No time limits
- ✅ Full-resolution recording (up to 1080p or 4K)
- ✅ Works even on basic hardware
- ✅ Simple to use with clear controls
- ✅ Supports multiple file formats
- ✅ Optional webcam or microphone input
The four screen recorders covered in this article check every one of these boxes.
🧰 2. ShareX – The Powerhouse Screen Recorder & Capture Suite
Let’s start with ShareX, a tool that’s loved by developers, teachers, gamers, and office users alike. It’s completely open-source and one of the most versatile free screen recorders available today.
🟩 Why ShareX Stands Out
ShareX is not just a screen recorder — it’s a complete capture toolbox. You can record videos, take screenshots, create GIFs, and even upload your captures directly to cloud services or custom servers.
Before we jump into setup steps, here’s a quick list of what makes it special:
- Record up to 4K at 60fps
- No watermark, no time limits
- Multiple formats: MP4, AVI, WebM, and GIF
- Customizable hotkeys (you can start/stop recording with a single key)
- Built-in screenshot editor with blur, arrows, and annotations
- Lightweight enough to run on 2 GB RAM systems
- Automatic cloud upload after recording — the shareable link is ready instantly
🧩 How to Use ShareX
Let’s move step by step through its setup and usage process.
- Download ShareX
Get it from the official site: https://getsharex.com/ - Install and Launch
The installation takes less than a minute. When you open it, you’ll see a simple left-panel menu. - Configure Capture Hotkeys
- Go to Hotkey Settings.
- Set your preferred shortcut (e.g.,
Print Screento start/stop recording). - You can also assign a shortcut to “Record GIF” or “Take Screenshot.”
- Select Capture Mode
- Choose Screen Recording for videos.
- Choose Screen Recording (GIF) for animated images.
- Select the Recording Area
- You can record the entire screen, a region, or a specific window.
- Drag the frame manually to select the exact portion.
- Record and Save
Once you start recording, a small overlay shows the duration and FPS.
Press the hotkey again to stop — your recording will be saved automatically. - Auto-Upload (Optional)
If enabled, ShareX uploads the video to your configured destination (like Imgur, Dropbox, or Google Drive) and copies the link to your clipboard.
⚙️ Tips for Best Performance
- If you face lag, lower FPS from 60 → 30.
- Choose FFmpeg as your video encoder for better quality-size balance.
- For memes or tutorials, use the GIF capture mode — it’s fast and fun.
🪶 3. CamStudio – Classic Lightweight Recorder That Still Works
If you’re looking for something ultra-simple, CamStudio is a great throwback tool. It’s one of the oldest screen recorders for Windows, yet still surprisingly useful in 2025.
🕹️ Why CamStudio Is Still Relevant
CamStudio looks like it came straight out of the Windows XP era — but that’s part of its charm. It’s ideal if you just want to hit Record and go, without any clutter or complexity.


Here’s what it offers:
- Records in AVI or SWF formats
- No watermark, no recording limits
- Extremely low CPU and RAM usage (works fine even on 1–2 GB RAM PCs)
- Lets you add caption text or annotations
- Minimal interface that anyone can understand
🧭 How to Set Up and Record with CamStudio
- Download from the official site: https://camstudio.org/
- Launch the app and select your output format (AVI).
- Click Region → Full Screen or Region → Select Region to define the capture area.
- Choose Options → Record audio from microphone if you’re narrating.
- Hit the red Record button, and that’s it!
- Press Stop, and your video is saved instantly.
⚡ Performance Notes
- On older systems, CamStudio is unbeatable in efficiency.
- However, it lacks modern editing tools and doesn’t support MP4 natively (you can convert later using HandBrake or VLC).
- Perfect for creating quick demonstrations or training snippets on legacy hardware.
🎥 4. FlashBack Express – Modern, Feature-Packed Yet Free
Now let’s move to something more polished: FlashBack Express.
This free version of FlashBack Pro gives you professional-grade performance without charging anything.
💎 What Makes FlashBack Express Great
Unlike CamStudio, this recorder feels modern, with a clean interface and built-in editor. Even the free version has:
- No watermarks or time limits
- Ability to record screen + webcam + microphone simultaneously
- Trim and edit videos directly within the app
- Noise reduction and background sound cleanup
- MP4, AVI, and WMV export options
- Easy upload to YouTube or local save
🧰 How to Use FlashBack Express
- Download it from https://www.flashbackrecorder.com/express/
- Install and open it — the dashboard will show “Record Your Screen.”
- Choose recording type:
- Full screen, region, or window.
- Tick “Record Webcam” if you want picture-in-picture view.
- Click Record. A countdown appears before capture begins.
- When finished, click Stop, and the recording automatically opens in the editor.
- Trim, cut, or enhance the audio as needed, then export.
💡 Notes for Low-End PCs
FlashBack Express runs comfortably on 4 GB RAM and a dual-core CPU, but on very weak hardware it may stutter at high frame rates.
To improve performance:
- Record at 30 fps instead of 60 fps.
- Close background apps.
- Keep videos under 30 minutes if disk space is limited.
Even so, for tutorials or webcam sessions, its built-in editing makes it one of the most complete free solutions.
🧩 5. VokoscreenNG – Open-Source Recorder for Windows & Linux
If you prefer open-source software that’s both reliable and flexible, VokoscreenNG is worth exploring.
It’s perfect for teachers, YouTubers, and software demonstrators — and it runs beautifully even on modest systems.
🌍 Cross-Platform and Feature-Rich
VokoscreenNG’s biggest strength is simplicity with control. You don’t need to tinker much; most defaults work right away.
Key features include:
- Works on Windows 10/11 and Linux
- Records full screen, selected area, or single window
- Captures system audio + microphone simultaneously
- Supports multiple file formats (MKV, MP4, AVI, WebM)
- Built-in timer to start/stop automatically
- Frame-rate control up to 60 fps
- Low CPU usage even with multiple windows open
🧭 How to Use VokoscreenNG
Let’s go through it slowly so you can set it up properly:
- Download from the official project page: https://linuxecke.volkoh.de/vokoscreen/vokoscreen.html
- Install and open the app — the interface will show tabs like Screen, Audio, Camera, Folder, etc.
- Under Screen, choose Full Screen or Area.
- Under Audio, enable both PulseAudio (system sound) and Microphone if you need commentary.
- Optional: Enable Countdown Timer or Automatic Stop for scheduled captures.
- Press the Start button to begin recording.
- When done, click Stop — your file will be saved instantly.
🧠 Real-World Use Tips
- For tutorial creators, combine screen + webcam for a professional look.
- On older PCs, lowering resolution to 720p keeps recordings smooth.
- Output files are large, so always check free storage before long sessions.
Because it’s open-source, you can even inspect or modify the code — great for developers or privacy-conscious users who dislike closed-source apps.
⚖️ 6. Which One Should You Choose?
To help you decide quickly, here’s a comparison table summarizing the four recorders:
| Feature / Tool | ShareX | CamStudio | FlashBack Express | VokoscreenNG |
|---|---|---|---|---|
| Watermark | ❌ None | ❌ None | ❌ None | ❌ None |
| Time Limit | ❌ None | ❌ None | ❌ None | ❌ None |
| Max Resolution | 4K @ 60 fps | 1080p | 1080p @ 60 fps | 1080p @ 60 fps |
| System Requirement | 2 GB RAM | 1 GB RAM | 4 GB RAM | 2 GB RAM |
| Webcam Recording | ✅ | ❌ | ✅ | ✅ |
| Built-in Editor | ✅ (basic) | ❌ | ✅ (advanced) | ❌ |
| OS Support | Windows | Windows | Windows | Windows & Linux |
| Upload/Sharing | ✅ Auto upload | ❌ | ✅ YouTube export | ❌ |
| Open Source | ✅ | ❌ | ❌ | ✅ |
🧾 Summary
- For low-end PCs → CamStudio or ShareX
- For tutorials with webcam → FlashBack Express
- For Linux users → VokoscreenNG
- For power users who want automation → ShareX
Each recorder shines in its own category — there’s no one-size-fits-all, but together they cover almost every recording scenario.
❓ 7. Common Questions (Q&A)
Q1. Which recorder is best for gaming?
ShareX can handle lightweight games at 60 fps, but if you’re into heavy gaming, consider OBS Studio (though it’s heavier).
For casual gameplay tutorials, ShareX or FlashBack Express should be perfect.
Q2. Can these tools record both microphone and system audio?
Yes. ShareX, FlashBack Express, and VokoscreenNG all support dual-audio recording.
CamStudio can do so too, but its audio sync may drift slightly on long recordings.
Q3. Do any of these tools add watermarks?
No — all four are watermark-free even in their free versions.
Q4. Which recorder consumes the least CPU?
CamStudio wins here. It barely touches system resources and works fine on 10-year-old machines.
Q5. Can I use these for YouTube tutorials?
Absolutely. ShareX and FlashBack Express even have direct upload options. Just ensure you check your audio levels before publishing.
Q6. Is it safe to download these from third-party sites?
No. Always use official websites listed above. Third-party downloads may include malware or adware.
🏁 8. Final Thoughts
Finding a truly free screen recorder that’s both powerful and lightweight isn’t easy — but these four options prove it’s possible.
- ShareX gives you professional tools, automation, and flexibility.
- CamStudio keeps things old-school and efficient for older PCs.
- FlashBack Express provides a modern, user-friendly experience with editing built-in.
- VokoscreenNG bridges the Windows–Linux gap with reliable open-source performance.
No matter which you choose, you’ll be able to record your screen without watermarks, limits, or frustration — and that’s what makes these tools stand out in 2025.
⚠️ Disclaimer
Always download software only from official websites linked above. Avoid unofficial sources to prevent malware infections.
Performance may vary depending on your hardware specifications and background processes.
#ScreenRecording #FreeSoftware #WindowsTools #ShareX #CamStudio #FlashBackExpress #VokoscreenNG #OBSalternative #TutorialTools #Windows11 #OpenSource


