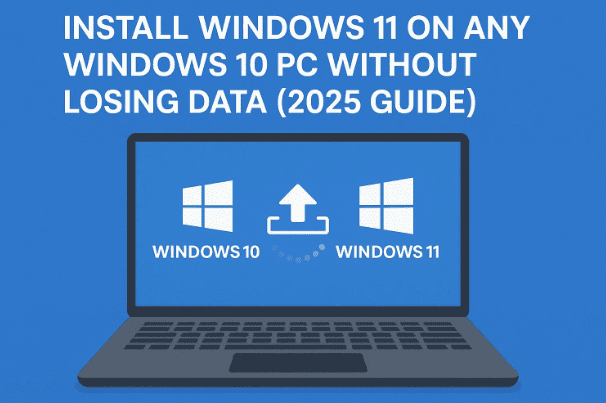
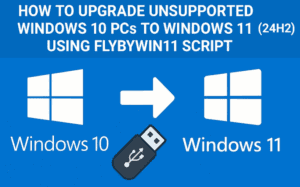
Upgrading to Windows 11 should be simple — but for many users, Microsoft’s system requirements stand in the way. Even if your PC runs smoothly, the company might still block your upgrade because of missing hardware features like TPM 2.0 or Secure Boot.
The good news? You can upgrade from Windows 10 to Windows 11 without data loss, even on unsupported PCs — and it’s surprisingly easy. This article will walk you through everything step-by-step, explain how it works, and include important safety tips to protect your files.
Let’s dive in.
🧩 1. Why Windows 11 Blocks Certain PCs
Before we start, it’s important to understand why Microsoft prevents some devices from upgrading.
Windows 11 introduced stricter security requirements, including:
- Trusted Platform Module (TPM) 2.0
- Secure Boot
- Supported CPU list (8th-gen Intel or Ryzen 2000 and newer)
These features improve data protection and system integrity — but they also make many older PCs officially “unsupported.”
The result? You might have a perfectly functional PC that runs great, but Windows Update refuses to offer the Windows 11 upgrade.
That’s where this method comes in. It bypasses the restrictions without registry edits or risky hacks, using a simple open-source utility.
🧰 2. What You’ll Need Before Starting
Let’s get our checklist ready before we move to the actual steps.
- ✅ A working Windows 10 installation (activated and updated)
- ✅ A reliable internet connection
- ✅ At least 20 GB free space on your main drive
- ✅ A backup of your important files (documents, photos, downloads, etc.)
- ✅ The Flyoobe (formerly FlyBy11) tool — an open-source Windows upgrade assistant
👉 Official repository: https://github.com/builtbybel/Flyoobe
Backing up your data is crucial. Even though this process performs an in-place upgrade that keeps your files, settings, and apps, any interruption — such as a power failure — could corrupt your installation. A quick backup to an external drive or cloud storage ensures you can recover easily.
⚙️ 3. Step-by-Step: Upgrade Windows 10 to Windows 11 Using Flyoobe
Now that everything’s ready, let’s go through the process in a calm, methodical way.


🪄 Step 1: Download Flyoobe
- Open your browser and visit
👉 https://github.com/builtbybel/Flyoobe - Scroll to the Releases section.
- Download the latest ZIP file (for example,
Flyoobe.zip). - Once downloaded, extract the contents into a new folder — e.g.,
C:\Flyoobe.
You’ll now see an executable file called Flyoobe.exe in that folder.
Note:
Some antivirus programs may flag new open-source tools as “unknown.” If you see a warning, choose Allow or Restore — this tool is safe when downloaded from the official GitHub link above.
🪄 Step 2: Run Flyoobe as Administrator
- Right-click
Flyoobe.exe→ select Run as administrator. - If Windows shows a “More info” warning, click Run anyway.
- The Flyoobe window will open.
You’ll see two small checkmarks at the top. These indicate your PC’s compatibility (TPM 2.0 and Secure Boot).
- If one or both boxes are red, your PC is unsupported — but that’s fine. This tool exists precisely for such cases.
- If they’re green, your PC is officially compatible, and this process will still work.
🪄 Step 3: Download the Windows 11 ISO
At the bottom of Flyoobe, click Start Upgrade Now. A menu will appear with several options.
- Choose Download Windows ISO.
- You can either open Microsoft’s official site or click Download via PHTO (a built-in downloader).
- When asked, confirm:
- Version: Windows 11
- Release: 24H2 (the latest as of 2025)
- Edition: Windows 11 Home/Pro/Education (choose default)
- Language: Select the same language as your current Windows 10 (e.g., English (United States)).
- Architecture:
x64for most PCs (ARM only for specific tablets).
- Save the ISO file to your Downloads folder.
The download is around 5 GB, so it may take several minutes depending on your internet speed.
🪄 Step 4: Mount the Windows 11 ISO
When the ISO finishes downloading:
- Return to Flyoobe and click More options → From computer.
- Navigate to your
Downloadsfolder and select the Windows 11 ISO file. - Click OK to mount and verify it.
- If a PowerShell window appears asking for permission, choose Yes.
Flyoobe will now prepare a virtual installer using that ISO.
You may briefly see the text “Installing Windows Server” — don’t panic.
This is a trick the tool uses to bypass Microsoft’s hardware check. It doesn’t actually install a server edition; you’ll end up with Windows 11 Home or Pro depending on your current license.
🪄 Step 5: Start the In-Place Upgrade
You’ll now see a message: “Windows installation can proceed.”
- Click Next to begin.
- Accept Microsoft’s license agreement.
- When prompted, ensure the option Keep personal files, settings, and apps is selected.
If that option is greyed out, it means your language or edition doesn’t match the ISO you downloaded.
In that case, repeat Step 3 and choose the correct language version (for most users in the U.S., that’s English (United States)).
- Confirm by clicking Install.
Windows will now begin upgrading. Your PC will restart several times, and the screen may go blank temporarily — this is completely normal.
Grab a coffee, and let it run.
🪄 Step 6: Wait for Installation to Complete
Depending on your hardware, the installation can take anywhere from 30 minutes to 1 hour.
When done, you’ll see the familiar Windows 11 login screen.
Enter your existing PIN or password — no new account required — and you’ll be greeted by the fresh Windows 11 desktop.
All your:
- Installed programs
- Documents, downloads, and photos
- Desktop icons and settings
…will remain exactly as they were on Windows 10.
That’s the beauty of an in-place upgrade.
🪄 Step 7: Run Windows Update
Once your new desktop appears:
- Open Settings → Windows Update.
- Click Check for updates.
You may see additional security or feature patches for the 24H2 release — install them to keep your system current.
Congratulations! You’ve just upgraded an unsupported PC to Windows 11 safely and for free.
🧭 4. Understanding What Just Happened
Let’s quickly summarize the logic behind this method.
Microsoft’s official installer checks for TPM 2.0, Secure Boot, and CPU compatibility before allowing installation.
Flyoobe bypasses that step by using the Windows Server installer template — which doesn’t enforce those checks — but substitutes your existing license information to install the correct edition afterward.
That’s why the tool shows “Server Setup” during the process — but the final result is a genuine Windows 11 environment matching your original activation.
Your license key, whether OEM or digital, automatically transfers to Windows 11 because it’s embedded in your system’s BIOS.
💾 5. Safety and Backup Recommendations
Even though this process is reliable, here are a few important points to keep in mind:
- Always back up first.
Even a minor interruption can corrupt system files. Tools like Macrium Reflect Free or Windows Backup are perfect for creating quick system images. - Use a UPS if possible.
Power failures during upgrades are rare but can be disastrous. - Check your disk health.
If your hard drive has bad sectors, fix them usingchkdsk /fbefore upgrading. - Don’t interrupt the process.
Let Windows restart on its own — don’t power it off manually unless it’s completely frozen for over an hour.
🧠 6. Common Questions and Answers (FAQ)
🔹 Q1: Is Flyoobe safe and free to use?
Yes. It’s an open-source tool developed by Builtbybel (a trusted Windows developer). You can inspect the source code on GitHub:
👉 https://github.com/builtbybel/Flyoobe
🔹 Q2: Will my files and apps really stay intact?
Yes — provided you choose the correct language and edition during setup.
Always verify that the “Keep personal files, settings, and apps” option is selected before installation begins.
🔹 Q3: Do I need to reactivate Windows after upgrading?
No. Your existing Windows 10 digital license carries over automatically.
If activation doesn’t appear instantly, go to Settings → System → Activation and click Troubleshoot. Windows will revalidate your license online.
🔹 Q4: Will I continue receiving Windows updates?
For now, yes.
Unsupported hardware still receives Windows 11 updates normally. In the future, Microsoft could restrict updates for unofficial upgrades — but there’s no sign of that yet.
🔹 Q5: Can I roll back to Windows 10 if I don’t like Windows 11?
Absolutely.
You have 10 days after upgrading to roll back easily:
- Go to Settings → System → Recovery.
- Under “Go back,” click Go back to Windows 10.
- Windows will restore your previous installation automatically.
After 10 days, you’d need to reinstall Windows 10 manually using a USB or ISO.
🔹 Q6: My PC is more than 8 years old. Should I still upgrade?
Probably not.
If your system struggles to run Windows 10 smoothly, Windows 11 won’t perform any better. This method is best for modern but unsupported hardware — like 6th gen Intel or first-gen Ryzen machines that run fine but fail Microsoft’s arbitrary checks.
🔹 Q7: What if something goes wrong during installation?
If the upgrade fails:
- Restart your PC.
- Re-run Flyoobe and choose Repair Upgrade.
- Ensure your ISO is not corrupted (re-download if necessary).
Because this method doesn’t erase your drive, your files remain intact even if the first attempt fails.
🔹 Q8: Will missing TPM or Secure Boot cause issues later?
Generally, no.
Those components mainly handle encryption (BitLocker) and secure firmware booting. You might lose access to BitLocker encryption or Windows Hello hardware security, but day-to-day performance and updates remain unaffected.
🔹 Q9: How do I check if my PC supports Windows 11 officially?
You can use Microsoft’s PC Health Check app:
👉 https://aka.ms/PCHealthCheck
It will list which components fail the compatibility test (CPU, TPM, or Secure Boot).
🔄 7. If You Want to Stay on Windows 10
Windows 10 support officially ends on October 14, 2025.
After that, it will stop receiving regular security updates. However, Microsoft plans to offer Extended Security Updates (ESU) — a paid service mainly for organizations.
If your PC can’t or shouldn’t upgrade, you can:
- Use Windows 10 LTSC (Long-Term Servicing Channel) for extended updates.
- Or migrate to a lightweight Linux distribution like Zorin OS or Linux Mint for everyday tasks.
🧾 8. Important Disclaimer
This article is for educational purposes only.
The method described here uses an open-source tool to perform an in-place upgrade on unsupported hardware. While it works reliably, any system modification carries risk.
Always back up your data before proceeding, and use only the official GitHub link for Flyoobe to avoid tampered versions.
🎯 Final Thoughts
With Microsoft’s strict requirements and Windows 10’s upcoming end of support, many users feel trapped between upgrading hardware or staying behind. Thankfully, open-source developers like Builtbybel have created safe and practical tools like Flyoobe that make it possible to bring new life to older PCs.
The entire upgrade process takes less than an hour, preserves all your files, and gives you a fully functional, activated copy of Windows 11 — no registry tweaks or shady installers required.
So, if you’ve been staring at that “This PC can’t run Windows 11” message for months — it’s time to fix that. Follow the steps in this article carefully, back up your data, and welcome your computer to Windows 11.
Tags: Windows 11, Windows 10 Upgrade, Unsupported Hardware, TPM Bypass, Secure Boot, Flyoobe, Windows Installation, Microsoft Update, In-place Upgrade, Data Backup
Hashtags: #Windows11 #WindowsUpgrade #Microsoft #TPMBypass #Flyoobe #Windows10 #PCUpgrade #TechGuide #NoDataLoss #SecureBoot