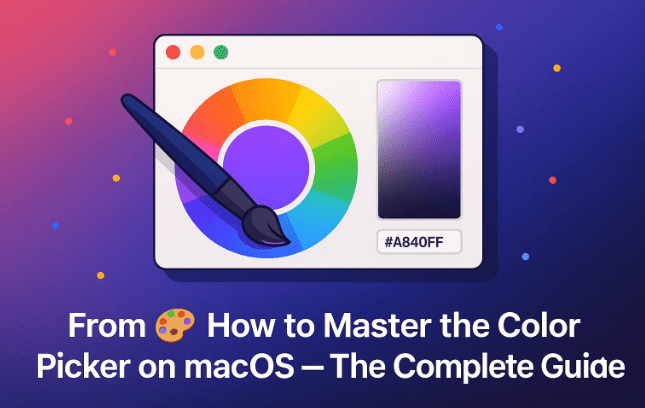
Every Mac comes with a surprisingly powerful yet often overlooked tool called the Color Picker. Whether you’re editing a presentation in Keynote, designing in Freeform, or simply changing the color of text in Pages, this tiny utility silently powers color selection across macOS.
In this article, we’ll walk through everything you need to know about the macOS Color Picker — what it is, where to find it, how to use it effectively, and some lesser-known pro tips that can help you save time and maintain visual consistency across all your Mac apps.
Let’s start from the basics.
1️⃣ What Is the Color Picker on Mac?
Before diving into features and techniques, let’s understand what the Color Picker actually is.
The macOS Color Picker is a system-wide color selection tool built directly into macOS. It ensures that every app — from Pages to Preview — can offer a consistent, unified way to pick and customize colors.
Some apps (like Photoshop or Affinity Designer) include their own color selectors, but most Apple apps use this universal Color Picker window.
Where You’ll Find It
You’ll see it in many places:
- When choosing a text color in Pages or Numbers.
- When filling shapes or annotations in Preview or Freeform.
- When customizing UI elements in apps like Keynote, TextEdit, or even third-party apps that integrate Apple’s color interface.
No matter where you find it, the Color Picker looks and behaves the same — giving you access to five distinct modes (Color Wheel, Sliders, Pencils, Palettes, and Image Palettes), plus the ability to save favorite colors and control opacity.
2️⃣ Accessing the Color Picker on macOS
So far, so good — now let’s see how to bring up the Color Picker in any app.
Example: Using Pages
- Select some text or an object.
- Open the Format → Style panel.
- Under “Text Color,” click the small color icon.
- If you only see a small grid of preset colors, click the Color Wheel icon beside it — this opens the full system Color Picker.
You can now choose any color from across the visible spectrum, not just the limited preset palette.
The same applies to other apps. For instance:


- In Freeform, click a shape → tap the color icon → choose the Color Wheel.
- In Preview, select an annotation or drawing → go to “Show Colors.”
No matter the app, the experience remains consistent.
3️⃣ Understanding the Color Wheel and Brightness Slider
Once you open the Color Picker, you’ll typically see the Color Wheel, which displays a circular gradient of hues. But many users get confused when the wheel appears entirely black or gray — this is because of the Brightness Slider at the bottom.
Let’s clarify how it works.
How to Adjust Brightness
- If the Brightness Slider is all the way to the right, every color on the wheel turns black.
- If it’s all the way to the left, you’ll see bright, saturated colors.
- Moving it between the extremes lets you create darker or lighter variations of any hue.
So, to pick a perfect tone:
- Move the brightness slider toward the middle or left.
- Click anywhere on the wheel to choose your hue.
- Fine-tune brightness as needed to find your ideal color.
This simple slider is key to accessing the full color range — from vivid shades to deep, muted tones.
4️⃣ Setting Transparency (Opacity) in Colors
Now that we’ve handled brightness, let’s move to something equally useful: opacity (sometimes called transparency).
Not every color needs to be fully solid. For instance, you might want a semi-transparent shape in Freeform or a highlight box in Preview. The Color Picker lets you control that easily.
Example in Freeform:
- Select your object (say, a square).
- Click the color icon and then the Color Wheel.
- At the bottom of the Color Picker, find the Opacity Slider.
- Adjust it from 100% (solid) down to your desired transparency (like 50%).
You’ll instantly see through the shape to whatever’s underneath — perfect for overlays, shading, or subtle backgrounds.
Example in Preview:
In Preview, opacity settings are hidden in the “Show Colors” panel:
- Create a rectangle or shape annotation.
- Open Show Colors.
- Adjust the Opacity slider at the bottom.
This technique is ideal for highlighting text in PDFs — a transparent yellow rectangle can mimic the look of a marker highlighter without obscuring the text.
5️⃣ Saving Favorite Colors for Reuse
Let’s move to the next big advantage — Favorites (Color Chips) at the bottom of the Color Picker window.
These small squares are not random. They store your frequently used or custom-picked colors, and they stay consistent across all macOS apps.
How to Add a Color to Favorites
- Choose a color using any picker mode.
- Once it appears in the left preview box, drag that box down to an empty square below.
Now that color is saved permanently as one of your favorites.
Why It’s So Useful
- Favorites sync across apps. A color saved in Freeform will appear in Pages or Keynote too.
- You can quickly apply your brand or theme colors without memorizing hex codes.
- You can rearrange them by dragging, or delete one by selecting and pressing Delete.
For design projects, this is invaluable. It ensures consistency — your document headings, shapes, and highlights can share identical colors across different apps.
6️⃣ Using the Eyedropper Tool to Match Colors
So far, we’ve chosen colors manually. But what if you want to match a color from an image or another part of your screen?
That’s where the Eyedropper Tool comes in — one of the most practical tools inside the Color Picker.
How It Works
- Open the Color Picker.
- Click the Eyedropper icon (a small pipette symbol).
- Hover anywhere on your screen — over an image, button, or even text.
- Click to capture that color instantly.
For example, say you have a sunset photo and want your book cover in Pages to match that orange glow — just use the eyedropper on the photo, and the Color Picker will apply that exact shade.
You can even drag that captured color into your Favorites to reuse it later.
7️⃣ Opening the Color Picker Without Selecting an Object
Here’s a neat little trick that even experienced Mac users miss.
You can open the Color Picker directly from the menu bar — no need to have any object or text selected.
How to Do It:
- In any app that supports it, click Format → Show Colors.
- The Color Picker will appear, ready to use.
Once open, it stays accessible while you switch between elements. You can drag colors from the picker onto objects, shapes, or text selections without re-opening it each time.
You can even drag colors directly from your Favorites bar onto other items — for example, dragging your favorite blue onto a shape in Pages or a text box in Keynote.
This simple workflow tweak can save you dozens of clicks.
8️⃣ Entering Colors Using Hex Codes and Sliders
Designers often need exact color values — usually in hexadecimal (HEX) or RGB formats. The Color Picker lets you input these directly.
Switching to Color Sliders Mode
At the top of the Color Picker, you’ll see five small icons representing different modes. Click the second one — Color Sliders.
Here you can toggle between multiple systems:
- RGB (Red, Green, Blue)
- Grayscale
- CMYK (Cyan, Magenta, Yellow, Black)
- HSB (Hue, Saturation, Brightness)
To enter a precise color:
- Switch to RGB Sliders.
- You’ll see a field showing the HEX value (e.g.,
#FF0000for red). - Type or paste your value directly to match a specific color.
Alternatively, switch to HSB mode to tweak colors visually:
- Hue adjusts the base color (red, blue, green, etc.).
- Saturation controls intensity.
- Brightness controls lightness/darkness.
This is particularly handy when you want a consistent hue but darker or lighter variations for highlights and shadows.
9️⃣ Exploring Other Color Picker Modes
So far, we’ve used the Wheel and Sliders, but macOS includes three more unique modes, each with its own advantage.
🖍️ 1. Pencils
This mode provides a familiar set of color pencils, each representing a standard color name like “Turquoise,” “Lavender,” or “Sky Blue.”
It’s a quick way to pick visually familiar colors, though it lacks precision.
🎨 2. Color Palettes
Palettes give you predefined color sets, such as:
- Apple Developer Colors
- Web Safe Colors
- Crayons
But the best part? You can create your own color palette:
- Click the three-dot icon (⋯) → New.
- Add colors using the + button.
- Rename them (e.g., “Title Text,” “Background,” “Accent”).
This is perfect for branding or project work where consistency matters. The palettes are systemwide, and you can even import .CLR color files from colleagues or design teams.
To export your palettes, go to Finder → Go → Library → Colors, where all your saved .clr files are stored.
🌈 3. Image Palette
This mode displays a color spectrum square or allows you to use your own image as a palette.
You can:
- Drag and drop an image directly into the panel.
- Or select New from File / New from Clipboard.
Then, simply click on any part of the image to pick a color.
It’s perfect for designers — imagine using a brand’s logo image as your color reference source.
10️⃣ Advanced Tip — Drag and Drop Colors Between Apps
Here’s one of the Color Picker’s most powerful but hidden features: drag and drop color transfer.
Yes, you can literally drag colors from the Color Picker’s Favorites or active swatch into any compatible app.
Example:
- In Pages, open the Color Picker and select a color.
- Drag that color from the swatch directly onto text, a shape, or another object.
- It applies immediately.
You can even drag colors between separate apps like Freeform and Keynote. This makes maintaining consistent colors across your entire Mac ecosystem incredibly easy.
💡 Why You Should Master the Color Picker
Learning the Color Picker is not just about aesthetics — it’s about efficiency and consistency.
Here’s what you gain:
- Universal consistency: Your saved favorites and palettes follow you across all apps.
- Precision control: Enter HEX, RGB, or HSB values for pixel-perfect matches.
- Creative flexibility: Adjust brightness, opacity, or create transparent highlights.
- Professional polish: Match brand or project colors accurately using eyedropper or imported palettes.
Whether you’re writing, designing, or marking up PDFs, knowing these tools saves you time and frustration.
💬 Frequently Asked Questions (FAQ)
Q1. How do I reset or remove a saved color from my Favorites?
Select the Color Picker window so it’s active, click the color square, and press Delete on your keyboard.
Q2. Can I share my color palettes with others?
Yes. Your custom palettes are saved as .clr files under Library → Colors. You can share those files with other Mac users who can import them via the Color Picker.
Q3. Why does my Color Wheel show only black or gray?
That happens when the Brightness Slider is set too far right (full darkness). Move it left to restore visible colors.
Q4. How do I get back the Color Picker if it disappears?
Go to Format → Show Colors in the app menu to reopen it instantly.
Q5. Are the Color Picker settings synced between devices?
Currently, macOS does not sync these through iCloud automatically. They are stored locally, but you can manually copy .clr files between Macs.
⚠️ Disclaimer
This article is based on macOS’s built-in Color Picker available in macOS Ventura, Sonoma, and newer versions. Interface elements may vary slightly depending on your macOS version or system theme. For official Apple documentation, visit: Apple Support – macOS Color Picker.
🎯 Final Thoughts
The macOS Color Picker might seem like a small utility, but once you master it, it becomes one of the most powerful creative tools on your Mac. From precision color selection to global favorites and cross-app drag-and-drop, it offers everything a casual user or professional designer could need.
So next time you’re coloring shapes, annotating documents, or designing slides — skip the default presets and open the full Color Picker. Spend a few minutes customizing it, and you’ll save hours later.
#macOS #ColorPicker #AppleTips #MacGuide #Keynote #Freeform #Pages #DesignTools #MacProductivity #dtptips