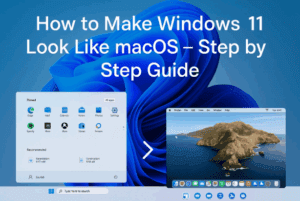
Ever wondered what macOS would feel like on your Windows machine — without erasing your main drive or affecting your setup? The good news is that you can do exactly that. By installing macOS on an external SSD or hard drive, you can run Apple’s operating system side by side with Windows, switching between them whenever you like.
In this article, we’ll go step by step through how to install macOS on an external drive using OpenCore, the modern bootloader that allows macOS to run on non-Apple hardware (often referred to as a Hackintosh). This approach is perfect if you want to test or learn macOS legally for personal, educational, or app-development purposes.
🍎 1. Why Install macOS on an External Drive
Let’s start with the big “why.” There are several practical reasons you might want to do this:
- Dual Operating Systems: Run Windows and macOS side by side without formatting your PC.
- Safe Testing Environment: Experiment with macOS features, app development, or UI without affecting your Windows files.
- Portability: Carry your personalized macOS installation on an external SSD and plug it into any compatible PC.
- Learning and Compatibility: Developers often test software builds across operating systems without buying extra hardware.
This approach gives you the best of both worlds — flexibility and safety.
⚙️ 2. System Requirements and Preparation
Before diving in, make sure your setup meets the following:
- Processor: Intel CPU (4th Gen or later preferred). ⚠️ This method is not officially supported for AMD processors and requires advanced patches if attempted.
- Storage: Minimum 64 GB external SSD or HDD (USB 3.0 or USB-C recommended).
- Internet Connection: Required during macOS installation for downloading components.
- Software Needed:
- OpenCorePkg (GitHub)
- Python (Microsoft Store)
- CPU-Z (to identify processor code name)
Finally, always back up your important data. This process involves disk formatting, and any mistake could erase drives if selected incorrectly.
💽 3. Step 1: Connect and Format the External Drive
First, plug in your external hard drive or SSD. Preferably use a USB-C SSD for better speed and reliability.
Next, open Disk Management in Windows:
- Press Windows + R, type
diskmgmt.msc, and hit Enter. - Locate your external disk.
- If it has existing partitions, right-click → Delete Volume for each until all space is “Unallocated.”
This ensures we start with a clean drive ready for macOS formatting.
🧱 4. Step 2: Convert the Drive to GPT Partition Scheme
macOS requires UEFI boot, which works only with a GUID Partition Table (GPT) layout.
Here’s how to convert:


- Right-click on the disk label (e.g., Disk 2) on the left pane in Disk Management.
- Select Convert to GPT Disk.
- Wait for Windows to complete the conversion.
If the option is grayed out, make sure you’ve deleted all existing partitions first.
🧩 5. Step 3: Create Installer and macOS Partitions
Now, we’ll divide the external drive into two sections:
- Installer Partition (2 GB)
- Right-click the unallocated space → New Simple Volume → set size to 2048 MB.
- Format as FAT32.
- Name it
Installer.
- macOS Partition (Remaining Space)
- Use the remaining unallocated area to create another partition.
- Format as exFAT.
- Name it
macOS.
💡 Why exFAT?
macOS and Windows can both read/write exFAT, which simplifies file transfer during setup.
We’ll later reformat this macOS partition to APFS (Apple File System) inside macOS recovery.
🔍 6. Step 4: Identify Your Processor Type
Before downloading configuration files, you must know your processor’s code name.
This determines which OpenCore EFI configuration you’ll use.
- Install and open CPU-Z.
- In the CPU tab, look for Code Name (e.g., Coffee Lake, Kaby Lake, Skylake, etc.).
- Note it down.
Only Intel processors are supported by this guide. AMD installations require advanced modification, which is beyond this tutorial.
🧰 7. Step 5: Download the Correct OpenCore EFI Folder
OpenCore acts as the bootloader that lets macOS start on non-Apple hardware by injecting essential drivers and firmware support.
- Visit the official OpenCorePkg GitHub page:
👉 https://github.com/acidanthera/OpenCorePkg - Choose the EFI folder suitable for your processor architecture. You can also refer to updated community builds:
👉 Hackintosh EFI Folder for All Chipsets (InsanelyMac Forum) - Download and extract the ZIP file.
After extraction, copy the EFI folder to your Installer partition created earlier.
This folder contains everything needed for OpenCore to boot the macOS installer.
🌐 8. Step 6: Download macOS Recovery Files Using macrecovery.py
macOS installation files are stored as recovery images. We’ll download them directly from Apple’s servers using OpenCore’s built-in script.
Step-by-step:
- Inside the extracted OpenCorePkg, navigate to:
Utilities → macrecovery - In the folder’s address bar, type
cmdand press Enter — this opens Command Prompt in that directory. - Run the following command to list available macOS versions and download the one you prefer. For example, to get macOS Sonoma (14.x), copy its command from the OpenCore installer guide:
👉 OpenCore macrecovery Guide - Paste and run the command (example syntax):
python macrecovery.py -b Mac-7BA5B2D9E42DDD94 -m 00000000000000000 downloadThe script will begin downloading the recovery image directly from Apple.
Once complete, you’ll see a new folder named:
com.apple.recovery.boot
Inside, there will be a critical file called BaseSystem.dmg — the macOS recovery image.
Copy the entire folder (com.apple.recovery.boot) to your Installer partition.
💾 9. Step 7: Prepare the Installer Drive
Your Installer partition should now contain:
EFI
com.apple.recovery.boot
Double-check that:
- The EFI folder contains the OpenCore files.
- The com.apple.recovery.boot folder includes the BaseSystem.dmg file.
You’re almost ready to boot into macOS recovery. But before that, let’s handle one crucial network requirement.
🌐 10. Network Tip: Use Ethernet Instead of Wi-Fi
During macOS installation, the system might need to verify files online.
Many PC Wi-Fi adapters are not natively supported by macOS, which can cause failed installations or “No network found” errors.
✅ Recommendation:
Connect your PC via a wired Ethernet cable during setup to avoid connectivity issues.
🚀 11. Step 8: Boot From OpenCore and Install macOS
Now comes the exciting part — booting into the macOS installer environment.
Step 1: Enter BIOS
- Restart your PC and immediately press the BIOS key (commonly F2, Del, or Esc).
- Disable Secure Boot under the Boot or Security tab.
- Set your external drive as the first boot device in the boot order.
- Save and exit.
Step 2: Boot Into OpenCore
After restarting, you’ll see the OpenCore Boot Menu — proof that your setup is working.
Select the first option to boot into macOS Recovery.
Step 3: Format the macOS Partition to APFS
In the Recovery screen:
- Choose Disk Utility.
- Select your external drive’s
macOSpartition. - Click Erase and set:
- Format: APFS
- Scheme: GUID Partition Map
- Click Erase again to confirm.
This prepares the partition for macOS installation.
Step 4: Start the Installation
- Close Disk Utility.
- Select Reinstall macOS Sonoma (or whichever version you downloaded).
- Choose the newly formatted macOS partition as the installation destination.
The installation takes around 45 – 60 minutes depending on your SSD speed. Your PC may restart several times — don’t disconnect the external drive during the process.
Once finished, macOS will boot to the setup assistant screen. Follow the on-screen prompts to configure language, region, Apple ID (optional), and privacy preferences.
Congratulations! 🎉
You now have a fully working macOS installation running from an external drive on your PC.
❓ 12. FAQs About Running macOS on an External Drive
Q1. Will this damage my Windows installation?
No. Since macOS is installed on an external drive, your internal disk remains untouched. Just ensure you select the correct disk during partitioning.
Q2. Can I unplug the drive and use macOS on another PC?
Only if that PC has compatible hardware and the same EFI configuration. Otherwise, you’ll need to tweak OpenCore’s configuration files.
Q3. Why can’t macOS detect my Wi-Fi or Bluetooth?
Most PC network adapters don’t have macOS drivers. Consider using a USB Wi-Fi dongle or Ethernet connection.
Q4. Can I update macOS normally?
Minor updates (like 14.1 → 14.2) usually work fine. Major version upgrades might require new OpenCore EFI updates.
Q5. Is this legal?
Apple’s license allows macOS to run only on Apple hardware. Installing it elsewhere is technically unsupported. Use it strictly for personal learning or testing.
Q6. How do I switch between macOS and Windows?
Each time you boot, you’ll see the OpenCore Boot Menu. Select macOS or Windows accordingly.
Q7. Can I install macOS on an internal secondary drive instead?
Yes, the process is identical — just be extra cautious when selecting the correct drive during setup to avoid overwriting Windows.
🏁 13. Final Thoughts and Safety Tips
So far, you’ve created an external dual-boot system that lets you experience macOS without ever giving up your Windows installation.
It’s an excellent way to explore Apple’s operating system, test development environments like Xcode, or simply familiarize yourself with macOS interface and utilities.
Here are a few closing suggestions:
- Always keep a backup of your OpenCore EFI folder.
- Avoid applying macOS system updates without checking OpenCore compatibility.
- Don’t enable FileVault encryption on external macOS installations — it can cause boot issues.
- For better performance, prefer SSD over HDD.
- If something goes wrong, you can simply wipe the external drive and start over — your main system remains safe.
⚠️ Disclaimer
This guide is provided purely for educational and experimental purposes.
Apple does not officially support macOS installations on non-Apple hardware. Proceed only if you understand the technical implications and accept responsibility for potential data loss or incompatibility.
#macOS #OpenCore #Hackintosh #DualBoot #Windows11 #ExternalDrive #macOSSonoma