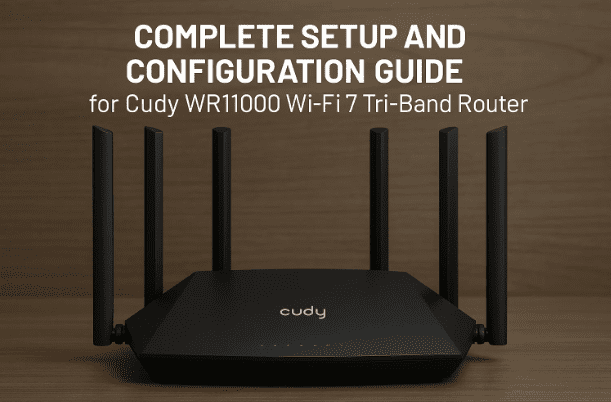
Setting up a high-performance router like the Cudy WR11000 can truly transform your internet experience — but only if it’s configured correctly. This router supports Wi-Fi 7 with 2.4GHz, 5GHz, and 6GHz tri-band connectivity, offering lightning-fast wireless speeds and stable wired connections via 4× 2.5G Ethernet ports.
In this article, we’ll walk through every feature and setting in detail — from initial setup and Wi-Fi configuration to VPN, QoS, and firmware management. Whether you’re a beginner or a network enthusiast, this guide will help you unleash the full potential of your Cudy WR11000 router.
1. Overview of the Cudy WR11000 Router
The Cudy WR11000 is a Wi-Fi 7 tri-band router designed for heavy internet users, streamers, and gamers who need both speed and stability.
Key Highlights:
- Wi-Fi 7 technology with 2.4GHz, 5GHz, and 6GHz bands.
- 4× 2.5G LAN ports for ultra-fast wired connections.
- Support for VPN protocols (PPTP, L2TP, OpenVPN, WireGuard).
- Mesh support for extended coverage.
- QoS, Parental Control, DDNS, and Port Forwarding for power users.
Before diving into advanced options, let’s first learn how to log in and access the main interface.
2. Accessing the Web Interface
To configure your Cudy router, you’ll first need to log into its web interface.
Steps:
- Connect your PC or smartphone to the router via Wi-Fi or Ethernet cable.
- Open a web browser and type:
http://cudy.netor192.168.10.1 - Enter your default login credentials (usually printed on the back label).
- Create a new admin password for security when prompted.
Once logged in, you’ll reach the System Status page — the heart of the Cudy interface.
👉 Official Site: https://www.cudy.com
3. Understanding the Dashboard
When you enter the main interface, you’ll first see System Status at the top. This section gives you a snapshot of your network.
Key sections:
- Internet Icon: Shows whether the router is online.
- Client Icon: Lists all connected devices (wired and wireless).
- Quick Setup Button: For one-click configuration.
- Mesh Status: Displays connected mesh nodes and their IP, MAC address, and firmware versions.
Scrolling down, you’ll find detailed status information:
- Connection type (e.g., Dynamic IP or PPPoE).
- Router mode (Wireless Router or Access Point).
- WAN interface details and LAN connection count.
This dashboard helps you confirm that your router is properly connected before making deeper changes.


4. Configuring Internet Connection (DHCP, PPPoE, Static)
Now that your router is up and running, let’s configure your internet connection type. This step ensures the router communicates correctly with your ISP.
Connection Types:
| Type | Description | Common Use |
|---|---|---|
| Dynamic IP (DHCP) | Automatically receives IP from your ISP. | Most home broadband. |
| PPPoE | Requires ISP username/password. | Fiber or DSL users. |
| Static IP | Manually configured with IP, subnet, and gateway. | Corporate networks. |
Step-by-Step Setup:
- Click WAN Settings in the sidebar.
- Under Protocol, choose your connection type.
- For PPPoE, enter your username and password given by your ISP.
- Click Save and Apply.
- Check Status → Internet Connected to confirm success.
💡 Tip: If you’re unsure of your connection type, contact your ISP or check your previous router’s settings.
5. LAN and IP Settings
Your LAN (Local Area Network) controls how devices communicate within your home.
You can view or modify:
- Local IP Address (e.g., 192.168.10.1)
- Subnet Mask (typically 255.255.255.0)
- MAC Address of the LAN interface
To adjust:
- Go to LAN Settings → Local Area Settings.
- Edit your IP or subnet only if necessary.
- Click Save and Apply.
Changing LAN ranges is useful when using multiple routers to prevent IP conflicts.
6. Wi-Fi Setup for 2.4GHz, 5GHz, and 6GHz Bands
Cudy WR11000’s biggest strength is its tri-band Wi-Fi 7 performance. Each band serves a specific purpose.
Here’s what each band does:
- 2.4GHz: Best range, lower speed — ideal for older devices or IoT gadgets.
- 5GHz: Faster, moderate range — perfect for smart TVs, phones, and laptops.
- 6GHz: Ultra-fast, low-latency — great for gaming and Wi-Fi 7-compatible devices.
Let’s configure them step by step.
🟢 2.4GHz Wi-Fi Setup
- Go to Wireless → 2.4GHz Settings.
- Enable Wi-Fi.
- Set your SSID (Wi-Fi name), e.g.,
Home_24G. - Choose Encryption: WPA2/WPA3-Personal (recommended).
- Set a strong password (mix letters, numbers, and symbols).
- Leave Channel Width and Channel on Auto.
- Save settings.
💬 For large homes, set transmit power to “High”; for apartments, use “Medium” to avoid interference.
🔵 5GHz Wi-Fi Setup
- Navigate to Wireless → 5GHz Settings.
- Enable it if turned off.
- Name it uniquely (e.g.,
Home_5G). - Choose WPA2/WPA3 security.
- Enter a strong password.
- Channel Width: leave Auto, or select 80MHz/160MHz for higher throughput.
- Set Transmit Power to “Medium” for balance.
If your environment is crowded with other routers, manually selecting a free channel can help avoid interference.
🟣 6GHz Wi-Fi Setup
This band is the signature of Wi-Fi 7 routers.
Steps:
- Enable 6GHz band.
- Set SSID (e.g.,
Home_6G). - Use WPA3 security for maximum protection.
- Set password, and keep channel settings on Auto.
- Save and reboot.
7. Advanced Wireless Settings and Wi-Fi 7 MLO Feature
Once basic Wi-Fi is configured, you can fine-tune advanced parameters for best performance.
Available Options:
- Network Mode: Leave default unless specific device compatibility issues arise.
- Transmit Power: Adjust coverage (High for wide areas, Low for small rooms).
- Hidden SSID: Hide Wi-Fi name if you prefer privacy.
- Separate Client: Prevent connected devices from communicating (useful for guests).
🌐 Multi-Link Operation (MLO)
Wi-Fi 7 introduces MLO — Multi-Link Operation, which allows devices to use multiple Wi-Fi bands simultaneously.
- Enable “MLO Network” under Wi-Fi settings.
- This merges 2.4GHz, 5GHz, and 6GHz for combined throughput.
- Ideal for Wi-Fi 7-ready devices like modern laptops and flagship phones.
After enabling, click Save and Apply to activate MLO for blazing speeds and lower latency.
8. Managing Connected Devices
Under the Client/Device section, you’ll find a detailed list of every device on your network.
You can:
- View IP address, MAC, and host name.
- Check signal strength (for Wi-Fi users).
- See real-time bandwidth usage.
- Block or unblock any device instantly.
- Rename devices for easier recognition.
- Apply Rate Limit to control bandwidth usage.
This gives you full visibility over your home network and ensures no unknown users are hogging your Wi-Fi.
9. Setting Up VPN (PPTP, L2TP, OpenVPN, WireGuard)
One of the best parts of the Cudy WR11000 is its integrated VPN support — both client and server modes.
Supported Protocols:
| Protocol | Type | Recommended Use |
|---|---|---|
| PPTP / L2TP | Basic | Older systems; less secure. |
| OpenVPN | Secure | Works with most providers. |
| WireGuard | Fastest | Best balance of speed & security. |
| ZeroTier | Virtual LAN | Advanced network users. |
| IPSec Site-to-Site | Business | Office-to-office secure links. |
Setup Steps:
- Go to VPN Settings.
- Enable VPN Client.
- Choose protocol (e.g., WireGuard).
- Enter server address, username, and password from your VPN provider.
- Enable Encryption.
- Click Save and Apply.
For most users, WireGuard is recommended — it’s faster and more secure than traditional VPNs.
10. DHCP Server Explained
The DHCP server automatically assigns IP addresses to connected devices.
Default Setup:
- Status: Enabled
- Start IP: e.g., 192.168.10.100
- End IP: e.g., 192.168.10.250
- Lease Time: 120 minutes
You can also view the DHCP Client List showing:
- Device name
- Assigned IP
- MAC address
If you want certain devices (like a printer or NAS) to keep the same IP, use Address Reservation.
11. Quick Setup and Operation Modes
If you prefer a guided configuration, use Quick Setup from the main menu.
You can:
- Set up as a Wireless Router (default mode).
- Use as a Wireless Access Point (AP) to extend coverage.
The wizard will ask for:
- Time zone
- Internet connection type (DHCP, PPPoE, etc.)
- Wi-Fi name and password
- Review before saving
Click Save and Apply to finish. The router will reboot and start broadcasting your Wi-Fi.
12. Network Features: VLAN, DDNS, QoS, and Port Forwarding
The Cudy WR11000 is loaded with advanced networking tools.
VLAN and IPTV
If your ISP requires VLAN tagging for IPTV, configure it under IPTV/VLAN Settings.
DDNS (Dynamic DNS)
DDNS allows you to access your home router remotely using a domain name instead of a changing IP.
Supported providers can be selected directly from the DDNS menu.
QoS (Quality of Service)
Control how your bandwidth is shared:
- High priority: PC, Gaming console, Smart TV
- Medium: Phones, tablets
- Low: IoT devices
Enabling QoS ensures smooth performance even during heavy usage.
Port Forwarding & Triggering
Used for hosting servers or online gaming.
- Port Forwarding: Opens specific ports permanently.
- Port Triggering: Opens them dynamically only when needed.
DMZ (Demilitarized Zone)
Places a device outside the firewall — only use when absolutely necessary for troubleshooting.
13. Security and Firewall Options
Security should never be ignored. The Cudy WR11000 provides multiple protection layers.
Firewall
- SPI Firewall: Must remain enabled.
- Ping from WAN: Disable to hide router from external scans.
MAC / IP / Domain Filters
- Allow or block specific devices, IPs, or websites.
- Useful for parental or office restrictions.
WPS (Wi-Fi Protected Setup)
Quick connection button — recommended to keep disabled to prevent brute-force access.
IP & MAC Binding
Locks each device to a specific IP, preventing spoofing and improving network stability.
Wi-Fi Schedule
You can schedule Wi-Fi to turn off at specific times (like night hours) automatically.
14. System Management and Firmware Update
Firmware Update
Keeping your router up to date improves stability and security.
Options:
- Auto Update: Router downloads updates directly.
- Manual Update: Download the firmware file from Cudy’s Support Page.
⚠️ Always verify your model before updating. Installing incorrect firmware may brick your router.
Backup & Restore
Before making major changes, export your settings as a backup. If needed, restore later with a single click.
Administration
- Change your admin login password.
- Restrict management access to specific devices (Local Management).
- Use Remote Management only when needed.
Other System Tools
- Time Settings: Keep accurate clock for logs.
- Scheduled Reboot: Maintain performance.
- LED Control: Turn off router lights at night.
- TR-069: Allows ISPs to manage routers remotely.
15. Diagnostic Tools and Troubleshooting
The Cudy router includes built-in tools to help you diagnose connection issues.
Tools Available:
- Ping Test: Checks if your internet is reachable.
- Trace Route: Shows the exact data path to a server.
- NS Lookup: Confirms DNS resolution.
- System Log: Records events like reboots or failed logins.
- Diagnosis: Performs a complete health check of the router.
If you face unstable connectivity, running these tools can help identify whether the issue lies with your ISP or local network.
16. Frequently Asked Questions (FAQs)
Q1. What’s the maximum speed of the Cudy WR11000?
It supports up to 11,000 Mbps combined tri-band throughput (Wi-Fi 7 speeds).
Q2. How do I access the router if I forget the password?
Press and hold the Reset button for 10 seconds. Then log in using the default credentials on the label.
Q3. Can I use this router as a range extender?
Yes. In Quick Setup → Operation Mode, choose Access Point Mode.
Q4. Is WireGuard better than OpenVPN?
Yes, WireGuard offers faster speed with modern encryption while using fewer system resources.
Q5. Should I enable MLO if I don’t have Wi-Fi 7 devices?
No need. It benefits only Wi-Fi 7-compatible devices; others will still connect normally to 2.4GHz or 5GHz.
17. Disclaimer
This article is intended for educational purposes to guide users in configuring their own routers. Always download firmware only from the official Cudy website. Advanced settings like VLAN, DDNS, and port forwarding should be used with caution — incorrect configuration may lead to loss of connectivity or security issues.
Cudy® is a registered trademark of Cudy Technology Co., Ltd.
Tags & Hashtags
Tags: Cudy WR11000 setup, WiFi 7 router, tri-band WiFi, VPN setup, QoS, DHCP server, firmware update, network security, parental control, Wi-Fi 7 MLO, router configuration guide
Hashtags: #CudyWR11000 #WiFi7 #RouterSetup #HomeNetworking #TechGuide #VPN #QoS #WiFiSecurity #ParentalControl


