So, you’ve just installed Windows 11, but now you’re faced with a system filled with telemetry, bloatware, and other privacy concerns. If you don’t want to manually go through settings, disabling all the unnecessary features yourself, this guide is for you. I’m here to share a powerful script that will help you debloat Windows 11, enhance your privacy, and disable telemetry—all without lifting a finger.
Why Use a Debloating Script?
Windows 11 comes with a bunch of unnecessary apps and services (commonly known as bloatware) that not only take up space but also invade your privacy with constant data collection. This tutorial will walk you through a simple solution to debloat your system.
Step 1: Download a New Browser (If You Plan to Remove Edge)
Before we start, if you’re planning to remove Microsoft Edge, you’ll need an alternative browser. I’ll be using Google Chrome, but feel free to choose another.
Important note: Always install a browser before removing Edge, or else you’ll be left with no way to browse the web.
Step 2: Create a System Restore Point
It’s always a good idea to create a system restore point before making major changes to your system. Although the script we’ll use has a built-in revert option, having your own restore point gives you extra peace of mind.
To do this:
- Enable system restore.
- Allocate around 5% disk space.
- Name your restore point something like “Before Tweaks” and click Create.
Step 3: Download the Debloating Script from GitHub
The script we’ll be using is open-source and available on GitHub. The link is provided here, and it’s broken down into various sections to allow you to pick and choose which features to remove or disable.
Since the script is open-source, you can view its code and verify that it doesn’t contain any malicious components. However, Windows Defender will flag it as a potential threat, so you’ll need to set up an exclusion.
Step 4: Set Up Windows Defender Exclusion
To allow the script to run smoothly, we need to prevent Windows Defender from interfering. Here’s how:
- Open Windows Security > Virus & Threat Protection.
- Scroll down to Exclusions and add an exclusion for the folder containing the script.
- Additionally, you may need to turn off real-time protection temporarily while the script runs.
Tip: If you’re tech-savvy, you can save the batch file containing your selections to rerun the script later.
Step 5: Run the Script
Once you’ve downloaded and excluded the script, run it as an administrator. The first thing we’re going to do is disable OS Data Collection (Telemetry).

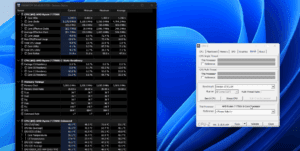


The script breaks down options into categories, making it easy to checkmark what you want to disable. It also provides descriptions of what each feature does, which helps you understand what changes you’re making. You can even choose to revert the settings later.
Pro Tip: Use the Select All feature with caution. It’s always better to go through each item manually and ensure you know what you’re disabling or removing.
Step 6: Removing Bloatware and Windows Features
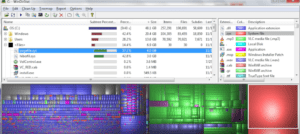
One of the most useful features of this script is the ability to remove bloatware, including Windows apps, OneDrive, and even Microsoft Edge.
Here’s what you can do:
- Remove Bloatware: Get rid of unnecessary apps like OneDrive, Windows widgets, and Co-pilot.
- Advanced Settings: Disable built-in Windows features like Microsoft Defender and Windows updates (although not recommended).
- Custom Privacy and Security Settings: Disable tracking, telemetry, and unwanted background services.
Note: If you’re planning to remove Microsoft Defender, make sure you install an alternative antivirus solution. Running a system without protection is risky.
Step 7: Configuring Privacy Settings
The script also allows you to adjust privacy-related settings, such as:
- Disabling NVIDIA Telemetry.
- Blocking tracking hosts by adding entries to the hosts file.
- Cleaning up privacy settings to prevent data collection by Microsoft and other third-party apps.
Step 8: Restart Your System and Review Changes
Once the script has finished running, restart your system to apply the changes. You’ll notice several differences:
- Edge will be completely gone.
- Windows Defender will be disabled if you chose that option.
- Windows Updates will be turned off if you opted to disable them (not recommended).
At this point, your system should be much cleaner, faster, and more private. However, I would advise leaving Windows Defender and updates enabled for security reasons, unless you’re very confident in your alternative solutions.
Final Touches
To tidy up:
- You can manually remove any remaining small apps that the script might have missed.
- Adjust your system’s appearance by switching to dark mode or making other aesthetic tweaks.
Conclusion: Is It Worth It?
Using this script allows you to significantly reduce bloat and telemetry in Windows 11. If you want a lightweight, privacy-focused operating system, this is a great way to achieve it without the hassle of manually tweaking every setting.
Disclaimer: This tutorial is for educational purposes. The decision to remove certain features like Edge, Defender, or Windows Update is entirely yours. I’m not recommending you do it, but showing you how it’s done if you choose to.
Let me know in the comments if you’ve tried this script, and feel free to share your experiences or concerns!
#Windows11 #DebloatWindows #RemoveBloatware #PrivacyConcerns #WindowsDefender #EdgeRemoval #GitHubScript #TechTips


