Let’s be honest. We’ve all been there. Staring at the screen after a frustrating loss in FIFA 23, wondering what magic trick your opponent has that you don’t. You feel like you’re playing well, possessing the ball, creating chances, but somehow, you’re not getting the wins. The difference between a good player and a great one often comes down to a handful of key techniques executed with precision and timing.
As a seasoned FIFA player, I’ve spent countless hours in Division Rivals, FUT Champions, and competitive tournaments, dissecting the meta and understanding what truly works. The game has evolved, and so must our strategies. This isn’t about having a million-coin team; it’s about knowing how to use your tools effectively.
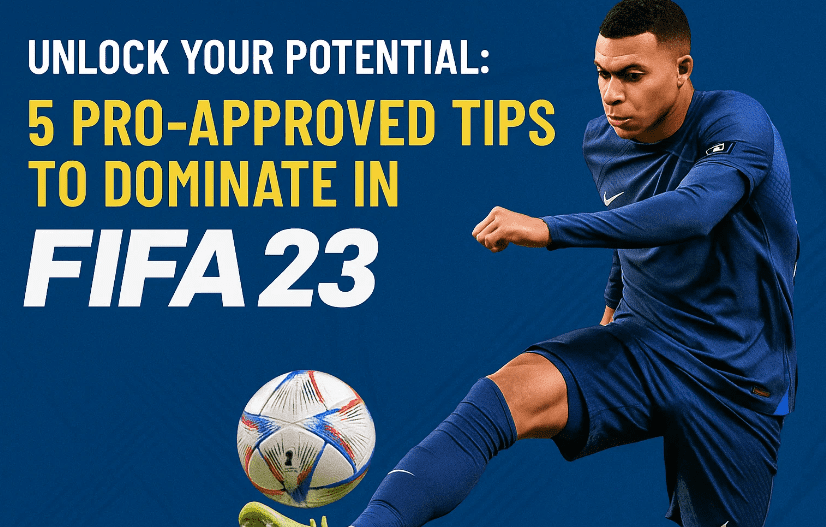
In this guide, I’m going to break down five essential tips that will immediately elevate your game. For each tip, I’ll explain exactly what it is, show you how to perform it, and then analyze why it’s so effective. Forget the fluff; this is a practical, step-by-step checklist for victory. Let’s get started.
Tip #1: Mastering the Driven Lobbed Through Ball (and the Run That Makes It Work)
We might as well start with the most potent weapon in the attacking arsenal this year. The Driven Lobbed Through Ball is, frankly, a joke how well it works. It’s the same mechanic that dominated FIFA 22 and 21, and it’s back with a vengeance. If you’re not using it, you’re leaving goals on the table.
How to Perform It:
The input itself is simple. It’s a through ball (Y on Xbox / Triangle on PlayStation) while simultaneously holding L1 + R1 (LB + RB on Xbox). Hold them as you press the through ball button.
However, performing the pass is only half the battle. The real secret, the element that isn’t discussed enough, is using L1 (LB) to trigger manual runs before you even make the pass. The AI’s offensive movement can be passive, so you need to take control.
Analysis and Execution:
Let’s break down the thought process. You receive the ball with a central midfielder. You’re walking forward, scanning the field, but your striker is static, marked by a defender. This is where you intervene.
- Step 1: Trigger the Run. Tap L1 (LB) and then flick the right stick towards your striker, or simply point your left stick in his direction and press L1 to send him on a run. This forces him to make a darting move behind the defensive line.
- Step 2: Time the Pass. The magic is in the timing. You need to wait for the exact moment your striker is about to make his break, ensuring he stays onside but gets behind the defender.
- Step 3: Execute. As he makes his move, hold L1 + R1 + Y (Triangle). The result is a perfectly weighted, lofted pass that arcs over the heads of defenders and lands at your striker’s feet for a clean breakaway.
This wouldn’t be possible without the initial L1 trigger. Relying on the AI to make smart runs is a recipe for frustration; you have to be the conductor.
Taking it Further: The First-Time Through Ball
Now, let’s add a layer of sophistication. Sometimes, playing the through ball directly isn’t on. The defense is too compact. This is where the “first-time” through ball becomes devastating.
In this scenario, you trigger the run for your striker. Instead of playing the ball directly to him, you play a quick, first-time pass to another player on the wing. This first-time pass serves two purposes:
- It moves the ball quickly, catching the defense off guard.
- It acts as a distraction. The defender marking your striker will often momentarily glance at the ball carrier, creating just enough space for the run to continue unchecked.
Immediately after playing that first-time pass, you then launch the L1+R1+Triangle through ball to your now-free striker. There’s a hidden bonus: first-time passes, including through balls, seem to be more accurate and powerful in the game’s engine. Incorporating this one-two passing sequence will make your attacks unpredictable and deadly.


Summary:
- Action: L1 + R1 + Triangle
- Key Setup: Use L1 to trigger manual runs first.
- Pro Tip: Try to execute the through ball as a first-time pass after a quick layoff for even better results.
Alright, we’ve got our attacking passing down. Now, what do you do when a stubborn defense sits back and doesn’t give you that space behind? It’s time to talk about shooting from distance.
Tip #2: Unleashing Devastating Long Shots: The Trivela and Power Shot
Breaking down a defensive wall is one of the toughest challenges in FIFA 23. Thankfully, EA has given us two incredible tools to do just that: the Trivella and the Power Shot. They are different tools for different situations.
How to Perform Them:
- Trivella Shot: While shooting (**
B** on Xbox / Circle on PlayStation), hold L2 (LT). This instructs your player to attempt an outside-of-the-foot shot. - Power Shot: Hold L1 + R1 (LB + RB) and then press and hold B (Circle) to power up the shot. A targeting reticle will appear, and you must release the button to shoot.
Analysis and Execution:
The Trivella:
This is arguably the most broken shot in the game. You’ll see it all over social media, and for good reason—it’s incredibly effective, even with players who don’t have high shooting stats.
The key is the angle. You don’t want to be facing directly at the goal. The Trivella is most effective when you’re cutting in from the wing at an angle.
- For a right-footed player, this is best done on the right side of the pitch, cutting inside onto their left foot (or taking the shot with the outside of their right foot).
- For a left-footed player, the left side is your money spot.
The technique is simple: dribble inward, let go of the sprint button to ensure a clean connection, and hold L2 + Circle. The ball will curl with incredible dip and pace, often leaving the goalkeeper rooted to the spot. Don’t be afraid to try it from distance; the success rate is surprisingly high.
The Power Shot:
This is a different beast. The Power Shot requires space and time because the wind-up animation is long. If a defender is close, they will easily tackle you.
The best time to use it is when you’re facing the goal directly with a few yards of space, perhaps from a cleared corner or a layoff. Because you have to manually aim using the reticle, it’s much harder to pull off from a tight angle. It’s a straight-line, thunderous strike.
A clever use for the Power Shot is in a one-on-one situation where a defender is catching up from behind. Instead of trying to round the keeper, you can blast a Power Shot early. The keeper doesn’t have time to rush out and cut down the angle, and the sheer power often beats them.
Summary:
- Trivella: L2 + Circle. Use it at an angle from the wings. Don’t sprint.
- Power Shot: L1 + R1 + Circle. Use it when facing the goal with space. Be mindful of the long animation.
So far, we’ve covered breaking defenses with passes and shots. But what about when you need to create that space yourself? That’s where our next tip comes in.
Tip #3: Creating Space with R1 Dribbling
Left stick dribbling has been nerfed into the ground this year. The close control that defined previous FIFAs is gone. In its place, R1 (RB) Dribbling has emerged as the primary tool for creating that crucial half a yard of space in the final third.
How to Perform It:
It could not be simpler. While dribbling with the left stick, hold R1 (RB). Your player will adopt a lower, more controlled stance and make smaller, quicker touches.
Analysis and Execution:
This isn’t a skill move; it’s a dribbling style. Its primary use is in tight spaces where a simple touch isn’t enough to evade a defender. You use it to feint, shift the ball, and throw off your opponent’s timing before making a key pass or taking a shot.
For example, your striker receives the ball with his back to goal in the box. A defender is right on him. Instead of a predictable turn, a quick burst of R1 dribbling allows him to shift the ball to one side, creating just enough separation to get a shot off or lay the ball to a teammate.
It’s also incredibly effective on the wings. If you’re trapped near the touchline, using R1 dribbling can help you shield the ball and cut inside without losing possession. The key is to use it in short, deliberate bursts. Don’t hold it down constantly, or you’ll slow your play down too much. It’s a tool for manipulation, not for traversal.
Summary:
- Action: Hold R1 (RB) while dribbling with the left stick.
- When to Use: In the final third to create a half-yard of space for a pass or shot.
- Pro Tip: Use it in short bursts; it’s not meant for sprinting or long-distance dribbling.
We’ve spent a lot of time on attack, but as the old adage goes, offense wins games, but defense wins championships. Let’s talk about the most crucial defensive technique in FIFA 23.
Tip #4: Controlling the Pitch with Second Man Press
Defending can feel overwhelming, especially against skilled opponents who pass quickly. Trying to control one player and cover all the passing lanes is impossible. This is where the Second Man Press (R1/RB) becomes your most valuable defensive asset. But a warning: this is a tool for the wise. Spamming it will destroy your defensive shape.
How to Perform It:
While defending, hold R1 (RB). This will command the AI-controlled player closest to the ball to apply pressure, while you manually control another player.
Analysis and Execution:
The genius of this technique is not in holding the button down; it’s in how you use it tactically. The goal is to use the second man to apply pressure to the ball carrier while you, the user, manually cut off the most dangerous passing option.
Think of it as forming a defensive duo. The AI is the harasser, and you are the interceptor. You force your opponent into a dilemma: try to beat the pressure and risk you stepping in, or make a pass directly into the lane you’re covering.
For this to work, you must have the “Next Player Switch Indicator” turned on in your settings. This little arrow above a player’s head shows you who the AI will control when you press R1. This allows you to make an informed decision about who you should manually control to cover the pass.
The most common mistake is holding R1 down for entire possessions. This will pull your players wildly out of position, creating massive gaps for your opponent to exploit. Use it in short, intelligent presses to force mistakes, not to do the defending for you.
Summary:
- Action: Hold R1 (RB) while defending.
- Key Strategy: Use the second man to pressure the ball while you manually cut the most dangerous passing lane.
- Crucial Setting: Enable “Next Player Switch Indicator” to know who will press.
- Warning: Do NOT hold it down constantly. Use it methodically.
Finally, no elite-level guide would be complete without addressing the art of the skill move. Let’s demystify how the pros use them.
Tip #5: Integrating Effective Skill Moves
Skill moves are not just for showboating. At the highest level, they are essential tools for becoming an unpredictable and lethal attacker. You don’t need to know a hundred of them; you just need to master a few effective ones and, more importantly, know when to use them.
How to Perform Them:
This varies per move (e.g., a Ball Roll is holding the right stick left or right, a Heel to Heel is flicking the right stick forward then backward). I highly recommend searching for a dedicated “Best Skill Moves” guide to practice the inputs in the skill games. For this article, we focus on the philosophy.
Analysis and Execution:
The biggest misconception is that skill moves must be chained together in long combos. This is rarely effective. The best players use one, maybe two skills in a sequence, combined with left-stick and R1 dribbling.
The most important rule: Do not sprint while performing skill moves. For the animation to be quick and effective, you need to be walking or at a complete standstill. Sprinting into a skill move makes it slow and easy to read.
Use skill moves in the final third to create separation. For example, you’re on the edge of the box with the ball. The defense is set. A simple sequence of stepovers followed by a ball roll can be enough to make a defender commit the wrong way, opening a passing lane or a shooting angle.
The goal is unpredictability. If you only ever pass, you’re predictable. If you only ever shoot, you’re predictable. Throwing in a well-timed skill move forces your opponent to hesitate, and in that split second of hesitation, you can win the game.
Summary:
- When to Use: In the final third to create space and be unpredictable.
- Golden Rule: Let go of sprint (R2/RT) before attempting a skill.
- Philosophy: Quality over quantity. Master a few 4-star and 5-star moves like the Heel to Heel, Ball Roll, and Elasticos rather than trying to learn them all.
Frequently Asked Questions (FAQ)
Q: I have a cheap team. Will these tips still work for me?
A: Absolutely. While having elite players like Mbappé makes executing these techniques easier, the fundamentals work with any team. The Trivella shot is effective even with silver players, and Second Man Press is a tactical choice, not a player-dependent one.
Q: What are the best custom tactics for these strategies?
A: While custom tactics are important, they are a personal preference that complements gameplay. For the attacking tips (Through Balls, Long Shots), using “Forward Runs” and “Get In Behind” instructions on your strikers is helpful. For defending, “Stay Back While Attacking” on your full-backs is recommended to maintain shape when using Second Man Press.
Q: I keep getting countered when using Second Man Press. What am I doing wrong?
A: You are almost certainly holding the R1 button for too long. You are pulling your players out of position. Use it in short, two-to-three-second bursts to apply pressure and then release it to regain your defensive shape.
Q: Where is the best place to practice these tips?
A: The Skill Games mode, specifically the “Attacking” and “Defending” scenarios, is a fantastic, low-pressure environment to practice Trivella shots, Power Shots, and timed through balls. Practice in Squad Battles on a low difficulty to get a feel for them against AI before taking them online.
Q: My opponent seems to read my skill moves every time. Why?
A: You’re likely being predictable. If you do the same skill move in the same situation every time, a good player will adapt. Mix up your play. Use a skill move one time, and the next time, play a simple pass. The element of surprise is your greatest weapon.
Disclaimer: This guide is based on the gameplay meta of FIFA 23 as of its most recent title update. Game mechanics and effectiveness of certain techniques can change with future patches and updates from EA Sports. Performance may also vary based on individual connection quality and gameplay style.
Tags:
FIFA 23, EA Sports, Gameplay Guide, FIFA Tips, FIFA Ultimate Team, FUT, Improving at FIFA, Video Games, Football Games, Gaming Strategies
FIFA23 #FIFAGuide #GamingTips #EASports #FUT #FootballGame #LearnFIFA #ProTips #SecondManPress #Trivella