Unlock Seamless Scrolling in Photoshop to Fit to Screen Interface: How to Enable Overscroll
Photoshop is a powerful tool for graphic design, photo editing, and digital art. However, even the most experienced users sometimes find themselves discovering features that can significantly enhance their workflow. One such feature is “Overscroll.” Enabling Overscroll allows you to scroll beyond the canvas edges, providing more flexibility when working on detailed projects. This blog post will guide you through the steps to enable Overscroll in Photoshop and explain why it’s beneficial.
What is Overscroll in Photoshop?
Overscroll is a feature in Photoshop that allows users to scroll beyond the boundaries of the canvas. This means you can move the canvas freely within the window, providing extra space around the edges. This can be particularly useful when you’re zoomed in and need to focus on specific details near the edges of your project.
Why Enable Overscroll?
- Enhanced Precision: Overscroll allows you to move the canvas and focus on the exact part of the image you’re working on, without being constrained by the window edges.
- Improved Navigation: When working on large projects or multiple layers, being able to scroll beyond the canvas can help in navigating through different parts of your work more efficiently.
- Better Workflow: For tasks that require fine detail, such as retouching photos or creating intricate designs, Overscroll provides the extra space needed to maneuver your tools comfortably.
How to Enable Overscroll in Photoshop
Follow these simple steps to enable Overscroll in Photoshop:
- Open Photoshop: Launch Adobe Photoshop on your computer.
- Access Preferences:
- On Windows: Click on
Editin the top menu, then selectPreferences, and thenTools. - On Mac: Click on
Photoshopin the top menu, then selectPreferences, and thenTools.
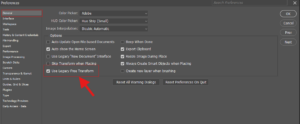
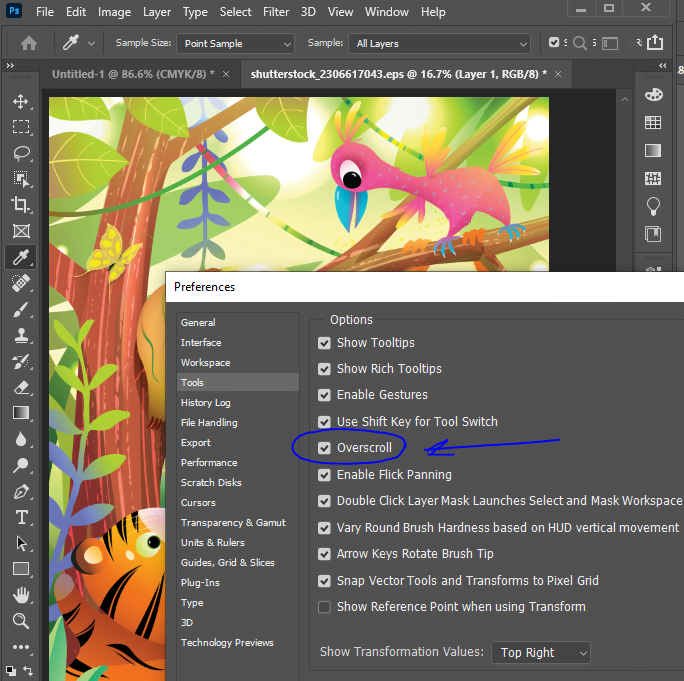
- Enable Overscroll: In the Preferences window, look for the option labeled “Overscroll” and check the box next to it.
- Apply and Close: Click
OKto apply the changes and close the Preferences window.
Now, you should be able to scroll beyond the canvas edges when using the Hand tool (shortcut H).
Step-by-Step Visual Guide
For those who prefer a visual guide, here’s a step-by-step breakdown:
- Open Photoshop Preferences:
Navigate to Edit > Preferences > Tools (Windows) or Photoshop > Preferences > Tools (Mac). - Locate the Overscroll Option:
In the Tools section, find the “Overscroll” option. - Enable and Confirm:
Check the box next to “Overscroll,” then click OK to apply the changes.
Tips for Using Overscroll Effectively
- Combine with Zoom: Use the zoom tool (shortcut
Z) to get a closer look at the details, then use the Hand tool (shortcutH) to navigate freely. - Custom Workspaces: Set up custom workspaces that benefit from the extra navigation space provided by Overscroll.
- Shortcut Keys: Familiarize yourself with Photoshop shortcut keys to switch between tools quickly and make the most of Overscroll.
Conclusion
Enabling Overscroll in Photoshop is a simple yet powerful adjustment that can enhance your editing and design workflow. By allowing you to navigate beyond the canvas boundaries, it offers better control and precision, especially when working on detailed projects. Give it a try and see how it improves your Photoshop experience.
For more tips and tricks on using Photoshop, be sure to follow our blog and check out our latest tutorials.