If you’re using a mid-range or high-end PC or laptop, chances are you’re into gaming—or at the very least, looking for peak performance from your machine. Whether you’re a gamer or a power user, ensuring your system is optimized is key to getting the most out of your Windows 10 or 11 environment.
This detailed guide walks you through the essential steps to boost FPS, eliminate lag, and get smoother performance, even for non-gamers. Let’s dive in and supercharge your Windows system!

📌 Step-by-Step Guide to Optimize Windows for Performance
✅ Step 1: Create a System Restore Point
Before making changes, it’s smart to create a restore point in case anything goes wrong.
- Open Windows Search
- Type Create a restore point
- Click the Create button in the System Properties window
- Give it a name (e.g., Pre-Optimization) and hit Create
🎮 Step 2: Enable Game Mode and Graphics Optimizations
- Go to Windows Search → Type Game Mode Settings
- Make sure Game Mode is enabled
- Scroll down and click Graphics
- Enable Optimizations for Windowed Games
- If available, enable Hardware Accelerated GPU Scheduling
🔒 Step 3: Tweak Privacy & Security Settings
1. Disable Unnecessary Permissions
- Go to Privacy & Security > General
- Disable ad tracking and unnecessary data collection
- Disable features under:
- Speech
- Inking & Typing Personalization
- Diagnostics & Feedback
- Turn off permissions for unused apps like:
- Location, Notifications, Phone Calls, Email, Messaging, etc.
2. Adjust Windows Security
- Go to Privacy & Security > Windows Security > Device Security
- Click Core Isolation Details
- Disable Memory Integrity (for better gaming performance)
⚠️ Disabling Memory Integrity may reduce security slightly but improves gaming performance. Proceed only if you’re comfortable with the trade-off.
💡 Step 4: Disable Visual and System Effects
- Go to System > Notifications: Turn off all notifications and enable Do Not Disturb
- Go to Personalization > Dynamic Lighting: Turn both toggles off
- Go to Apps > Advanced App Settings > Share Across Devices: Turn it off
- Go to Accessibility > Visual Effects:
- Turn Transparency Effects and Animation Effects off
🔄 Step 5: Modify Windows Update Settings
- Go to Windows Update > Advanced Options
- Disable all unnecessary update-related toggles (e.g., receive updates for other products, download over metered connections)
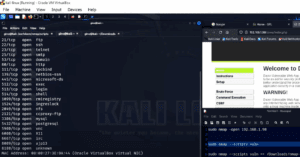
🧹 Step 6: Remove Bloatware Using Chris Titus Tech Utility
Chris Titus Tech’s utility is a powerful tool to clean bloatware and tweak Windows settings with ease.
🔧 How to Use:
- Open PowerShell as Administrator
- Paste the following command:
iwr -useb https://christitus.com/win | iex - The tool will launch. Choose “Tweak” from the top-left menu.
- Select the Standard preset under “Recommended Selections”
- Customize tweaks if needed:
- Disable Recall
- Disable Background Apps, Copilot, Telemetry
- Set Classic Right-Click Menu
- Remove Microsoft Edge if not required
Let the utility run. Once complete, it will show “Tweaks are Finished.”
👉 Chris Titus Tech Utility Website
🔧 Step 7: Optimize AMD Radeon Settings (If You Use AMD GPU)
For users with AMD graphics cards, using the Radeon Software can significantly enhance gaming performance.
📥 Download Link:


![How to Easily Reset or Format Your Windows 11 PC or Laptop [2025 Guide]](https://dtptips.com/wp-content/uploads/2025/04/image-443-300x192.png)


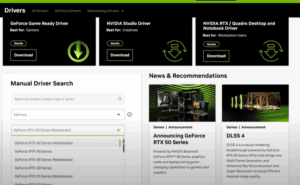
📌 Settings to Configure:
- Performance Tab:
- Radeon Anti-Lag → Enable
- Radeon Boost → Disable
- Radeon Chill → Disable
- Radeon Image Sharpening → Optional (set Sharpness to 75–80)
- Radeon Enhanced Sync → Disable
- Advanced Settings:
- Frame Rate Target Control → Enable
- Set FPS slightly below your monitor’s refresh rate
- E.g., if your display is 60Hz, set it to 59 FPS
To find your monitor’s refresh rate:
- Right-click on Desktop > Settings > Display > Advanced Display
📌 Final Words
Once you’ve applied all the steps above, you’ll notice a significant performance boost, whether you’re gaming or doing regular tasks. This system-wide optimization is especially useful for Windows 10 and 11 users with high-end or mid-range hardware.
🛡️ Disclaimer:
Modifying system settings and disabling features like Memory Integrity may slightly reduce system protection. Always create a restore point before applying system-level tweaks. Use third-party tools like Chris Titus Tech at your own discretion.
🏷️ Tags:
Windows optimization, gaming performance, FPS boost, Windows 10 tweaks, Windows 11 gaming, AMD Radeon settings, bloatware removal, system performance, Chris Titus Tech
🔖 Hashtags:
#WindowsOptimization #GamingPerformance #FPSBoost #Windows11 #ChrisTitusTech #AMDRadeon #BloatwareRemoval #PCGaming #PerformanceTuning


