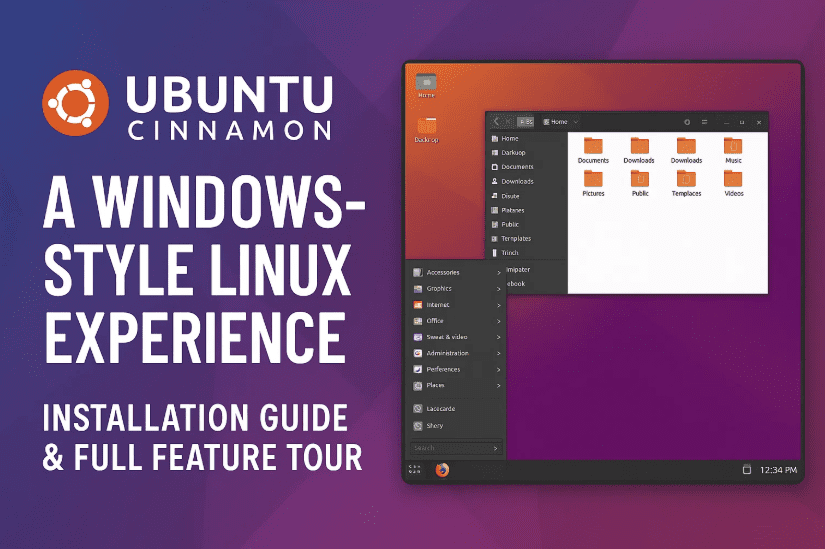
If you’re a Windows user curious about switching to Linux but worried about the learning curve, there’s great news: Ubuntu Cinnamon might be the perfect Linux distribution for you. It offers a desktop experience that closely resembles Windows, complete with a taskbar, start menu, system tray, and easy-to-use apps.
In this detailed article, we’ll walk you through:
- What Ubuntu Cinnamon is and how it differs from standard Ubuntu
- Step-by-step installation instructions (with Live Mode testing)
- An in-depth look at its user interface and apps
- Advanced partitioning options (LVM, ZFS)
- Helpful comparisons for beginners
Let’s dive in and explore this user-friendly Linux alternative!
🧠 What Is Ubuntu Cinnamon?
Ubuntu Cinnamon is an official flavor of Ubuntu that uses the Cinnamon desktop environment, which was originally developed for Linux Mint. It mimics the look and feel of classic Windows, making it easier for beginners to transition from Windows 10 or 11.
Key Features of Cinnamon Desktop:
- Traditional taskbar and start menu
- System tray with volume, network, clock, and notifications
- Intuitive file manager with sidebar, address bar, and trash
- Control Center similar to Windows Control Panel
🔁 Ubuntu Cinnamon vs Standard Ubuntu (GNOME)
Before installing, let’s understand how Cinnamon differs from standard Ubuntu, which uses the GNOME desktop.
| Feature | Ubuntu Cinnamon | Standard Ubuntu (GNOME) |
|---|---|---|
| Desktop Layout | Classic Windows-like | Minimalist & Touch-friendly |
| Customization | Easy and extensive | Limited without extensions |
| Resource Usage | Lightweight | Heavier on system resources |
| Performance | Fast, great for older hardware | Polished but slower on low-end PCs |
| User-Friendliness | Ideal for Windows switchers | More suited for modern Linux users |
If you’re used to Windows and want a similar user experience, Cinnamon is the way to go.
🧪 Let’s Talk Installation: Preparing Your System
Before we jump into the install process, it’s helpful to know that Ubuntu Cinnamon supports Live Mode. That means you can run it straight from a USB drive to test the look and feel without installing anything permanently.
🔽 Step 1: Download Ubuntu Cinnamon
- Visit the official download page:
👉 https://cdimage.ubuntu.com/ubuntucinnamon/daily-live/current/
🔌 Step 2: Create a Bootable USB Drive
Use a tool like:
- Rufus
- Etcher (for Linux/macOS)
- Ventoy
Burn the ISO file to a USB stick (at least 4GB) or DVD.
💻 Step 3: Boot Into Live Mode
- Insert the USB and restart your PC
- Enter your BIOS/UEFI settings (usually by pressing
F2,DEL, orESC) - Select your USB device to boot
- You’ll see options to “Try Ubuntu Cinnamon” or “Install Ubuntu Cinnamon”
- Select “Try” to explore it without making any changes
💡 Note: Any files or changes made in Live Mode are lost after reboot. Use this only for testing!
🚀 Installing Ubuntu Cinnamon (Step-by-Step)
Once you’re ready to install, double-click the Install Ubuntu Cinnamon icon on the desktop.


🧭 Step 1: Language & Accessibility
- Choose your preferred language.
- Enable accessibility features if needed.
⌨️ Step 2: Keyboard Layout
- Select your layout (e.g., US QWERTY) and test typing in the field.
🌐 Step 3: Network Setup
- Connect via Wi-Fi or Ethernet.
- Or continue offline (you can update later).
⚙️ Step 4: Installation Type
Choose between:
- Normal installation – Includes all features
- Minimal installation – Lightweight, fewer apps
Check these boxes:
- Install third-party drivers for graphics/Wi-Fi
- Enable support for media files (MP3, video codecs)
💽 Step 5: Disk Setup Options
You’ll see several choices for disk configuration:
- Erase disk and install Ubuntu Cinnamon – Simple install on one disk
- Manual partitioning – Ideal for dual-boot setups
- Advanced options:
- LVM (Logical Volume Manager) – Resize partitions on the fly
- ZFS (Zettabyte File System) – Supports compression, snapshots, RAID-like features
✅ Recommendation: Use default if you’re a beginner. Choose LVM/ZFS only if you’re familiar with advanced Linux storage.
👤 Step 6: Create User Account
- Pick a username and computer name
- Set a secure password
- Decide whether to require password on login
🕒 Step 7: Timezone
- Set your location to auto-detect time
Finally, review the summary and click Install Now. Installation takes 10–20 minutes depending on system speed.
After installation, restart your system (keep the USB plugged during the first boot to avoid errors).
🧭 First Boot and Desktop Experience
Congrats! You’re now booting into Ubuntu Cinnamon from your hard drive.
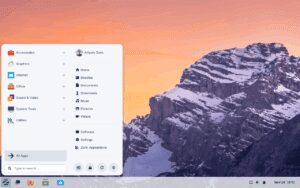
What You’ll See:
- A Windows-like desktop layout
- Start Menu with categorized apps
- File Manager with traditional views
- System Tray with clock, sound, network, and notifications
- Control Center with full OS customization
🔧 Customization and Features Overview
Let’s move on to the good stuff! Cinnamon offers tons of easy customizations and tools:
📂 File Manager
- Tree view or icon view
- Sidebar for quick folders
- Navigation buttons like Windows Explorer
🎛️ Control Center
Similar to Control Panel, includes:
- Themes & Appearance
- Date and Time
- Keyboard & Accessibility
- Online accounts integration
- Startup apps
- Window settings
📦 Software Manager (Like Microsoft Store)
- Browse and install apps like browsers, media players, and utilities
- Update system apps and drivers
- Requires password for installation (sudo authentication)
🧱 Terminal
- Command-line interface similar to Windows CMD or PowerShell
- Great for installing packages or system tweaks
📺 Applets, Panels, and Widgets
Right-click the bottom taskbar (called panel in Cinnamon) to:
- Add new panels (top/left/right)
- Enable Edit Mode to rearrange or resize
- Add Applets like CPU monitor, weather, clock styles
- Download more applets directly from within Cinnamon
⚙️ Other Features to Explore
- LibreOffice: Full office suite like Microsoft Office
- GIMP: Image editor similar to Photoshop
- Firefox & Thunderbird: Pre-installed browser and email client
- Startup Disk Creator: Make USB installers from within Linux
- Network Settings: Set static IP, proxy, or manage devices
- Trash & Home Folders: Just like Windows Recycle Bin and “This PC”
❓ Frequently Asked Questions (FAQs)
Q1: Can I dual-boot Ubuntu Cinnamon with Windows?
Yes, choose “Manual Partitioning” during setup and select the drive with available space. You’ll need to shrink your Windows partition beforehand using Disk Management.
Q2: Will it run on old laptops?
Yes! Cinnamon is lightweight and runs well even on older machines with 2–4 GB RAM.
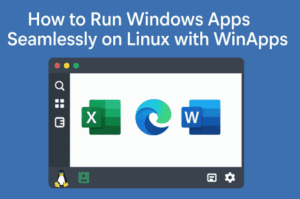
Q3: Can I run Windows apps on Ubuntu Cinnamon?
You can install Wine or Bottles to run some Windows apps, though compatibility varies.
Q4: Is this secure?
Yes. Linux systems are generally very secure and less prone to viruses. Keep the system updated using the built-in software updater.
🧑💻 Final Thoughts
Ubuntu Cinnamon is a fantastic choice if you’re switching from Windows and want a familiar experience while enjoying the power and freedom of Linux. Its layout feels like home, but beneath the surface lies a robust, flexible operating system ready for productivity, customization, and experimentation.
So why not give it a try? Boot it from a USB, explore Live Mode, and install only if you love it (spoiler: you probably will!).
🔖 Tags:
linux desktop, ubuntu cinnamon, windows alternative, linux for beginners, cinnamon desktop, linux installation guide, lvm vs zfs, ubuntu live mode, linux customization, open source operating system
📢 Hashtags:
#UbuntuCinnamon #LinuxForBeginners #WindowsAlternative #OpenSource #LinuxDesktop #CinnamonDE #DualBoot #LVM #ZFS #Ubuntu2025
Disclaimer: This article is for educational purposes only. Linux installations may modify disk partitions—ensure you back up your data before proceeding. Ubuntu Cinnamon is an official Ubuntu flavor, and its usage is subject to open-source licenses.