Upgrading from a slow hard drive (HDD) to a solid-state drive (SSD) is one of the smartest performance upgrades you can make in 2025. Even if your laptop already has an SSD, it can still slow down over time — especially if it’s an older SATA drive or nearly full. But here’s the common problem:
Most people think that upgrading a drive means reinstalling Windows, downloading drivers, and losing apps or files in the process. That’s hours of tedious work — and a big risk of data loss.
The good news? You can transfer Windows to a new SSD without reinstalling anything and without losing your data. This process is called OS migration or disk cloning.
Let’s break it down step by step, understand the tools involved, and explore how you can safely clone your operating system to a faster SSD in under an hour.

⚡ 1. Why You Should Upgrade from HDD to SSD
If you’re still running Windows from a mechanical hard drive, slow performance is inevitable — longer boot times, laggy app launches, and random freezes.
An HDD uses spinning magnetic disks to read and write data, while an SSD stores data in flash memory. This allows SSDs to operate 10x faster, consume less power, and generate less heat.
Even an older system can feel brand new after moving to an SSD. Boot times drop from 4 minutes to around 12 seconds, apps open instantly, and your system becomes far more responsive.
🧩 2. Why Reinstalling Windows Is Not Always the Best Option
Traditionally, when upgrading your drive, you’d reinstall Windows and all your drivers and apps from scratch.
But this method has several downsides:
- You lose all installed apps, settings, and customizations.
- It can take 3–5 hours or more to fully set up the system.
- There’s always a risk of missing drivers or losing license keys.
- You may accidentally format or overwrite data.
That’s why cloning or OS migration is a far better approach — it lets you copy your existing system exactly as it is to your new SSD, ready to boot.
🧠 3. Understanding OS Migration and Cloning
Let’s understand what happens when you migrate your OS.
When you clone your Windows installation, the tool copies your system partition (C:), boot records, and hidden partitions (like System Reserved) directly to your new SSD.
After cloning, your SSD becomes an exact duplicate of your old drive — same files, same settings, same apps — but much faster.
It’s like moving your house to a new, cleaner neighborhood without repacking a single box.
🛠️ 4. Choosing the Right Tool for Migration
To clone your drive, you need reliable disk management software.
While several tools exist, one standout option is 4DDiG Partition Manager — a universal cloning and disk management utility that supports all brands of HDDs and SSDs.
🔗 Official site: https://4ddig.tenorshare.com/partition-manager.html


What makes it special:
- Works with any brand of SSD (Samsung, Crucial, WD, Kingston, etc.).
- Offers OS migration, full disk cloning, and partition resizing.
- Includes boot repair and data wipe functions.
- Has a beginner-friendly interface — even first-time users can clone drives safely.
💰 5. Free vs Paid Migration Tools: What’s the Difference?
Before you start, it’s important to know the types of tools available.
| Type | Example Tools | Key Features | Limitations |
|---|---|---|---|
| Free Brand Tools | Samsung Data Migration, WD Acronis Edition | Simple cloning for same-brand SSDs | Brand-locked — works only with specific SSDs |
| Free Universal Tools | Macrium Reflect Free | Basic cloning | Limited customization and recovery features |
| Paid Tools | 4DDiG Partition Manager, EaseUS Todo Backup | Advanced cloning, recovery, resizing | Full access requires license |
If you’re migrating from a different brand or want partition control and recovery tools, a universal paid option is worth it.
For one-time users, most tools also offer a free trial.
💻 6. Setting Up Your New SSD for Migration
Before starting the cloning process, you need to connect your new SSD to your laptop or desktop.
Here are your main connection options:
- For laptops with extra NVMe slot: directly install the SSD in the slot.
- For SATA drives: use a SATA-to-USB adapter or enclosure to connect externally.
- For desktops: simply connect the SSD to an available SATA port using the power and data cables.
If you’re using an external enclosure, note that USB 3.0 adapters provide much faster transfer speeds than USB 2.0 ones — this can significantly reduce migration time.
Once connected, ensure Windows recognizes the SSD by checking in:
Disk Management → Right-click Start → Disk Management
🧭 7. Step-by-Step: How to Clone Windows from HDD to SSD
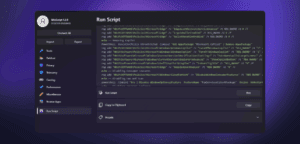
Now that everything’s ready, let’s go step-by-step through the cloning process using 4DDiG Partition Manager.
Step 1: Launch the Tool
After installing and opening the software, go to “Migrate OS” from the sidebar.
The program will automatically detect your C drive and required system partitions.
Step 2: Choose the Destination Drive
Select your new SSD as the destination.
⚠️ Note: All existing data on that SSD will be erased — so back up anything important.
Step 3: Confirm and Start Cloning
Click Start and confirm when prompted.
Now the cloning begins — depending on your drive size and connection type, this process can take 20–60 minutes.
You can safely use your system during the early phase, but avoid heavy multitasking to ensure smooth transfer.
Step 4: Wait for Completion
Once done, you’ll receive a completion message.
Now, your new SSD contains the same system setup, apps, and files — ready to boot.
🧩 8. Booting Windows from the New SSD
After cloning, it’s time to boot your computer from the SSD.
You’ll need to make a small change in the BIOS.
Steps:
- Restart your PC and repeatedly press F2, Del, or F12 (depending on brand) to enter BIOS.
- Go to the Boot section.
- Set your new SSD or Windows Boot Manager (SSD) as the first boot device.
- Save changes and exit BIOS.
Your system will now start directly from the SSD.
You’ll notice instantly faster startup and load times.
If both drives (old HDD and new SSD) remain connected, you can later format the old one for extra storage.
🧱 9. Additional Features: Resize, Merge, and Recover Partitions
Once you’ve successfully migrated Windows, tools like 4DDiG Partition Manager can do much more:
- Resize Partitions: Expand or shrink existing partitions without losing data.
- Merge Partitions: Combine two partitions for better storage management.
- Partition Recovery: Recover accidentally deleted partitions in a few clicks.
- Boot Repair: Fix systems that fail to boot due to MBR/GPT or BCD errors.
- Data Wipe: Securely erase drives so no recovery software can retrieve deleted data.
If you handle multiple systems or often help others with installations, these advanced tools save a lot of time.
⚙️ 10. Performance Comparison: HDD vs SSD Boot Speed
Here’s how your system performance changes after upgrading to an SSD:
| Task | HDD (Average Time) | SSD (Average Time) | Improvement |
|---|---|---|---|
| Windows Boot Time | 3–4 minutes | 10–12 seconds | ✅ 90% faster |
| App Launch | 8–15 seconds | 1–2 seconds | ✅ 7× faster |
| File Copy (1 GB) | 40 seconds | 6 seconds | ✅ 85% faster |
| Overall System Responsiveness | Moderate lag | Instant response | ✅ Major boost |
Upgrading to an SSD doesn’t just improve speed — it extends your laptop’s usable life by years.
🧩 11. Common Mistakes and Troubleshooting Tips
Many users make small errors during cloning. Here’s what to avoid:
- Not checking SSD capacity: Ensure your SSD is at least as large as the data on your C drive.
- Forgetting BIOS boot order: If Windows doesn’t boot, recheck your boot sequence.
- Cloning wrong partitions: Always let the tool auto-select the OS and system reserved partitions.
- Unplugging during cloning: Avoid touching cables or closing the laptop lid mid-process.
If cloning fails, most tools (including 4DDiG) provide detailed logs to identify the issue.
❓ 12. Frequently Asked Questions (FAQ)
Q1. Can I clone only the C drive instead of the entire disk?
Yes, migration tools allow cloning just the OS partition instead of all data drives.
Q2. Will my Windows license work after migration?
Absolutely. Since you’re copying the same system, your license and activation remain intact.
Q3. Can I migrate from SSD to SSD (not HDD)?
Yes. You can upgrade from an older or smaller SSD to a larger/faster one using the same method.
Q4. What happens if my new SSD is smaller than my old drive?
If your used space is smaller than the SSD capacity, migration still works — only used data is cloned.
Q5. Should I remove the old drive after migration?
It’s recommended to disconnect it after the first boot from SSD to avoid confusion in boot order.
Q6. Can I use this method to upgrade laptops like HP, Dell, or Lenovo?
Yes. This process works on all major Windows laptops and desktops, regardless of brand.
🧠 13. Final Thoughts
Migrating your operating system from HDD to SSD is no longer a technical challenge.
With reliable cloning software, you can transfer Windows, apps, and files safely — without reinstalling or risking data loss.
If your system feels sluggish or takes forever to boot, upgrading to an SSD is the most impactful performance upgrade you can make.
Tools like 4DDiG Partition Manager make the process seamless — and once done, you’ll wonder why you didn’t do it sooner.
Take the time today to give your computer the speed it deserves.
After all, a faster PC isn’t just about performance — it’s about saving time and frustration every day.
Disclaimer:
This article is for educational purposes only. Always back up your important data before performing OS migration or disk cloning. Results may vary depending on your system configuration, SSD quality, and connection method.
Tags: Windows migration, SSD cloning, HDD to SSD, OS transfer, data backup, partition manager, 4DDiG, Windows 11, NVMe upgrade, laptop speed boost
Hashtags: #Windows11 #SSDUpgrade #Cloning #TechGuide #PartitionManager #DataMigration #LaptopTips #4DDiG


