Installing Windows 11 from scratch? This step-by-step guide will show you how to perform a clean, optimized installation—removing bloatware, avoiding forced Microsoft accounts, and ensuring maximum compatibility while keeping essential functionality intact.
Why a Custom Windows 11 Install?
A default Windows 11 installation comes with unnecessary apps, telemetry, and forced Microsoft account logins. By following this method, you’ll get:
✅ No bloatware (Edge, Copilot, OneDrive, etc.)
✅ Local account setup (no Microsoft account required)
✅ Better privacy & performance
✅ Full compatibility (unlike aggressive debloat scripts)
What You’ll Need
- USB drive (8GB+)
- Windows 11 ISO (from Microsoft)
- Rufus (for creating bootable USB)
- Revo Uninstaller (Portable) (for removing bloatware)
Step 1: Download Windows 11 ISO
- Go to Microsoft’s Windows 11 Download Page.
- Scroll to “Download Windows 11 Disk Image (ISO)”.
- Select Windows 11 (Multi-edition) and download the 64-bit ISO.
Step 2: Create a Bootable USB with Rufus
- Download Rufus Portable.
- Insert your USB drive and open Rufus.
- Select the Windows 11 ISO you downloaded.
- Under “Partition scheme,” choose:
- GPT (for UEFI systems)
- MBR (for older BIOS systems)
- Press
Alt+Efor dual BIOS/UEFI support
- Click Start → Enable these options:
- Bypass TPM & Secure Boot checks
- Skip Microsoft account requirement
- Disable BitLocker encryption
- Wait for Rufus to finish (~10-20 mins).
Step 3: Install Windows 11 (The Right Way)
- Boot from the USB (Restart PC & press BIOS key:
F12,ESC, orDEL). - At setup, change “Time & Currency Format” to “English (World)” (reduces bloatware).
- Disconnect Ethernet/WiFi (to avoid forced Microsoft login).
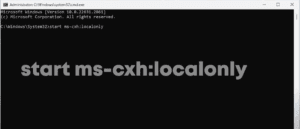
- When prompted for a Microsoft account, press
Shift + F10and run:
start ms-cxh:localonly- This forces a local account setup.
- Complete installation with your preferred username.
Step 4: Remove Bloatware & Optimize
1. Install a Better Browser (Without Using Edge)
- Open Command Prompt as Admin and run:
  winget install -id Brave.Brave  # For Brave browser
  winget install -id Google.Chrome  # For Chrome (must capitalize)
2. Remove Microsoft Edge & Other Bloatware
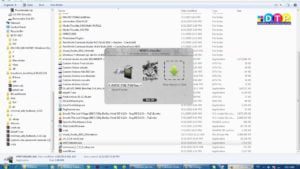
- Download Revo Uninstaller Portable.
- Run it → Select Microsoft Edge → Uninstall (choose Moderate Scan).
- Delete all leftover registry entries & files.
- Repeat for:
- OneDrive
- Copilot (won’t work without Edge)
- Clipchamp, Microsoft News, Outlook, etc.
3. Clean Up the Taskbar & Start Menu
- Right-click taskbar → Taskbar settings → Disable:
- Widgets
- Task View
- Search Box
- Unpin: Microsoft Store, Outlook, Edge (if still showing).
Step 5: Final Tweaks (Optional)
- Disable Telemetry:
- Go to Settings → Privacy & Security → Diagnostics & Feedback → Turn off “Send optional data”.
- Stop Automatic Updates (Temporarily):
- Run
services.msc→ Disable “Windows Update”. - Restore Classic Right-Click Menu:
- Run in CMD:
reg add "HKCU\Software\Classes\CLSID\{86ca1aa0-34aa-4e8b-a509-50c905bae2a2}\InprocServer32" /f /ve
→ Restart PC.
Final Thoughts: A Balanced Windows 11 Install
This method gives you a clean, fast Windows 11 without breaking compatibility. Unlike full debloat scripts, this keeps essential services intact while removing unwanted apps.
Tags:
Windows 11, Clean Install, Debloat Windows, Windows Optimization, Rufus, Revo Uninstaller
Hashtags:
#Windows11 #CleanInstall #DebloatWindows #TechGuide #PCPerformance
Disclaimer:
- Removing system apps (like Edge) may break some features (Copilot, WebView apps).
- Windows updates may reinstall some bloatware—use tools like BloatyNosy to block them.
- Third-party license keys may violate Microsoft’s terms—use at your own risk.
Enjoy your optimized Windows 11! 🚀💻