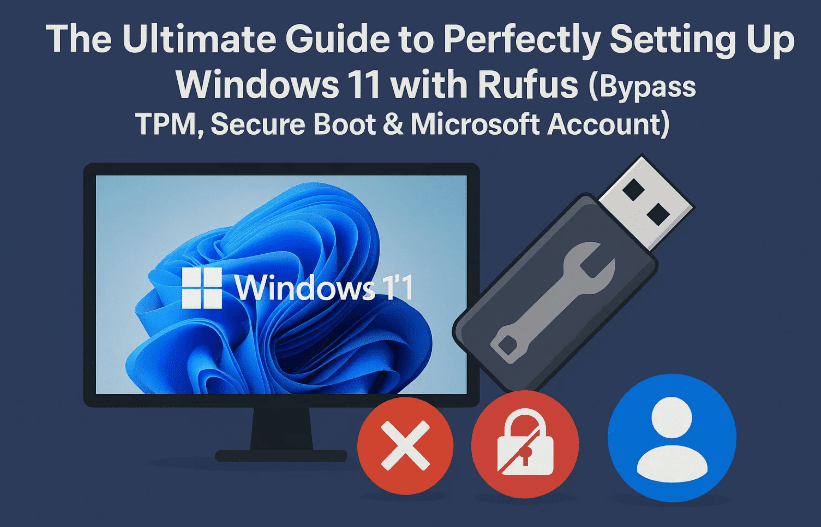
Setting up Windows 11 can feel a bit overwhelming, especially with all the new restrictions like TPM 2.0, Secure Boot, and Microsoft account requirements. But what if you could bypass all of that and install a clean, lightweight version of Windows 11 on any PC — even older hardware?
Whether you’re a beginner or a seasoned tech enthusiast, this detailed guide walks you through the complete Windows 11 setup: from downloading the ISO, creating a bootable USB, bypassing Microsoft’s strict requirements, installing a clean system, and even activating Windows affordably.
Let’s get started.
🧰 Step 1: Gather Your Tools
Before jumping into the installation, make sure you have the following:
- ✅ A working Windows PC (to prepare the USB)
- ✅ A USB flash drive (minimum 8 GB storage)
- ✅ An active internet connection
Download the Windows 11 ISO:
- Open your browser and search:
Download Windows 11 ISO - Click the official Microsoft link (usually titled Download Windows 11).
- Scroll to Download Windows 11 Disk Image (ISO) section.
- Select Windows 11 (multi-edition ISO) and click Confirm.
- Choose your language (e.g., English – United States) and click Confirm.
- Click the 64-bit Download button (approx. 6 GB).
🔧 Step 2: Download and Set Up Rufus
We’ll use Rufus, a lightweight utility to create a bootable USB and bypass Windows 11 requirements.
🔗 Download Rufus:
https://rufus.ie
Steps:
- Search for Rufus download in your browser.
- Download the Portable version (recommended for simplicity).
- Launch Rufus. Allow any security prompts (click “Yes”).
Prepare the USB:
- Insert your USB flash drive.
⚠️ WARNING: All data will be erased. - In Rufus:
- Under Device, select your USB drive.
- Under Boot Selection, click Select and browse to the ISO you downloaded.
- Leave Partition Scheme as GPT and Target System as UEFI.
- Volume label: You can rename it (e.g., Windows 11 Install).
- File System: Leave as NTFS.
- Click Start.
Important Customization:
When Rufus asks to customize the image, check the following options:
- ✅ Remove requirement for 4GB+ RAM, TPM 2.0, and Secure Boot
- ✅ Remove requirement for online Microsoft account
- ✅ Disable data collection
- ✅ Skip privacy questions
Click OK. Confirm format warning and let Rufus create the bootable USB.
Once it says Ready (green bar), click Close and eject your USB safely.
💻 Step 3: Boot from USB and Begin Installation
Boot into USB:
- Plug the bootable USB into the target computer.
- Power it on and press the boot menu key repeatedly.
Common keys: F12, F10, Esc (depends on your PC’s brand). - In the boot menu, select your USB device.
If you see your regular OS booting, restart and try again. Timing is key!
🛠️ Step 4: Install Windows 11 Cleanly
- On the setup screen, set language as English (United States) and time/currency as English (World) for universal compatibility.
- Click Next > Install Now.
- Accept license terms > Click Next.
- On the disk selection screen:
- Select each partition on Disk 0 (or main drive) and click Delete.
- When only Unallocated space remains, click Next.
Windows will begin installing. Let it finish — your PC will restart several times.


🔐 Step 5: Activate Windows 11 Affordably
Want to unlock all features and remove the watermark? You can activate Windows 11 using a budget-friendly key.
🔗 Visit: https://premiumkeys.com
Steps:
- Search for Windows 11 Pro Retail Key.
- Add to cart.
- Use discount code:
TECH9for extra savings. - Pay securely via Visa or crypto.
- You’ll receive the activation key by email or your account panel.
👤 Step 6: Set Up a Local Account (No Microsoft Login Needed)
Thanks to Rufus tweaks, you’ll see “I don’t have internet” during setup.
- Click I don’t have internet.
- Enter a local username (e.g., TechFan).
- Set a password or leave blank.
- Skip the privacy questions.
Windows will finalize your setup and bring you to a clean desktop.
🧩 Step 7: Activate Windows & Install Updates
Activate Windows:
- Right-click Start > Click Settings
- Go to System > Activation
- Click Change Product Key
- Paste the key from premiumkeys.com
- Click Next and then Activate
Check for Updates:
- Go to Settings > Windows Update
- Click Check for updates
- Let it install all patches and drivers (graphics, Wi-Fi, etc.)
- Restart if prompted
Your system is now fully updated and activated!
❓ Frequently Asked Questions (FAQs)
Q: Can I use this method on older PCs without TPM?
A: Yes! The Rufus customization bypasses TPM and Secure Boot requirements.
Q: Is PremiumKeys.com safe?
A: It’s a widely-used key reseller. Always check reviews and save your key securely.
Q: Will updates work after bypassing Microsoft account?
A: Yes, you can still receive Windows Updates with a local account.
Q: Can I switch to a Microsoft account later?
A: Absolutely — go to Settings > Accounts and link your account anytime.
📌 Tags:
windows 11 clean install, bypass TPM secure boot, windows 11 usb setup, rufus tutorial, windows 11 offline account, windows 11 iso install, activate windows 11, remove windows 11 watermark
📢 Hashtags:
#Windows11 #CleanInstall #TechTutorial #TPMBypass #Rufus #WindowsSetup #OfflineAccount #WindowsTips
🛡️ Disclaimer:
This article is for educational purposes only. Use of third-party tools and license keys should comply with local laws and terms of service. Always back up your data before performing a clean installation. Product keys purchased from key resellers may vary in reliability — use with caution.
You’ve now installed Windows 11 like a pro — fast, clean, and fully customized!
💬 Drop a comment if this setup guide helped, or share your own tweaks.
Stay tuned and stay passionate about tech!


