Windows 11 is a powerful operating system, but it comes with a lot of pre-installed bloatware and unnecessary features that can slow down your system and compromise your privacy. If you’re looking for a simple, safe, and effective way to remove this bloat and customize your Windows 11 experience, this guide is for you. We’ll walk you through using a free, user-friendly tool that allows you to debloat Windows 11, re-enable features if needed, and even install essential software—all in one place.

Introducing the Ultimate Windows 11 Customization Tool
The tool we’re discussing is a free, open-source program designed to give you complete control over your Windows 11 installation. It allows you to:
- Remove pre-installed apps and bloatware.
- Disable unnecessary features and services.
- Enhance privacy by turning off telemetry and data collection.
- Install essential software like browsers, utilities, and games.
The best part? It’s fully customizable, so you can choose exactly what to remove or keep, ensuring your system runs exactly the way you want it to.
Step 1: Download and Install the Tool
To get started, visit the official website or GitHub page for the tool. You’ll find two versions available:
- Installer Version: This version installs the tool on your system for regular use.
- Portable Version: This version doesn’t require installation and can be run directly from a USB drive or folder.
For most users, the installer version is recommended. Download the executable file, and if your browser blocks it (which is common for executable files), simply allow the download. Once downloaded, run the installer and follow the on-screen instructions to complete the setup.
Step 2: Create a Restore Point
Before making any changes to your system, it’s crucial to create a restore point. This allows you to revert to a previous state if something goes wrong. The tool includes an option to create a restore point automatically. Simply check the box for “Create Restore Point” and let the tool handle the rest.
Step 3: Customize Your Windows 11 Installation
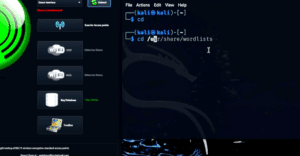
Once the tool is installed, you’ll see a clean, intuitive interface with several sections. Here’s how to navigate and customize your system:
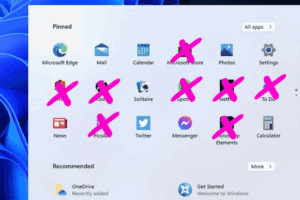
1. Debloat Section
This section allows you to remove unnecessary apps and features. Here’s what you can do:
- Remove Third-Party Apps: Uninstall pre-installed apps like Candy Crush, Spotify, and others.
- Remove Microsoft Apps: Uninstall Microsoft apps like Xbox, OneDrive, and more.
- Disable Consumer Features: Turn off suggestions, notifications, and other intrusive features.
- Remove Copilot: Disable Microsoft’s AI-powered Copilot feature.
- Remove Widgets: Get rid of the widgets panel and taskbar widgets.
2. Privacy Section
Enhance your privacy by disabling data collection and app permissions:
- Disable Telemetry: Turn off Windows telemetry, update telemetry, and search telemetry.
- Disable App Access: Restrict apps from accessing your location, camera, microphone, and other sensitive data.
- Disable Biometrics: Turn off Windows Hello biometric authentication if you don’t use it.
3. Performance Section
Optimize your system for better performance:
- Set DNS: Configure custom DNS servers for faster internet speeds.
- Enable Ultimate Performance Power Plan: Unlock the hidden power plan for maximum performance.
- Disable HAGS (Hardware-Accelerated GPU Scheduling): Improve GPU performance on some systems.
- Disable Core Isolation: Reduce security for better performance (use with caution).
4. Miscellaneous Section
Customize your system’s appearance and functionality:


- Enable Dark Mode: Apply a dark theme to your system.
- Show File Extensions: Make file extensions visible in File Explorer.
- Disable Sticky Keys: Turn off the sticky keys feature.
- Disable Snap Layouts: Remove the snap layouts feature from the taskbar.
5. Software Installation
The tool also allows you to install essential software directly:
- Browsers: Install Chrome, Firefox, or other browsers.
- Utilities: Install tools like 7-Zip, Revo Uninstaller, and CPU-Z.
- Gaming: Install Steam, Epic Games, and other gaming platforms.
- Multimedia: Install VLC, Spotify, and other media players.
Step 4: Review and Run the Script
Once you’ve made your selections, you can review the script to see exactly what changes will be made. This transparency ensures you’re in control of every modification. If you’re satisfied, click “Run Script” to apply the changes. The tool will automatically create a restore point (if you selected the option) and begin debloating and customizing your system.
Step 5: Restart and Enjoy Your Clean System
After the script has finished running, restart your computer to apply all changes. You’ll notice a significant improvement in performance, with fewer background processes and a cleaner, more responsive system.
Final Thoughts
This tool is one of the easiest and safest ways to debloat and customize Windows 11. Whether you’re looking to improve performance, enhance privacy, or simply remove unwanted apps, this tool has you covered. Best of all, it’s free, open-source, and fully customizable, making it a must-have for any Windows 11 user.
Give it a try and experience the difference a clean, optimized Windows 11 installation can make!
Tags: Windows 11, debloat Windows, Windows customization, Windows performance, Windows privacy, remove bloatware, Windows optimization, open-source tools, Windows tweaks
Hashtags: #Windows11 #DebloatWindows #WindowsCustomization #WindowsPerformance #WindowsPrivacy #RemoveBloatware #OpenSource #WindowsOptimization


