Welcome to this detailed guide on how to install Windows 11 over the network using a tool called iVentoy. The main advantage of this method is that you can install the operating system on multiple computers simultaneously without needing a physical USB or DVD for each machine. Let’s dive in!
Step 1: What is iVentoy and Why Use It?
iVentoy is a network boot tool that allows you to deploy operating systems over the network. You can use it to install not only Windows but also other operating systems like Ubuntu, CentOS, and more.
This guide will walk you through installing Windows 11 using iVentoy on a Windows system. iVentoy can also be installed on Linux, but for simplicity, we’ll focus on the Windows version.
Step 2: Preparing a Custom Windows 11 ISO File
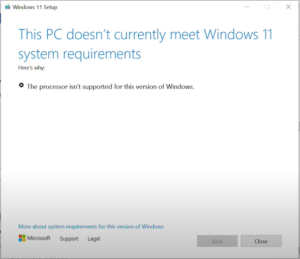
Note: iVentoy does not support the default Windows 11 ISO file, so you need to customize the ISO before using it.
Requirements:
- Windows 10 ISO (you can download this from Microsoft’s official site).
- Windows 11 ISO.
- A tool to edit the ISO files (we’ll use AnyBurn for this).
Steps to Create a Custom Windows 11 ISO:
- Extract the
install.wimFile from the Windows 11 ISO:- Mount the Windows 11 ISO on your computer, or use a tool to unzip it.
- Inside the extracted/mounted files, locate
install.wim(found in thesourcesfolder).
- Edit the Windows 10 ISO:
- Using AnyBurn (or a similar tool), open the Windows 10 ISO file.
- Navigate to the
sourcesfolder in the Windows 10 ISO. - Delete the
install.esdfile. - Replace it with the
install.wimfile from the Windows 11 installer.
- Save the ISO:
- Once you’ve replaced the file, save the edited Windows 10 ISO. You now have a custom Windows 11 installer that works with iVentoy.
Step 3: Setting Up iVentoy on Your Windows System
- Download and Install iVentoy:
- Visit the official iVentoy website and download the tool for Windows.
- Install the software and open it.
- Add the Custom Windows 11 ISO to iVentoy:
- In the iVentoy interface, navigate to the folder where ISO files are stored. This is usually the
isofolder within the iVentoy directory. - Copy and paste your custom Windows 11 ISO file into this folder.
- In the iVentoy interface, navigate to the folder where ISO files are stored. This is usually the
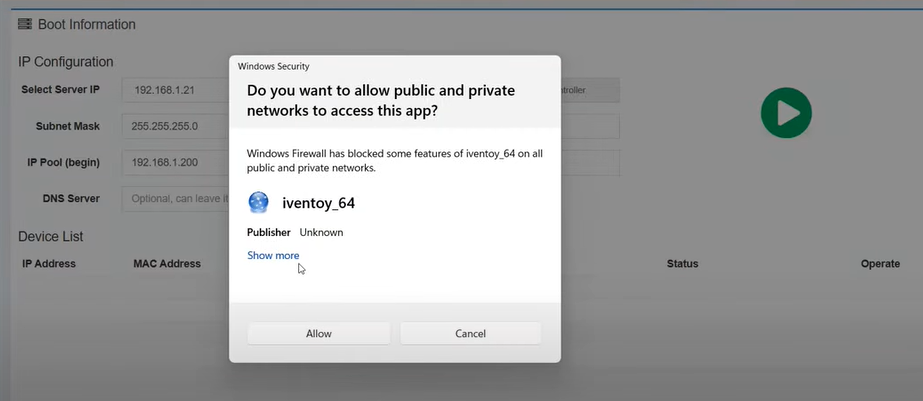
- Allow iVentoy Through the Firewall:
- To allow other computers to connect to iVentoy over the network, ensure you permit iVentoy to go through your Windows Firewall.
- Open Windows Firewall settings and make sure iVentoy has the necessary permissions for both public and private networks.
- Detect the ISO in iVentoy:
- In the iVentoy interface, ensure that the custom Windows 11 ISO file you added is detected.
- Click the Play button to launch iVentoy and make it ready to serve other computers over the network.
Step 4: Installing Windows 11 on Another Computer Over the Network
- Set the Client Computer to Boot From Network (PXE Boot):
- On the computer where you want to install Windows 11, access the UEFI/BIOS settings.
- Set the boot sequence to Boot from Network (also known as PXE boot).
- Save the settings and reboot the computer.
- Connect to iVentoy:
- When the client computer boots, it will automatically search for iVentoy on the network.
- iVentoy will allocate an IP address to the computer.
- Select the Custom Windows 11 Installer:
- Once the client computer connects to iVentoy, a menu will appear.
- Select the custom Windows 11 ISO that you prepared earlier.
- Begin Windows 11 Installation:
- The steps for installing Windows 11 are the same as installing from a bootable USB or DVD.
- Follow the on-screen prompts to complete the installation.
Step 5: Install Windows 11 on Multiple Computers Simultaneously
One of the key benefits of using iVentoy is the ability to install Windows 11 on multiple computers at the same time. Simply repeat the network boot process on each client computer, and iVentoy will handle the installation across all systems concurrently.
Conclusion
Installing Windows 11 over the network using iVentoy is a powerful way to streamline deployments, especially when working with multiple systems. By creating a custom ISO and setting up iVentoy correctly, you can simplify the process and install Windows without the need for multiple USB drives.
Thank you for following this guide. Don’t forget to like, share, and subscribe for more tech tips and tutorials!
#Windows11 #iVentoy #PXEBoot #NetworkInstallation #TechTutorial #OSDeployment #WindowsISO #CustomISO #ITSupport