Is your Windows 10 PC running slow? Don’t worry! With a few simple tweaks, you can significantly improve your computer’s speed and performance. Follow this step-by-step guide to optimize your system, disable unnecessary startup programs, adjust for best performance, and configure virtual memory.
Step 1: Disable Startup Applications
Startup applications are programs that automatically start running in the background when you turn on your computer, often slowing down your system. Here’s how to disable them:
- Open Task Manager:
- Right-click on the Taskbar.
- Select Task Manager.
- Disable Startup Programs:
- In Task Manager, click on the Startup tab.
- You will see a list of applications that start automatically when you turn on your system.
- Right-click on each unnecessary program and select Disable.
By disabling these apps, you prevent them from running in the background and consuming system resources.
Step 2: Set Windows for Best Performance
Adjusting your system settings for best performance can significantly improve the speed of your PC.
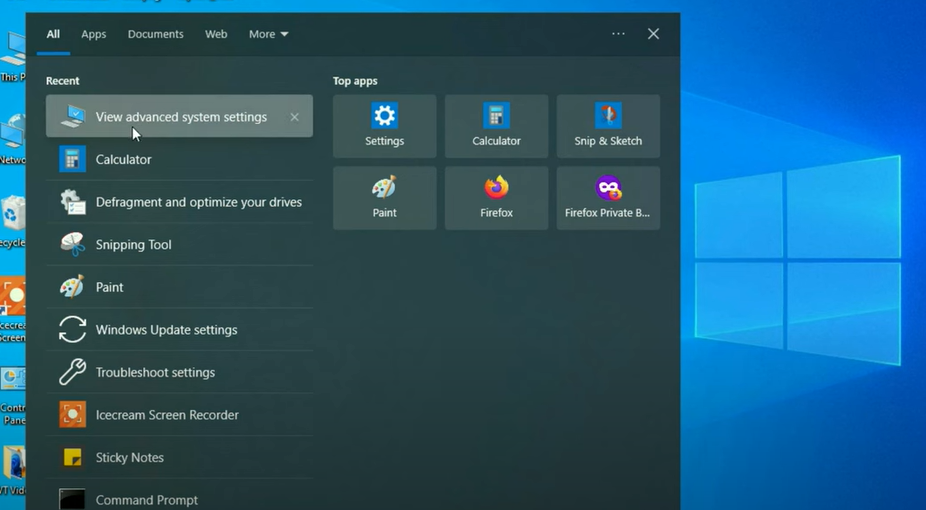
- Open Advanced System Settings:
- Click on the Search Bar and type View Advanced System Settings.
- Select the View Advanced System Settings option.
- Adjust Performance Settings:
- In the Advanced tab, click on Settings under the Performance section.
- Choose Adjust for Best Performance.
- Enable Essential Visual Effects (Optional):
- You can selectively enable a few visual effects. Check the following options if you want to retain some visual quality:
- Smooth edges of screen fonts
- Show thumbnails instead of icons
- Show windows contents while dragging
- You can selectively enable a few visual effects. Check the following options if you want to retain some visual quality:
- Apply Changes:
- Click Apply and then OK to confirm the settings.
This will ensure that Windows prioritizes performance over visual effects.
Step 3: Configure Virtual Memory
Virtual memory helps your PC run efficiently by using some hard drive space as additional RAM. Here’s how to configure it:
- Open Advanced System Settings:
- Go to the Search Bar and type View Advanced System Settings.
- Click on it to open the settings.
- Access Virtual Memory Settings:
- In the Advanced tab, under Performance, click Settings.
- Click the Advanced tab in the next window.
- Under Virtual Memory, click Change.
- Set Custom Virtual Memory:
- Uncheck the box for Automatically manage paging file size for all drives.
- Select your C: drive.
- Choose Custom Size.
- Calculate Virtual Memory:
- Your Minimum Virtual Memory should be 1.5 times your physical RAM.
- Your Maximum Virtual Memory should be 3 times your physical RAM.
- If you have 8GB of RAM:
- Convert it to MB: 8GB = 8192MB.
- Minimum Virtual Memory: 1.5 x 8192MB = 12288MB.
- Maximum Virtual Memory: 3 x 8192MB = 24576MB.
- Set Virtual Memory:
- Enter your calculated minimum and maximum values.
- Click Set, then OK.
- Restart Your Computer:
- Restart your system to apply the changes.
Conclusion
By following these three simple steps—disabling startup applications, setting Windows for best performance, and configuring virtual memory—you’ll see a noticeable improvement in the speed and performance of your Windows 10 PC. These optimizations will help reduce lag, improve system responsiveness, and make multitasking smoother.
If you found this guide helpful, feel free to share it and leave a comment below. Happy computing!
#Windows10 #PCPerformance #SpeedUpPC #VirtualMemory #WindowsTips #TaskManager #PerformanceBoost #OptimizeWindows