If you’ve ever felt mysterious slowdowns, odd disk spikes, or micro-stutters during gaming on Windows, you’ve probably stumbled across advice to “disable SysMain.” You might also know it by its former name, Superfetch. The internet has debated this service for years—some swear it’s essential, others say it causes more problems than it solves.
In this article, we’ll break down what SysMain actually does, why Microsoft included it, and whether it makes sense to disable it on your computer. We’ll also go step by step through safe methods to turn it off or back on, discuss who should consider disabling it, and provide real-world testing tips so you can make the right decision for your setup.
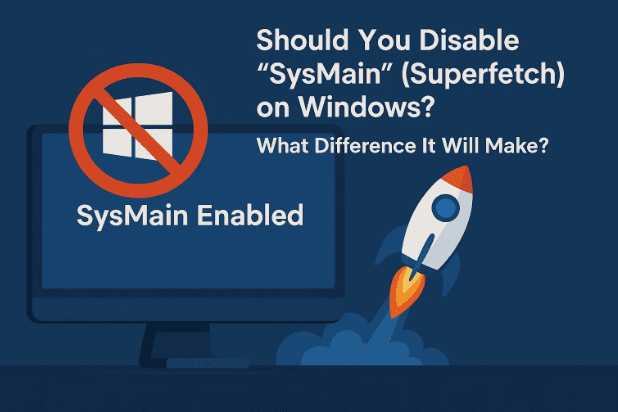
1) 🧠 What Is SysMain (Superfetch) and Why Does It Exist?
Let’s start simple, and we’ll keep it human.
SysMain is a Windows service designed to learn your usage patterns and pre-load frequently used applications and data into RAM. The goal is straightforward: if Windows can anticipate what you’ll open, it can get there faster. On older systems—especially those with hard disk drives (HDDs)—this prefetching made Windows feel snappier.
A few important clarifications:
- SysMain ≠ Search Indexing. People often confuse the two. Search indexing builds a catalog of your files so Windows Search is fast. SysMain is about prefetching and caching.
- It’s not “spyware.” It does monitor local usage patterns to optimize loading, but it’s not exfiltrating your personal data.
- It uses resources to save time later. That means occasional CPU, RAM, and disk activity—even when you didn’t “ask” for it at that moment.
So why the debate? Because prefetching costs something (background activity), and depending on your hardware and workload, the benefit may not outweigh that cost.
2) 🎯 Who Might Benefit from Disabling SysMain?
Before we jump to switches and commands, here’s a quick “gut-check” to see if disabling SysMain is worth trying. If any of these sound like you, you might benefit:
- You’re a gamer experiencing micro-stutters or random frame dips, especially in titles that stream lots of assets while you play.
- Your disk usage sits high (80–100%) for long stretches on an HDD system—often right after boot or randomly during light tasks.
- You run VMs (Virtual Machines), emulators, or heavy real-time workloads and suspect background disk/RAM activity is causing hiccups.
- You have a small amount of RAM (e.g., 4–8 GB) and notice frequent swapping, pauses, or sluggish multitasking.
- You prefer deterministic performance over predictive caching. You don’t care if Word opens 0.3 seconds faster; you care that your game never stutters.
Human note: I’ve seen many users report that VM freezes and “hiccup” moments reduced after disabling SysMain, particularly on HDD or budget SSD setups. You won’t always get miracles—but you may get consistency. Also if you are tech enthuasist and looking for more ways to have best experience while gaming you can try these tips also.
- Ultimate Windows Optimization Guide for Maximum Gaming Performance (FPS Boost & Lower Input Lag)
- Select 7 Reasons Why Your PC Gives Poor Gaming Performance and Low FPS… How to Fix It
- 13 Ways to Make Your Gaming PC Better—From Higher FPS to Smoother Performance
- Select 5 Ways You’re Robbing Your Gaming PC of Free Performance (And How to Fix It)
- or you can look out all such artitcles here and experience the superfast gaming.
3) 🧩 Who Should Keep SysMain Enabled?
Now, let’s be fair. SysMain isn’t “bad.” For many people, it’s neutral or even mildly helpful:
- Modern PCs with fast NVMe SSDs and 16–32 GB+ RAM. The overhead is small; prefetching may slightly speed up frequent workflows.
- Creative professionals opening the same large apps repeatedly (Photoshop, Premiere, Blender, VS Code with big repos). Launch-time can feel smoother.
- Everyday non-gaming users who don’t notice any stutters and just want Windows to feel “ready.”
If you’re in this camp, you can leave SysMain on and likely never think about it again. The key is symptoms. If you’re not seeing problems, you don’t need a fix.
4) 🛟 Before You Change Anything: Prep & Safety
We’re going to make safe, reversible changes. Still, a little prep goes a long way.


- Save your work and close apps.
- Create a Restore Point (optional but wise):
- Press Start → type “Restore Point” → Create a restore point → Create.
- Know how to revert (we cover this later).
- Observe a baseline (helpful for comparison):
- Boot time, a couple of app launch times, and one or two “problem” tasks (e.g., your game’s stuttery scene).
- Note Task Manager → Performance metrics (Disk, CPU, Memory during idle and work).
Let’s move to the actual switches now. So far we’ve done a good job laying the groundwork; the next steps are simple and quick.
5) 🖱️ Method 1 — Quick Disable via Services (GUI)
If you’re not a command-line person, this is your friend. It’s visual, simple, and reversible.
- Press Win + R, type
services.msc, press Enter. - Scroll to SysMain (older builds may show Superfetch).
- Double-click it.
- Click Stop to halt the service immediately.
- Set Startup type to Disabled (or Manual if you just want to test temporarily).
- Click Apply → OK.
- Reboot your PC.
Tip: If you only want to test for a day, set Startup type to Manual and Stop it. If you’re happy after testing, come back and set Disabled.
6) 🧰 Method 2 — Disable via PowerShell (Recommended for Power Users)
PowerShell gives you precision and is easy to reverse.
- Right-click Start → Windows Terminal (Admin) or PowerShell (Admin).
- Run the following to stop SysMain immediately:
Stop-Service -Name SysMain -Force - Prevent it from starting next boot:
Set-Service -Name SysMain -StartupType Disabled - Reboot your PC.
To test without fully disabling:
Stop-Service -Name SysMain -Force
Set-Service -Name SysMain -StartupType Manual
This way, it stays off until you decide to bring it back.
7) ⌨️ Method 3 — Disable via Command Prompt (sc)
Prefer classic cmd? No problem.
- Start → type “cmd” → Run as administrator.
- Stop the service now:
sc stop SysMain - Disable it for future boots:
sc config SysMain start= disabled(Mind the space afterstart=—it’s required byscsyntax.) - Restart your PC.
8) 🧭 Method 4 — Group Policy & Registry Notes (Advanced)
There’s no single “Turn off SysMain” policy in Group Policy like there is for some other features, but power users sometimes prefer policy-driven or registry-driven environments for consistency, imaging, or fleet management. If you’re in that camp:
- Group Policy: You’ll typically combine Service Control (via scripts) with policies that limit other prefetchers or background “smart” features (e.g., Windows Search, Delivery Optimization, Content prefetches).
- Registry: Historically, prefetch behavior has been associated with keys under:
HKEY_LOCAL_MACHINE\SYSTEM\CurrentControlSet\Control\Session Manager\Memory Management\PrefetchParametersValues likeEnablePrefetcher/EnableSuperfetchappeared on older Windows versions. On modern Windows 10/11, SysMain service state is the clearer on/off switch. Editing undocumented or deprecated keys can be brittle—service control is preferred.
If you manage multiple machines, a simple PowerShell script to set SysMain’s startup type across devices is the cleanest approach.
9) 🔄 How to Re-Enable SysMain (If You Change Your Mind)
No drama—just undo what you did.
Services (GUI):
services.msc→ SysMain → Start → set Startup type to Automatic (or Automatic (Delayed Start)) → Apply → OK → Reboot.
PowerShell:
Set-Service -Name SysMain -StartupType Automatic
Start-Service -Name SysMain
Command Prompt (sc):
sc config SysMain start= auto
sc start SysMain
If you were only testing and set it to Manual, switch it back to Automatic to restore default behavior.
10) 📏 How to Measure the Impact (Did This Really Help?)
We want data, not vibes. Here’s a simple, real-world test plan:
A. Boot & Idle
- Time your cold boot (from power off) to desktop readiness.
- After logging in, give Windows 2–3 minutes and watch Task Manager → Performance:
- Disk: Is it spiking to 80–100% for long periods?
- CPU: Does it calm down faster?
- Memory: Is “In use” a little lower?
B. Your Pain Case
- Gamers: Run the scene or map where you noticed hitches. Watch if frame pacing feels smoother.
- VM users: Launch and interact with your VM (start/stop, snapshot, disk-heavy tasks). Note if random freezes subside.
- Creators: Open your usual heavy app set (e.g., browser with 20 tabs + editor + Photoshop). Do launches feel slower? If yes, you might prefer SysMain ON.
C. App Launches (Optional)
- Pick 3 frequent apps. Measure open times 3× before and 3× after disabling SysMain; take the average.
- If you traded a tiny launch delay for zero micro-stutters in games, that’s usually a win.
D. Keep It Real
- Test for 2–3 days. Windows has rhythms (updates, maintenance, indexing). A single hour can mislead.
11) 🧩 Troubleshooting & Related Settings That Matter
Disabling SysMain is one lever. If you still see issues, these nearby switches often help:
- Windows Search Indexing
- If you rarely use Windows search, you can disable indexing (Services → Windows Search).
- If you search files/emails often, keep it on—but trim what’s indexed (Settings → Search → Searching Windows → Customize search locations).
- Background Apps / Startup Apps
- Settings → Apps → Startup. Disable noisy launchers and updaters you don’t need at boot.
- Task Manager → Startup tab: check impact ratings.
- Delivery Optimization
- Settings → Windows Update → Advanced options → Delivery Optimization. Turn off or limit background bandwidth.
- Game Mode & Xbox Game Bar
- Settings → Gaming → Game Mode = On (usually helpful).
- If you never use Game Bar, disable overlays and background capture.
- Disk Health
- A failing HDD can impersonate “Windows being slow.”
- Check SMART with a reputable tool, and consider migrating to an SSD—still the #1 upgrade for sluggish PCs.
- Drivers & Chipset
- GPU and chipset drivers can make or break smoothness. Keep them sane and up-to-date (not necessarily bleeding-edge for stability).
12) 🧪 Myth-Busting: Common Misconceptions about SysMain
- “SysMain is spyware.”
No. It analyzes app usage locally to prefetch resources. That’s it. - “Disabling SysMain always boosts FPS.”
Not always. The biggest wins are reduced stutters and fewer disk spikes on HDD or budget SSD systems. Raw FPS may be unchanged. - “If you have SSD, SysMain is useless.”
Not necessarily. SSDs reduce the need for prefetch, but some people still like the “always ready” feel for repeated app launches. Test and decide. - “Turning it off can break Windows.”
SysMain is a non-critical service. Disabling it is safe and reversible. If you dislike the result, re-enable in 30 seconds.
13) ❓ Frequently Asked Questions (FAQ)
Q1. Is it safe to disable SysMain on Windows 10/11?
Yes. It’s a standard Windows service. Stopping it and setting startup to Disabled is safe and reversible.
Q2. Will disabling SysMain improve gaming?
It often reduces stutters caused by background disk activity, especially on HDDs or slower SSDs. Max FPS usually doesn’t change; frame consistency often does.
Q3. I have 32 GB RAM and NVMe. Should I still disable it?
Probably not necessary. You can test (Manual + Stop) for a couple of days. If you feel no benefit, keep it Automatic.
Q4. My PC boots slower after disabling SysMain. Why?
SysMain can help “warm up” frequently used items. If boot or first-launch times matter more to you than mid-session smoothness, keep it on.
Q5. Does this affect Windows updates or security?
No. SysMain is unrelated to updates/security. It only influences prefetch and caching behavior.
Q6. Is this the same as disabling Windows Search or telemetry?
No. Those are separate components. You can tune them independently.
Q7. I disabled SysMain but still see disk spikes. What else can I try?
Check Windows Search indexing, Delivery Optimization, antivirus real-time scanning (exclude large game folders if appropriate), and third-party updaters.
Q8. Can I script this for multiple PCs?
Yes. Use PowerShell:
Stop-Service -Name SysMain -Force
Set-Service -Name SysMain -StartupType Disabled
Run as Admin, and manage remotely if you have that configured.
14) ✅ Final Thoughts & Sensible Defaults
Here’s the calm, balanced take:
- If you’re a gamer, on HDD, or running into random stutters: try disabling SysMain. The improvement often shows up as smoother frame pacing, fewer random pauses, and a calmer disk graph.
- If you’re on fast NVMe with lots of RAM and love snappy launches: keep SysMain on. It likely won’t hurt—and may make your daily workflow feel “already loaded.”
- When in doubt, test. Stop it, set it to Manual, live with it for 2–3 days, and observe. Re-enable if you prefer the old behavior.
Most importantly, remember: there’s no one-size-fits-all tweak. Windows runs on an incredible range of hardware and usage patterns. The best optimization is the one you can feel and you can explain.
⚠️ Disclaimer
This guide changes Windows service settings that are safe and reversible. Still, create a restore point before large changes, especially on work-critical systems. Results vary based on hardware, drivers, and workload. No third-party software is required or recommended in this article.
Note on links: We didn’t reference or rely on any third-party optimizer or external tool here, so there are no external software links to add. Everything you need is built into Windows.
Tags
Windows, SysMain, Superfetch, Windows 11, Windows 10, gaming stutter, disk usage, performance tweaks, Windows services, PowerShell, cmd, troubleshooting, optimization
Hashtags
#Windows11 #Windows10 #SysMain #Superfetch #PCOptimization #Gaming #Performance #PowerShell #Troubleshooting #TechGuide


