Have you ever felt frustrated when your PC’s C drive gets full because you’ve installed too many software programs? Or maybe you’ve wanted to carry your favorite apps from one computer to another without going through the installation process again and again? If yes, then you’re in for a treat.
In this article, we’ll explore a fantastic solution that lets you install and carry your software on a pen drive—yes, you read that right! This method saves storage on your computer, keeps your setup neat, and gives you the freedom to run your apps anywhere, anytime.

Why Install Software on a Pen Drive?
Before we get into the “how,” let’s talk about the “why.” Here are some common issues users face:
- The C drive gets filled up too quickly.
- Important applications need to be installed separately on different computers.
- Sharing software between systems is inconvenient.
- Reinstalling tools on every new machine wastes time.
Now imagine a setup where:
- You just plug in your USB pen drive,
- Open the software directly from it,
- And get working—without installation or admin rights.
Sounds amazing? Let’s show you how to make it happen.
Introducing Portable Apps Platform
The magic happens with an open-source tool called PortableApps.com Platform. This simple tool allows you to:
- Run apps directly from a USB drive.
- Carry over 1,100 popular free software tools in a lightweight package.
- Organize and manage your apps with an easy start menu interface.
- Use it across multiple computers, without leaving any trace behind.
Step-by-Step: How to Set Up Portable Apps on Your Pen Drive
Here’s how you can turn your USB into a powerful software toolkit:
Step 1: Plug in Your USB Drive
Insert a pen drive (preferably 8GB or more for better storage) into your computer.
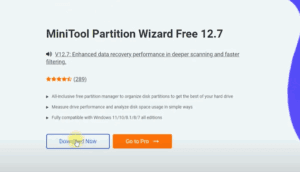
Step 2: Download the PortableApps Platform
- Go to the official PortableApps.com website.
- Click on the “Download Now” button.
- Once downloaded, run the installer.
Step 3: Install to USB Drive
- When the installer launches, choose your language.
- Select “New Install.”
- Choose the location where you want to install—this should be your USB drive (e.g., Drive E or F).
- Click Next and complete the installation.
Step 4: Launch the Portable Platform
After installation, you’ll see a “Start” shortcut on your USB. Click it, and a menu will pop up, similar to the Windows Start menu.
This menu shows all the software you’ve added and allows you to launch them directly from the USB!
Step 5: Add Your Favorite Portable Apps
- From the platform, click “Apps” > Get More Apps > By Category or By Title.
- Browse from categories like:
- Select and install the apps directly onto the USB drive.
Step 6: Plug and Play!
Now that your favorite apps are installed, just plug the pen drive into any Windows computer and launch the PortableApps Start Menu. No installation needed. Everything runs smoothly from the drive.


Advantages of Using PortableApps
- Saves precious space on your C drive.
- Avoids repeated installations on different systems.
- Makes your software truly portable.
- Keeps your data secure and separate.
Whether you’re a student, content creator, freelancer, or office professional, this is a game-changing method to simplify your workflow.
Final Thoughts
This little trick can make a big difference in your daily computing. Instead of crowding your PC with dozens of installed programs, just carry a USB drive loaded with all your essentials. It’s neat, efficient, and flexible.
We hope this article helped you set up your portable workspace. For more helpful guides like this one, bookmark this blog and stay tuned!
Tags: portable apps, install software on USB, USB software setup, run apps from pen drive, C drive full solution, computer tricks, windows hacks, portable software guide
Hashtags: #PortableApps #USBTricks #SoftwareTips #WindowsHacks #TechGuide #PenDriveTools #ProductivityHacks