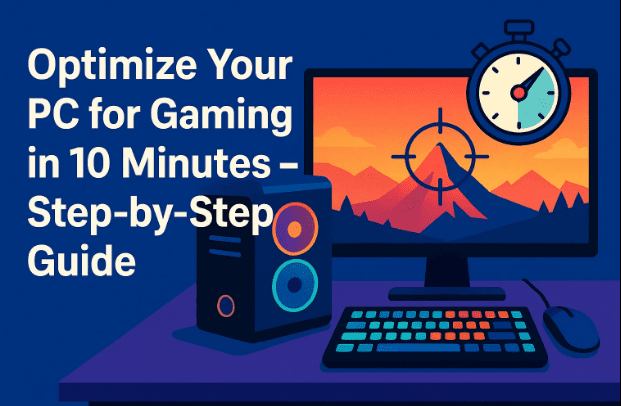
When it comes to PC gaming, every frame counts. Whether you’re playing competitive shooters like Valorant, Fortnite, or CS2—or just want smoother gameplay in single-player titles—optimizing your system can make a noticeable difference. The best part is you don’t need expensive upgrades to see improvements. With a few smart tweaks, you can reduce input delay, increase FPS, and make your computer feel faster overall.
This guide walks you through the essential steps to optimize your Windows PC for gaming in about 10 minutes. We’ll cover everything from Windows settings to GPU tweaks, registry modifications, and even a small BIOS adjustment. Each step is explained in detail so you understand what it does, why it matters, and when you should or shouldn’t use it.
For a detailed guide: Ultimate Guide to Optimizing Windows 10/11 for Gaming & Performance (2025 Edition)
🔄 Step 1: Create a Restore Point
Before changing anything, always set up a restore point. This acts like a safety net: if something goes wrong, you can roll back your system to the previous state.
- Press the Windows key, type Create a restore point, and hit Enter.
- Select your system drive (usually C:), then click Configure → Turn on system protection.
- Click Create and give it a name like “Pre-Gaming Tweaks.”
Now you can proceed confidently knowing you can undo changes if needed.
🎮 Step 2: Enable Game Mode & Graphics Optimizations
Windows includes a Game Mode designed to reduce background activity while gaming.
- Press Windows key, type Game Mode, and hit Enter.
- Turn Game Mode on.
Next, optimize graphics settings:
- Go to Graphics settings → Change default graphics settings.
- Enable Optimizations for windowed games (improves input delay in DX10/11 titles like Fortnite).
- If available, enable Hardware-accelerated GPU scheduling. This shifts some load from CPU to GPU.
⚠️ Note: Hardware scheduling may cause stutters in GPU-heavy games. Try it, but turn it off if you notice issues.
🛡️ Step 3: Disable Core Isolation
Core Isolation is a virtualization-based security feature. While good for enterprise security, it reduces gaming performance by ~5%.
- Press Windows key, type Core isolation, and press Enter.
- Disable Memory integrity.
As long as you keep Windows Defender on and avoid downloading suspicious files, you’ll remain safe without this enabled.
🗑️ Step 4: Debloat Windows with Chris Titus Tech Tool
Windows comes loaded with background services and apps you don’t need. Removing them frees up resources.


- Open Windows PowerShell as Administrator.
- Paste the following command (official Chris Titus Tech script line):
iwr -useb https://christitus.com/win | iex - The tool launches a GUI with multiple tweak options.
Recommended tweaks:
- Disable telemetry and background bloat.
- Disable unnecessary Windows features.
- Leave Adobe Network Block unchecked if you use Adobe services (to avoid breaking them).
Once selected, click Run Tweaks. After a few minutes, your PC will be cleaner and lighter.
⚡ Step 5: Switch to Ultimate Performance Power Plan
Power plans directly impact CPU frequency scaling and system responsiveness.
- Press Windows key, type Power Options, and open it.
- Open Command Prompt (Admin) and enter:
powercfg -duplicatescheme e9a42b02-d5df-448d-aa00-03f14749eb61 - Reopen power options and select Ultimate Performance.
This prevents CPU throttling and ensures maximum performance. However, on laptops, be mindful of battery drain.
⚙️ Step 6: Tweak Windows Settings
Now, let’s clean up Windows settings for maximum efficiency.
- Notifications: Disable unnecessary alerts under System → Notifications.
- Dynamic Lighting: Under Personalization → Dynamic Lighting, turn off background RGB control.
- Cross-device sharing: Disable under Apps → Advanced app settings.
- Startup Apps: Disable apps you don’t need running on boot.
- Visual Effects: In Accessibility → Visual Effects, disable Transparency and Animation effects.
- Privacy Settings: Turn off unnecessary tracking under Privacy & Security → General, Speech, Activity History, and Diagnostics.
- Windows Update: Disable auto-restart during active hours and peer-to-peer updates (Delivery Optimization).
This not only improves performance but also enhances privacy and security.
🔧 Step 7: Adjust Advanced System Settings
- Press Windows key, type Advanced system settings, and press Enter.
- Under Performance, click Settings → Choose Adjust for best performance.
- To keep some usability, check:
- Smooth edges of screen fonts
- Show thumbnails instead of icons
- Show window contents while dragging
This frees up resources while keeping the system usable.
🎨 Step 8: Optimize GPU Settings (Nvidia & AMD)
Your GPU control panel has hidden settings that can reduce latency and improve FPS.
For Nvidia GPUs
- Right-click desktop → Open Nvidia Control Panel.
- Go to Manage 3D settings → Global Settings.
- Recommended tweaks:
- Low Latency Mode: On
- Power Management Mode: Prefer maximum performance
- Texture Filtering Quality: High performance
- Threaded Optimization: On
You can also set these per-game under the Program Settings tab.
For AMD GPUs
- Open AMD Radeon Software.
- Under Preferences, disable all overlays, hotkeys, and background tasks.
- In Graphics Settings:
- Set Texture Filtering Quality → Performance.
- Enable Surface Format Optimization.
- Set Tessellation Mode → Override application settings → Off.
These tweaks reduce VRAM usage and improve 1% lows (minimum frame stability).
📝 Step 9: Registry Tweaks for Extra Performance
Registry edits can unlock hidden performance improvements. ⚠️ Always back up before editing.
- Open Registry Editor (Win + R → type
regedit).
a) GPU Scheduling Priority
Path:
HKEY_LOCAL_MACHINE\SOFTWARE\Microsoft\Windows NT\CurrentVersion\Multimedia\SystemProfile\Tasks\Games
- GPU Priority → Decimal 8
- Priority → Decimal 6
- Scheduling Category → High
- SFIO Priority → High
b) Win32 Priority Separation
Path:
HKEY_LOCAL_MACHINE\SYSTEM\CurrentControlSet\Control\PriorityControl
- Win32PrioritySeparation → Decimal 38
This prioritizes your game (foreground app) over background tasks.
c) Network Throttling
Path:
HKEY_LOCAL_MACHINE\SOFTWARE\Microsoft\Windows NT\CurrentVersion\Multimedia\SystemProfile
- Create DWORD NetworkThrottlingIndex.
- Set value →
FFFFFFFF(Hex) or4294967295(Decimal).
This disables throttling, reducing latency in online games.
d) System Responsiveness
Path (same as above):
- SystemResponsiveness → Set value to 0.
This dedicates 100% CPU resources to your game instead of reserving 20% for background tasks.
🧬 Step 10: BIOS Optimization (Enable XMP/DOCP)
Your RAM may not be running at its rated speed by default. Enabling XMP (Intel) or DOCP (AMD) ensures it performs as advertised.
- Restart PC → Enter BIOS (usually Del or F2).
- Locate XMP/DOCP → Enable Profile 1.
- Save and exit.
This instantly boosts memory performance, which improves minimum FPS in many games.
❓ Frequently Asked Questions
Q1. Is it safe to disable Core Isolation?
Yes, for most gamers. Windows Defender still protects you. Core Isolation is mainly beneficial in enterprise environments.
Q2. Will debloating Windows break apps?
If you’re cautious, no. Read each tweak description in the Chris Titus tool before applying.
Q3. Can registry tweaks harm my PC?
Not if you follow the exact paths and values. Always back up your registry first.
Q4. Does XMP/DOCP work on all RAM?
Only if your RAM supports it. Check your motherboard manual or RAM specs.
Q5. Should laptop users follow the same steps?
Mostly yes, but avoid Ultimate Performance power plan if you care about battery life.
⚠️ Disclaimer
These tweaks are safe if followed correctly, but proceed carefully. Always create a restore point before applying system-level or registry changes. Results may vary depending on your hardware configuration.
✅ Conclusion
Optimizing your PC for gaming doesn’t have to be complicated. By following these steps—cleaning Windows, adjusting power settings, disabling unnecessary features, optimizing GPU control panels, and enabling RAM profiles—you can significantly improve FPS, reduce stutters, and get a smoother gaming experience overall.
The key is balance: don’t blindly disable everything. Understand each tweak, test your system, and keep what works best for you. With just 10 minutes of effort, you can get performance boosts that often feel like a hardware upgrade.
Tags
Windows gaming optimization, PC performance tweaks, Nvidia settings for gaming, AMD Radeon optimization, registry tweaks gaming, BIOS XMP DOCP RAM speed
Hashtags
#PCGaming #Windows11 #GamingOptimization #FPSBoost #Nvidia #AMD #RegistryTweaks #XMP