Is your Windows 11 PC lagging or running slower than usual? This can be frustrating, especially when you rely on your computer for work, gaming, or other important tasks. In this detailed guide, we’ll walk you through quick and easy steps to fix the lagging issue on your Windows 11 system. By following these instructions, you’ll see a noticeable improvement in your PC’s performance within just 5 minutes!
Step-by-Step Guide to Fix Windows 11 Lagging and Slow Problems
1. Adjust Privacy and Security Settings
Windows 11 includes several background permissions that can slow down your system if not properly managed. Here’s how to disable unnecessary permissions:
- Right-click on the Windows icon and select Settings.
- From the left-hand menu, click on Privacy & Security.Windows Permissions:
- Click on General and disable all options. These permissions are often unnecessary and can cause slowdowns.
- Next, go to Speech, Inking & Typing Personalization, Diagnostic & Feedback, and Activity History, and disable these as well. These services can consume resources, leading to lag.
- Click on Search Permissions and set the SafeSearch level to Moderate. This maintains security without using excessive resources.
- Disable options under Cloud Content Search and Search History.
- Under More Settings, disable options that are not required for everyday use.
2. Disable Unnecessary App Permissions
Next, disable permissions for apps that you don’t use. This will help free up system resources:
- Go to Privacy & Security > App Permissions.
- If you’re not using services like Location, Camera, or Microphone, click on these options and disable them.
- Do the same for Voice Activation, Notifications, Account Info, Phone Calls, and Emails.
- Scroll down and disable permissions for other services like Messaging, Radios, File Downloads, and Documents.
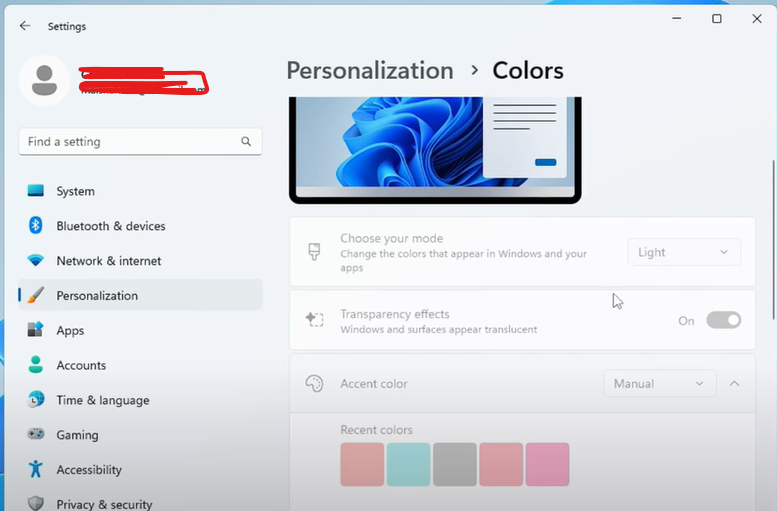
3. Disable Transparency Effects
While Windows 11’s transparency effects look visually appealing, they can slow down your system, especially if you’re facing lag issues. Here’s how to disable them:
- Go to Settings > Personalization > Colors.
- Scroll down to Transparency Effects and turn this option off. This will help reduce the load on your system’s resources without affecting its functionality.
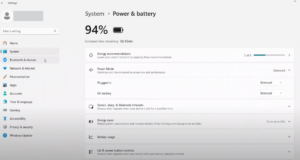
4. Optimize System Performance
You can adjust Windows 11 for better performance by tweaking system settings:
- Press Windows + S and type
sysdm.cplto open the System Properties window. - Go to the Advanced tab and click on Settings under the Performance section.
- Choose the option Adjust for Best Performance. This will disable visual effects that are resource-intensive.
- Under the list of options, check Smooth edges of screen fonts and Show thumbnails instead of icons for a balance between performance and usability.
- Click Apply and then OK.
5. Disable Unnecessary Startup Apps
Some applications launch automatically when you start your PC, which can significantly slow down boot time and overall performance. Disable them by following these steps:
- Right-click on the Windows icon and select Task Manager.
- In Task Manager, click on Startup Apps.
- Identify the third-party apps that you don’t need to run at startup, such as Microsoft Teams, OneDrive, ProtonVPN, Steam, Discord, or Skype.
- Right-click on the app and select Disable to prevent it from running during startup.
6. Uninstall Unnecessary Applications
Unnecessary or unused applications can consume disk space and resources, slowing down your PC. Here’s how to uninstall them:
- Press Windows + S and type
appwiz.cplto open Programs and Features. - Look for applications that you don’t recognize or no longer need, like Microsoft OneDrive (if you’re not using it), and uninstall them by right-clicking and selecting Uninstall.
- Go through the list carefully and remove any other unused applications to free up space and resources.
7. Restart Your PC
After applying all of the above changes, it’s time to restart your system to see the improvements:
- Click on the Start menu, then select Restart.
Once your PC restarts, you should notice a significant boost in performance, with reduced lagging and a faster, smoother experience.
Conclusion
By following these simple steps, you can fix the lagging and slow performance issues on your Windows 11 system. Disabling unnecessary permissions, adjusting performance settings, and managing startup apps are some of the quickest ways to speed up your PC. Additionally, uninstalling unused applications and disabling transparency effects can further enhance your system’s performance.
These fixes should give your Windows 11 PC a noticeable speed boost in just a few minutes. If the issue persists after applying these changes, you may want to consider further optimizations like updating drivers or checking for malware.


#Windows11 #PCPerformance #LaggingIssue #WindowsFix #Windows11Tips #TechFixes #WindowsSpeedBoost #OptimizeWindows11


