Introduction
If you’re just starting out with video editing or have recently installed Wondershare Filmora, this is the ultimate tutorial to help you go from zero to expert. In this comprehensive two-part guide, we’ll walk through everything from importing files and making basic cuts to color grading, audio editing, and much more. Whether you’re an aspiring content creator or someone just exploring editing as a hobby, Filmora makes the journey easy and enjoyable.
Let’s get started!
✅ Step 1: Launching Filmora & Setting Up Your Project
- Open Wondershare Filmora.
- You’ll see a screen asking you to choose a project aspect ratio.
- 16:9 for landscape (YouTube, general videos)
- 9:16 for vertical content (Instagram Reels, Shorts)
- Click “New Project” under the desired ratio.
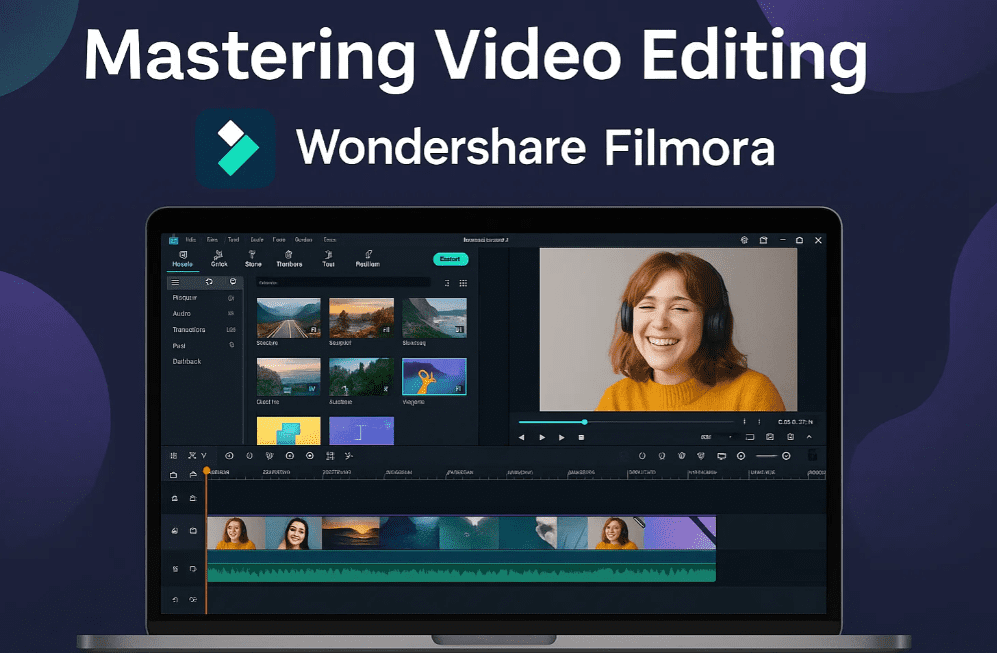
🔄 Step 2: Understanding the Filmora Interface
Once your project opens, you’ll see 3 main sections:
- Top Left: Media panel to import files (videos, images, audio)
- Top Right: Preview window to view edits
- Bottom Timeline: Where editing magic happens (multi-track layer-based)
📂 Step 3: Importing Media Files
- Click Import or drag-and-drop your media files.
- Filmora may ask about creating a proxy file for smoother editing on slower systems. Choose “No” if your system is powerful.
- Your imported videos will appear in the Media panel.
✂️ Step 4: Basic Cuts & Timeline Management
- Drag the video to the timeline.
- Use the scissor tool or press C on your keyboard to cut.
- To delete unwanted sections, click the clip and press Delete.
🎧 Step 5: Audio Editing Basics
- Right-click your clip in the timeline and select “Detach Audio”.
- The audio track will separate from the video.
- Use the Volume slider on the right panel or drag the line up/down on the waveform to adjust volume.
- Use the De-noise toggle to remove background noise. Keep the level moderate to avoid distortion.
✨ Step 6: Adding Motion (Zoom/Rotate/Position)
- Click on the video clip.
- Use Scale to zoom in/out.
- Rotate or adjust position as needed.
- Click the diamond icon to set keyframes.
- Move the playhead forward, adjust scale/position again → automatic animation created.
🎨 Step 7: Color Grading Essentials
- Go to the Color tab on the right.
- Use sliders for:
- Saturation: Increase vibrancy
- Contrast: Deepen shadows and highlights
- Brightness: Improve exposure
- Vignette: Add cinematic edges
- Want more control? Use the HSL panel to edit individual color ranges like blue or skin tones.
🏆 Step 8: J-Cut for Smooth Transitions
- Instead of abrupt cuts, use the J-cut technique:
- Cut audio slightly before the video.
- Let the sound play before the video changes to create flow.
- This improves storytelling and viewer retention.
🎞️ Step 9: Working With B-Rolls
- Drag your B-roll footage (secondary visuals) to an upper track.
- Use in/out points to trim clips precisely before inserting.
- B-roll enhances storytelling by showing what you’re talking about.
🔊 Step 10: Audio Speed Control & FX
- Click the audio clip, go to the Speed tab.
- Use 0.5x for slow motion or ramp speeds dynamically.
- Maintain pitch by checking the Maintain Pitch option.
In Part 2, we’ll cover:
- Advanced text animation and overlays
- Creative title templates
- Using Smart Cutout for professional masking
- Visual effects, cinematic transitions, and exporting with thumbnails
Part 2 here – Mastering Video Editing in Wondershare Filmora (Part 2 of 2) – Pro Techniques & Exporting
- 🎥 Get Wondershare Filmora: https://filmora.wondershare.com/
Tags: video editing, wondershare filmora, filmora tutorial, filmora for beginners, how to edit video, filmora editing tips
Hashtags:
#FilmoraTutorial #VideoEditingTips #EditLikeAPro #WondershareFilmora #BeginnerToPro #ContentCreation