CorelDRAW offers a powerful and versatile tool known as the Pointillizer, which allows users to create fascinating designs by arranging small objects into a larger shape. This guide will take you through the steps to create stunning effects using the Pointillizer tool in CorelDRAW.

What is the Pointillizer Tool?
The Pointillizer tool helps you arrange shapes in a repeating pattern to form a larger image. Whether you’re creating intricate designs with stars, triangles, or circles, the tool allows for creative freedom with the added ability to adjust size, density, and angles. This can transform simple objects into mesmerizing patterns.
Let’s walk through how to use this tool in a few simple steps.
Steps to Use the Pointillizer Tool in CorelDRAW:
- Open the Pointillizer Docker:
- Begin by selecting a shape that you want to transform.
- Go to the Effects menu, scroll down, and click on Pointillizer. This will open the Pointillizer docker.
- Apply the Pointillizer Effect to a Star:
- Let’s start with a star. Select a star shape on your canvas.
- In the Pointillizer docker, click Apply.
- The program will automatically fill the star with smaller stars, forming a star-shaped pattern with varying sizes. The smaller stars will typically fill the edges to create a complete design.
- Be patient, as large designs can take a while to process depending on the size and complexity of the shapes.
- Using Custom Shapes:
- The Pointillizer tool works with any shape, not just stars. Select another shape, such as a triangle.
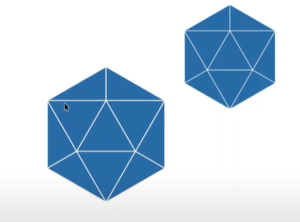
- After selecting your triangle, click Apply. The tool will arrange smaller triangles into the shape of a larger triangle.
- You can also adjust the Angle, Scale, and Density settings to achieve different design effects. For example, setting the Angle to 0 will align all triangles straight.
- Refining the Shapes:
- You can further enhance your designs by refining the shapes. For instance, if your design includes small unwanted shapes within the larger design, you can use the Intersect tool to remove them.
- Let’s say you have a large triangle filled with smaller triangles, and you want to refine the shape. You can use another triangle, overlap it with the existing design, and apply the Intersect tool to clean up any unwanted pieces. This will leave a more defined and clean triangle shape.
- Experimenting with Circular Patterns:
- The Pointillizer effect works great with circular designs as well. Try creating a simple circular object.
- Remove the outline, select the object, and apply the Pointillizer effect. You will see that smaller circles now fill the larger circular area, creating an interesting pattern.
- You can further adjust the appearance by changing the colors, fills, and outlines of these small circles.
- Additional Adjustments:
- Use the Scale, Density, and Angle settings to modify the overall effect of the Pointillizer.
- For example, increasing the density will fill the shape with more objects, while decreasing the scale will make the shapes smaller. Experiment with different combinations to achieve your desired design.
Creative Possibilities
The Pointillizer effect in CorelDRAW allows you to take simple shapes and transform them into complex, eye-catching designs. The possibilities are endless. Whether you are filling a star with smaller stars, creating a triangle of triangles, or working with circular patterns, the Pointillizer tool is a powerful feature that can give your designs a unique and artistic touch.
So go ahead, try out different shapes, tweak the settings, and let your creativity flow!
Hashtags: #CorelDRAW #PointillizerTool #DesignTips #VectorDesign #Shape


