Welcome to another lesson in our free CorelDRAW course! In today’s tutorial, we’ll explore CorelDRAW’s drawing tools, focusing on their unique functionalities and practical applications. Whether you’re drawing freehand, using Bezier curves, or creating intricate shapes, this guide will help you understand how to make the most of these tools.

Getting Started
Accessing the Drawing Tools
To begin, locate the drawing tools on CorelDRAW’s toolbar. These include:
- Freehand Tool (Shortcut: F5)
- Two-Point Line
- Bezier Tool
- Pen Tool
- B-Spline Tool
- Polyline Tool
- Three-Point Curve
Each tool serves different purposes and offers flexibility for diverse designs. Let’s dive into each tool’s functionality.
Exploring the Drawing Tools
1. Freehand Tool (F5)
This tool allows you to draw freehand shapes. To use it:
- Select the tool or press F5.
- Click and drag to draw.
- Notice that it creates a continuous curve with anchor points.
- Close your shape by connecting endpoints. Closed shapes can be filled with colors.
Practical Tip:
Use this tool for quick sketches or organic shapes.
2. Two-Point Line Tool
This tool is perfect for drawing straight lines:
- Click and drag to define the start and endpoint.
- Release to create the line.
Practical Tip:
Use this tool for structural designs or when creating guidelines.
3. Bezier Tool
A favorite among designers, the Bezier tool allows for precise control:
- Click to create anchor points.
- Adjust curves by dragging handles that appear after placing points.
- Use Esc or switch to the Selection tool to finalize the shape.
Practical Tip:
Ideal for tracing complex logos or illustrations.
4. Pen Tool
Similar to the Bezier tool but with added versatility:
- Click and drag to create curves.
- Continue clicking for subsequent points.
- Adjust curve tension by dragging.
Practical Tip:
The Pen tool is excellent for intricate designs and paths.
5. B-Spline Tool
This tool enables smooth, flowing curves:
- Define multiple points.
- Adjust curves between anchor points for smooth results.
Practical Tip:
Use this tool for creating rounded shapes or abstract designs.
6. Polyline Tool
A hybrid tool that combines straight lines and freehand drawing:
- Click for straight lines.
- Click and drag for freehand paths.
Practical Tip:
Best used when a design requires a mix of precision and organic flow.
7. Three-Point Curve Tool
This tool allows you to create curves efficiently:
- Click to define a starting point.
- Drag to establish the endpoint.
- Drag again to adjust the curve’s arc.
Practical Tip:
Use this tool for symmetrical designs and simple arcs.
Practical Exercise
Redesigning Logos with Bezier Tool
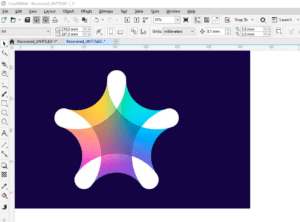
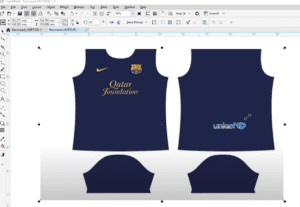
We’ll apply these tools to recreate three logos. Download the sample logos from the description of this article and follow these steps:
- Import the logo into CorelDRAW.
- Use the Bezier tool to trace the logo:
- Click at anchor points around the shape.
- Use the Shape Tool to adjust curves for precision.
- Add anchor points where needed for more control.
- Repeat the process for all logos.
Additional Tip:
Experiment with different tools to discover which one suits your workflow best.
Bonus Tips
Adjusting Shapes
- Select the Shape Tool.
- Click on a line or curve to add anchor points.
- Adjust curves by dragging handles.
Combining Tools
Combine the Polyline and Freehand tools to create complex designs with both structured and organic elements.
Conclusion
Mastering CorelDRAW’s drawing tools expands your creative capabilities. By understanding and experimenting with these tools, you can design logos, illustrations, and intricate patterns efficiently. Try out the exercise and see how these tools can transform your designs.
Tags:
CorelDRAW, drawing tools, freehand tool, Bezier curves, logo design, CorelDRAW course, CorelDRAW tutorial, graphic design tools, vector graphics, designing with CorelDRAW
Hashtags:
#CorelDRAW #DrawingTools #GraphicDesign #LogoDesign #BezierCurves #FreehandDrawing #CorelDRAWCourse #VectorGraphics

