Adobe InDesign is a powerhouse for creating stunning designs, interactive PDFs, and professional layouts. However, to truly unlock its potential, you need to explore its advanced features. This detailed guide shares 14 essential tips and tricks to help you make the most out of InDesign. Whether you’re generating QR codes, creating interactive elements, or automating tedious tasks, these steps will elevate your design skills. Let’s dive in!

1. Using Text Frames on Parent Pages
When working on multi-page documents like cookbooks or reports, setting text frames on parent pages saves time.
- Go to your Parent Pages (Master Pages).
- Use the Type Tool to create text frames for headers, content, or instructions.
- Return to your regular pages, where you’ll see faint outlines of your frames.
- Activate the frames by pressing Shift + Cmd (Mac) or Shift + Ctrl (Windows), and start typing.
This method eliminates the need to manually create text frames on every page.
2. Generating QR Codes
Add scannable links to flyers or brochures effortlessly.
- Go to Object > Generate QR Code.
- Choose Web Hyperlink and enter the desired URL.
- Customize the QR code color by selecting from the swatches.
- To edit, right-click and select Edit QR Code, making adjustments as needed.
Your flyers will now include an interactive, professional touch.
3. Creating Pop-Ups for Interactive PDFs
Design engaging presentations with pop-ups:
- Create a new layer for the pop-up and use the Rectangle Tool to design a semi-transparent overlay.
- Insert a video using File > Place and position it as desired.
- Add a Close Button using the Ellipse Tool and the Pen Tool for a cross icon.
- Use the Animation Panel to set the pop-up to appear on page load or a button click.
- Preview your interactive PDF via Window > Interactive > EPUB Interactivity Panel.
4. Adding Animated GIFs
Include animations in your interactive PDFs:
- Export a GIF from Photoshop.
- In InDesign, use File > Place to add the GIF.
- Use the Animation Panel to customize the animation, such as flying in from the left.
Preview the result to ensure the animation plays as expected.
5. Automating Table of Contents
Simplify TOC creation for large documents:
- Assign Paragraph Styles to your titles and TOC text.
- Go to Layout > Table of Contents and map the styles accordingly.
- Customize entry separators (e.g., bullets or tabs) and place the TOC in your document.
This ensures the TOC updates automatically with new sections.
6. Creating Masked Letters for Visual Designs
Achieve creative designs with masking:
- Place an image on your document.
- Use the Type Tool to create large text.
- Select both the image and text, then apply Object > Clipping Mask.
This integrates the image into the text, creating stunning visuals.
7. Using Pathfinder for Unique Designs
Combine and manipulate shapes for eye-catching effects:
- Go to Window > Pathfinder.
- Use options like Merge, Subtract, and Intersect to combine or cut out elements.
This tool is ideal for creating logos or intricate shapes.
8. Adjusting Text Wrap for Custom Layouts
Control text flow around images or objects:
- Select your object and go to Window > Text Wrap.
- Choose the wrap style and adjust the offsets.
This ensures text flows naturally, enhancing readability.
9. Utilizing Data Merge for Bulk Projects
Simplify repetitive tasks like creating ID cards or invitations:
- Go to Window > Utilities > Data Merge.
- Import a CSV file and map placeholders.
- Preview and generate personalized designs for multiple entries.
10. Exporting Accessible PDFs
Create inclusive designs for all audiences:
- Assign Alt Text to images via Object Export Options.
- Ensure proper Tab Order under the Articles Panel.
- Export using File > Export and select the Interactive PDF format.
11. Using Liquid Layout for Responsive Design
Design for multiple screen sizes:
- Enable Liquid Layout under Layout > Liquid Layout.
- Set rules like Scale or Recenter to adapt content to different dimensions.
This feature is crucial for designing responsive eBooks or presentations.
12. Creating Text Effects with the Gradient Feather Tool
Enhance your typography with subtle gradients:
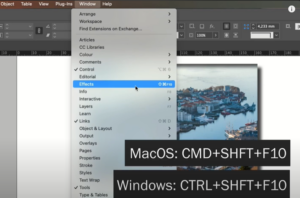
- Select text and go to Effects > Gradient Feather.
- Adjust the gradient direction and opacity.
This adds depth and sophistication to your text.
13. Mastering Styles for Consistent Design
Maintain uniformity across projects with styles:
- Use Paragraph, Character, and Object Styles for formatting.
- Update styles globally to apply changes instantly across the document.
14. Exporting Multiple Formats with Presets
Save time by creating export presets:
- Go to File > Export and select settings for print, web, or interactive PDFs.
- Save the preset for future projects to ensure consistency.
Conclusion
By mastering these 14 tips, you can harness the full power of Adobe InDesign, streamlining your workflow and enhancing your designs. Whether you’re a beginner or an advanced user, these techniques will take your skills to the next level. Explore, experiment, and elevate your projects today!
Tags: Adobe InDesign tips, interactive PDFs, QR code InDesign, table of contents automation, InDesign data merge, animation in PDFs, graphic design tools, professional layouts, Adobe tips and tricks, InDesign workflow, creating accessible PDFs
Hashtags: #AdobeInDesign #DesignTips #InteractivePDF #GraphicDesign #InDesignWorkflow #AdobeTips #InDesignTricks #DesignTools #ProfessionalLayouts #CreateWithAdobe
