Upgrading your CPU is one of the most satisfying hardware improvements you can make to your PC. It can breathe new life into your system, improve gaming performance, and enhance productivity for video editing, 3D rendering, or streaming.
However, upgrading a processor isn’t just about pulling one out and dropping another in. You need to understand motherboard compatibility, BIOS versions, socket types, and thermal paste application.
In this detailed guide, we’ll walk through how to upgrade an AMD CPU properly — using a real example of swapping an AMD Ryzen 7 7700X for a newer Ryzen 7 9800X3D — while explaining every important concept you need to know.
🧩 Step 1 – Understand Your Motherboard and Socket Compatibility
Before touching any hardware, it’s essential to know what motherboard you have and which CPUs it supports. Each AMD processor generation uses a specific socket and chipset, and not all are interchangeable.
Let’s break that down.
1. What Is a CPU Socket?
A CPU socket is the physical interface on the motherboard where the processor sits. AMD’s recent generations include:
| AMD Series | Socket | Typical Chipsets | Example CPUs |
|---|---|---|---|
| Ryzen 1000–5000 Series | AM4 | A320 / B450 / X570 | Ryzen 5 3600, Ryzen 9 5950X |
| Ryzen 7000 and 8000 Series | AM5 | B650 / X670 / A620 | Ryzen 7 7700X, Ryzen 7 9800X3D |
If you have an AM4 motherboard, you cannot install an AM5 CPU, since they use different physical pin layouts and DDR5 RAM requirements.
That’s why checking your motherboard model is the first and most critical step.
🔎 Step 2 – Identify Your Motherboard Model
If you aren’t sure what motherboard you’re using, don’t worry — a free tool can tell you in seconds.
🔧 Use CPU-Z
Download CPU-Z (a trusted diagnostic tool) and open it.
Under the “Mainboard” tab, you’ll find:
- Manufacturer: e.g., ASUS, MSI, Gigabyte, ASRock
- Model: e.g., ASUS TUF B650-PLUS WiFi
- Chipset and BIOS version
This information tells you exactly what board you have and what BIOS version it’s running — both are vital for deciding your next CPU upgrade.


🧮 Step 3 – Check CPU Support and Upgrade Options
Once you know your motherboard model, you need to see which CPUs it supports.
Option 1 – Visit the Manufacturer’s Website
Head to your motherboard manufacturer’s official support page (for example, asus.com, msi.com, gigabyte.com, or asrock.com) and look for a section called CPU Support List or Processor Compatibility.
There you’ll find:
- Every CPU the board can run
- The required BIOS version for each CPU
- Notes on memory or power requirements
If your desired CPU (say Ryzen 7 9800X3D) is listed, but only works from BIOS v 1.2.0.0 or later, you’ll need to update your BIOS before installing it.
Option 2 – Use PCPartPicker
Visit PCPartPicker and enter your motherboard model.
The site lists compatible CPUs and other components, helping you ensure the new processor fits your system’s chipset and socket type.
💡 Tip: PCPartPicker doesn’t always show the best prices, but it’s great for confirming compatibility before you buy.
⚙️ Step 4 – Check and Update Your BIOS (If Required)
A BIOS update (Basic Input/Output System) ensures your motherboard recognizes new CPU models. Without it, your system may fail to boot after installation.
How to Check Your BIOS Version
You already saw this in CPU-Z — it’s displayed under the “Mainboard” tab. Compare that version with the latest available on the manufacturer’s support page.
How to Update Your BIOS
Updating is easier than it used to be:
- Download the latest BIOS file from your motherboard’s support page.
- Copy it to a USB drive (formatted as FAT32).
- Enter BIOS setup by pressing Del / F2 during startup.
- Find the EZ Flash / M-Flash / Q-Flash utility (name varies by brand).
- Select the BIOS file on your USB drive and start the update.
⚠️ Important: Do not turn off your PC during the update.
A power failure could corrupt your BIOS chip and render the motherboard unusable.
Use a UPS if possible.
After the update, your board should now support newer CPUs like the Ryzen 7 9800X3D.
🧰 Step 5 – Gather the Right Tools and Materials
Before physically replacing the CPU, collect these essentials:
| Item | Purpose |
|---|---|
| Phillips-head screwdriver | Remove CPU cooler and case panels |
| Thermal paste | Ensures proper heat transfer between CPU and cooler |
| Isopropyl alcohol + cloth | Clean old thermal paste |
| Antistatic wrist strap | Prevents ESD damage |
| Flash drive | For BIOS update or drivers |
| CPU installation guide | (Usually included with your motherboard) |
Having everything ready avoids scrambling halfway through the process.
🔄 Step 6 – Remove the Old CPU
Now comes the hands-on part. Take it slow — patience here prevents costly mistakes.
- Shut down your PC and unplug it from power.
- Press the power button once (while unplugged) to discharge residual energy.
- Remove the side panel of your PC case.
- Unplug the CPU cooler’s fan connector from the motherboard.
- Unscrew or unclip the cooler carefully. If it’s stuck, gently twist it side-to-side to loosen the thermal paste bond.
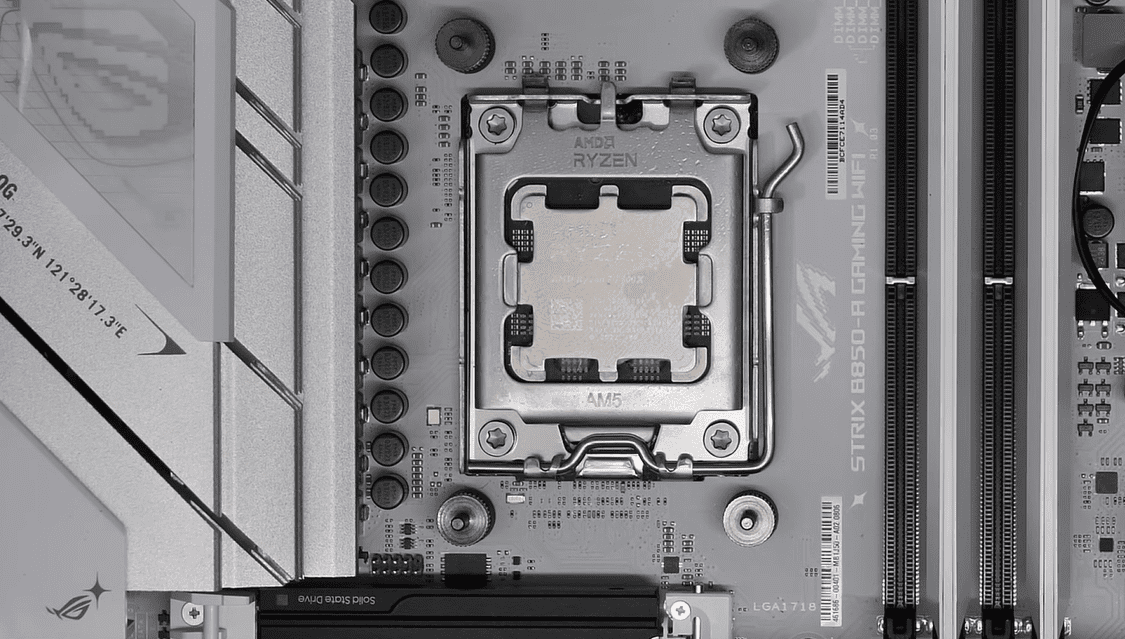
- Lift the CPU retention arm, then remove the old CPU straight up — avoid bending any pins (AM5 CPUs use contact pads, not pins).
- Clean the cooler’s base and the top of the old CPU with isopropyl alcohol to remove residue.
At this point, your socket should be clean and ready for its new upgrade.
🧠 Step 7 – Install the New CPU
- Align the CPU correctly. AMD marks one corner with a small gold triangle — match it to the triangle on the socket.
- Gently lower the CPU into place; do not force it.
- Lock the retention arm back down to secure it.
- Apply a pea-sized dot of thermal paste at the center of the CPU.
- Re-install the cooler, tightening screws evenly in a cross pattern.
- Reconnect the fan header.
Your new Ryzen 7 9800X3D is now physically installed!
⚡ Step 8 – First Boot and BIOS Check
When you power on the PC again:
- The first boot may take longer as the BIOS detects the new CPU.
- Enter BIOS and verify the CPU model and temperature readings.
- If everything looks good, set fan curves and enable DOCP / EXPO for RAM if needed.
- Save and exit.
Your system should now boot into Windows normally.
🧩 Step 9 – Install Drivers and Monitor Temperatures
After logging in:
- Update your chipset drivers from AMD’s official website (www.amd.com).
- Run Windows Update to fetch the latest patches.
- Use a temperature monitoring tool such as HWMonitor or HWiNFO to check CPU temps.
If idle temperatures are too high (over 50–55 °C at idle for desktop cooling), the cooler might need reseating or more thermal paste.
🎮 Step 10 – Enjoy the Performance Boost
Now the fun part — testing and enjoying the results!
The Ryzen 7 9800X3D offers a massive boost in gaming performance thanks to AMD’s 3D V-Cache technology, which adds extra L3 cache for faster data access.
You can expect smoother frame rates, better multitasking, and improved efficiency in productivity apps.
Run your favorite games or benchmarks to see the difference.
If everything is stable and temperatures are within safe limits (typically under 85 °C under load), you’ve successfully completed a CPU upgrade like a pro.
🧩 Common Questions and Answers
Q1: Can I upgrade to a Ryzen 7 9800X3D without changing my RAM?
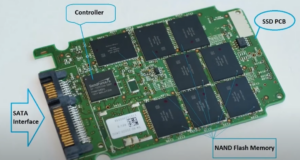
Yes, if you already use DDR5 memory on an AM5 board. Older AM4 boards use DDR4 and are not compatible with AM5 CPUs.
Q2: Do I need to reinstall Windows after a CPU upgrade?
Usually no. Windows 10/11 detects the new CPU automatically, though you may need to reactivate if the hardware ID changes significantly.
Q3: Will I lose my data during a CPU swap?
No, a CPU upgrade does not affect storage data. However, always back up important files before major hardware changes — just in case.
Q4: What if my PC doesn’t boot after installing the new CPU?
Recheck the following:
- BIOS version supports the new CPU
- CPU is seated correctly
- Power cables and RAM are secure
If it still fails, reinstall the old CPU to re-flash BIOS again.
Q5: How often should I re-apply thermal paste?
Typically every 2–3 years or whenever you remove the cooler.
🧭 Final Thoughts
Upgrading your AMD CPU is easier than it seems — as long as you take the right precautions.
Always start by checking compatibility and BIOS requirements, keep your workspace clean and static-free, and apply fresh thermal paste each time.
By following the steps above, you can transform an older system into a faster, more efficient machine that will serve you for years.
Disclaimer
This article is for educational and informational purposes only. Upgrading hardware can void warranties or cause damage if done improperly. Always follow official guidelines from AMD and your motherboard manufacturer.
#AMDUpgrade #RyzenCPU #PCBuild #TechGuide #BIOSUpdate #AM5 #CPUTutorial #PCGaming #HardwareTips


