Are you still running Windows 10? If so, you should know that Microsoft will officially end support for Windows 10 on October 14th, 2025. While many users can easily upgrade to Windows 11 using the free update option, others are facing roadblocks — primarily due to strict hardware requirements.
If your PC is older, you might have seen an error saying your system isn’t compatible with Windows 11. Microsoft introduced these requirements to enhance security and stability, but what if you’re not ready to give up your existing machine?

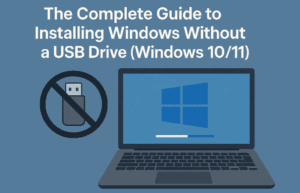
Good news — there is a way to upgrade to Windows 11 on unsupported hardware, and you won’t need any third-party tools or USB bootable drives. This guide will walk you through the process, step-by-step.
⚠️ Disclaimer: This method goes against Microsoft’s official recommendations. Microsoft designed hardware requirements in Windows 11 to protect users with features like TPM 2.0 and Secure Boot. Bypassing these checks could potentially leave your system more vulnerable. Proceed at your own risk.
Why Windows 11 Has Hardware Requirements
Microsoft’s push for stricter security measures has resulted in new baseline hardware standards. These are intended to protect users against modern threats by requiring things like:
- TPM 2.0 (Trusted Platform Module)
- Secure Boot
- Modern CPUs with virtualization-based security
These features help make your system more resilient to cyberattacks. But if your PC doesn’t support them, Windows 11 will refuse to install — unless you bypass the checks manually.
Before You Begin: Check Your Windows 10 Version
This method only works if you’re on the latest version of Windows 10 (22H2). Here’s how to check:
- Press Start and type
winver, then press Enter. - A window will open showing your Windows version.
- Confirm that it says Version 22H2.
If you’re not on 22H2, go to:
Start > Settings > Update & Security > Windows Update
Download and install all available updates. Reboot and repeat the process until your system is fully up to date.
Step-by-Step: How to Install Windows 11 on Unsupported Hardware
1. Download the Windows 11 ISO
Go to Microsoft’s official website:


Scroll down to the section labeled “Download Windows 11 Disk Image (ISO) for x64 devices”.
- Select Windows 11 (multi-edition ISO) from the dropdown.
- Click Download.
- Choose the same language as your current Windows 10 installation.
- Click Confirm, then click 64-bit Download.
The ISO file is large, so the download might take several minutes depending on your internet speed.
2. Mount the ISO File
Once the ISO is downloaded:
- Right-click the ISO file and select Mount.
- If prompted with a security warning, click Open.
- A new virtual drive will appear in File Explorer (e.g., E:).
Take note of the drive letter — you’ll need it soon.
3. Open an Elevated Command Prompt
- Press Start and type
cmd. - On the right-hand pane, click Run as Administrator.
- Accept the User Account Control (UAC) prompt.
4. Start the Installation with a Special Command
In the command prompt window:
- Type the drive letter of the mounted ISO followed by a colon (e.g.,
E:) and press Enter. - Then, type the following command and press Enter:
setup.exe /product server /compat ignorewarning /migratedrivers all
Don’t worry about the “server” reference — it’s just a workaround to bypass hardware checks. You’re still installing the standard version of Windows 11.
5. Proceed with the Installation
- A Windows Setup window will appear.
- Click Next.
- Accept the License Terms.
- Choose Keep personal files, apps, and settings when prompted.
- Click Next, then Install.
The upgrade process will begin. Your PC may restart several times.
Once the installation is complete, you’ll be welcomed by the Windows 11 desktop — all your files, settings, and programs will remain intact.
Final Thoughts
This workaround is ideal for users who want to continue using their existing hardware but stay on the latest Windows version. However, remember that Microsoft does not support running Windows 11 on unsupported hardware, and you might not receive all feature updates or support services.
That said, if you’re a power user comfortable with managing your system manually, this method could extend the life of your PC a bit longer — at least until you’re ready to upgrade your hardware.
Tags:
Windows 11 upgrade, unsupported hardware, Windows 10 end of support, bypass TPM, Secure Boot, Microsoft OS upgrade, install Windows 11 without TPM, Windows 11 ISO, Windows tips
Hashtags:
#Windows11 #UnsupportedHardware #WindowsUpgrade #Windows10EOL #TechTips #BypassTPM #MicrosoftWindows