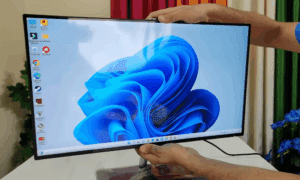
If you are wondering how to take a screenshot on Windows 11 (often referred to as WS1), you are in the right place! In this article, we will walk you through the easiest and most effective methods to capture your screen. Whether you want a full-screen capture or just a selected area, these techniques will help you take perfect screenshots with ease.

Let’s dive into the steps!
Method 1: Using Windows + Print Screen Shortcut
The first and simplest method to capture a screenshot is by using a keyboard shortcut. Here’s how:
- Press the Windows key + Print Screen key together on your keyboard.
- As soon as you press them, you will notice a slight blink on your screen. This indicates that the screenshot has been captured successfully.
- Now, go to This PC and open the Pictures folder.
- Inside the Pictures folder, you will find another folder named Screenshots.
- Your captured screenshot will be saved there automatically.
This method is very straightforward and perfect for quickly capturing the entire screen without needing any additional tools.
Method 2: Using Snipping Tool
If the first method doesn’t work for you, or if you want to capture a specific portion of the screen, you can use the built-in Snipping Tool. Here’s how:
- Go to the Search Box on your Windows taskbar.
- Type Snipping Tool and open it.
- Once the tool is open, you will see a camera icon. Click on it.
- Click on New to start capturing.
- Now, select the area of the screen you want to capture by dragging your cursor.
- The selected area will be captured immediately.
After capturing the screenshot, the Snipping Tool automatically opens a preview window. From there:
- If the screenshot is not saved automatically, you can click Save As and choose the desired location on your computer.
- If automatic saving is enabled, you will find your screenshot under Pictures > Screenshots.
The Snipping Tool is very handy when you need more control over what part of the screen you want to capture.
What If Snipping Tool Is Not Available?
If you cannot find the Snipping Tool on your PC, don’t worry! Microsoft provides built-in screenshot capabilities even if the Snipping Tool is missing. Make sure your system is updated to the latest version, and you should see either the Snipping Tool or its upgraded version (sometimes combined with the Snip & Sketch tool).
Conclusion
Capturing screenshots in Windows 11 (WS1) is easy and can be done using simple methods. Whether you prefer the quick shortcut of Windows + Print Screen or want to customize your capture using the Snipping Tool, both options are readily available for you. Bookmark this article for future reference, and you’ll always have the easiest solutions at your fingertips!
Tags: how to take screenshot in windows 11, windows 11 screenshot shortcut, snipping tool usage, snipping tool windows 11, best way to take screenshot, windows print screen key, windows snip and sketch, save screenshot automatically, windows screenshot guide
Hashtags: #Windows11 #ScreenshotGuide #SnippingTool #PrintScreen #WindowsTips #HowToScreenshot #WindowsHelp #TechGuide #ProductivityTools