Saving your work in CorelDRAW is a fundamental skill every user needs to master. This guide will walk you through the process of saving your CorelDRAW files efficiently, including choosing file formats, saving for compatibility, and creating templates for future use. Let’s dive in!
Steps to Save a Document in CorelDRAW
1. Open or Create a New Document
Before saving, ensure you have an open document. If you need to create a new document:
- Click on the New Document button.
- Perform your desired design task. For instance, create a shape, add a color, or design a flyer.
2. Saving Your Work
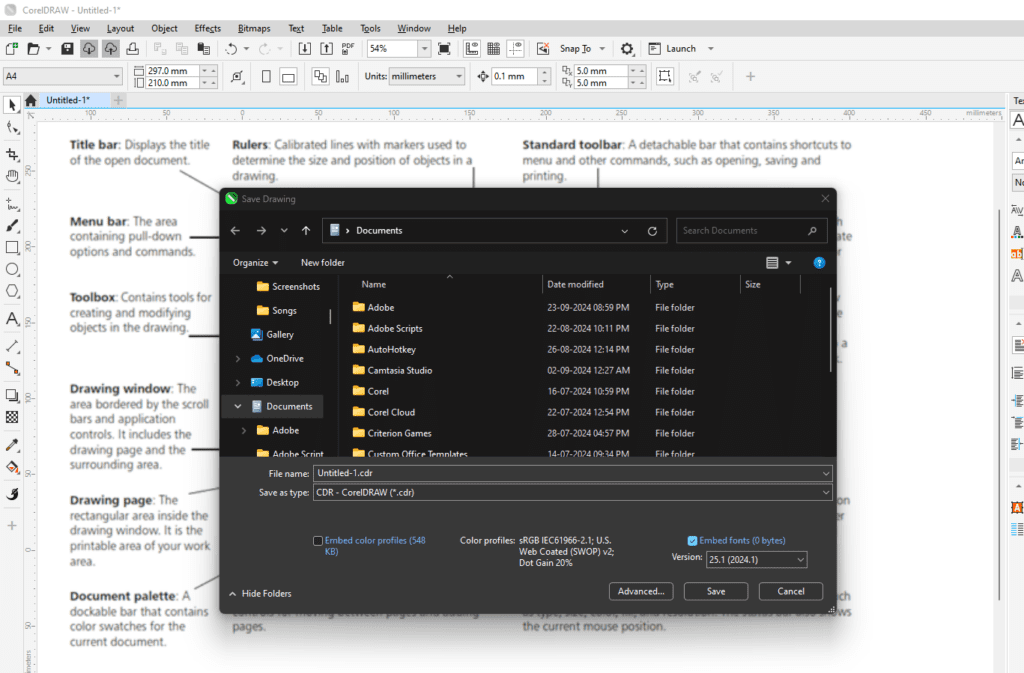
Once you’ve made progress on your design, it’s time to save your file. Here’s how:
- Click the Save icon (a floppy disk symbol) in the toolbar.
- Alternatively, go to the File menu and select Save or Save As.
Exploring Save Options
- Basic Save:
- After clicking Save, you’ll be prompted to choose a folder.
- Name your file and click Save.
- Corel Cloud Save:
- Choose the cloud save option to store your file securely online. This is a great option for accessing your work across devices.
- Save as Template:
- If you’re creating a reusable design, such as a business card or flyer, save it as a template by selecting Save as Template.
File Format and Version Compatibility
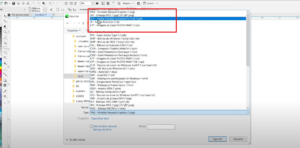
When saving, CorelDRAW allows you to select the file version:
- Why is this important? Older versions of CorelDRAW cannot open files saved in newer formats. For example, saving in version 24 might make it inaccessible to someone using version 22.
- Solution: Save the file in an older version if you plan to share it with someone using an older CorelDRAW version.
To change the version:
- In the save dialog, choose a version from the dropdown menu.
- CorelDRAW may display a warning about compatibility issues, but these are typically minor.
Saving in Different Formats
CorelDRAW supports multiple file formats. Here’s a breakdown:
- CDR (CorelDRAW File):
- Default file type for CorelDRAW projects.
- PDF:
- Ideal for sharing with clients or printing.
- Adobe Illustrator (AI):
- Export for compatibility with Adobe Illustrator.
- SVG (Scalable Vector Graphics):
- A web-friendly format for vectors.
- DWG:
- Export files for AutoCAD.
- Other Formats:
- CorelDRAW also supports PNG, JPG, and other file types for specific needs like embroidery or cutting machines.
Save As Option
If you need to save a second version of your file:
- Select File > Save As.
- Rename the file and select the desired format.
- Save it in a separate folder or alongside the original file.
Accessing Recent Files
CorelDRAW offers an easy way to reopen saved files:
- Use the Recent Files option in the File menu to quickly access your latest projects.
- Alternatively, navigate to the folder where you saved your file and double-click to open it.
Key Takeaways
- Always save your file frequently to avoid data loss.
- Use the version compatibility feature when sharing files.
- Explore various save formats to meet specific project requirements.
With this guide, you’re now equipped to save and manage your CorelDRAW files effectively. Stay tuned for the next tutorial, where we’ll explore exporting files in different formats such as JPG and PNG!
Tags
CorelDRAW, file saving, save options, version compatibility, Corel file formats, design tools, file management, CDR format, save as template
Hashtags
#CorelDRAW #FileSaving #DesignTips #SaveOptions #CorelTips #GraphicDesign
