If you’ve been enjoying running Android apps on your Windows 11 PC through the Windows Subsystem for Android (WSA), you may need to prepare for a change. Microsoft has officially confirmed that WSA support will end on March 5, 2025, along with the removal of the Amazon Appstore from the Microsoft Store.
But don’t panic—thanks to the open-source community, you still have a way to run Android apps (and even use the Google Play Store) on Windows 11, long after official support is gone.
In this article, we’ll cover:
- Why Microsoft is shutting down WSA
- What this means for you as a user
- Step-by-step instructions for installing a Google Play-enabled WSA build
- Troubleshooting tips and performance tweaks
- Security and stability considerations for using unofficial builds
Even though Microsoft ended official support for Windows Subsystem for Android, it doesn’t mean the end of Android apps on Windows. Thanks to community builds, you can still install WSA in 2025, run the Google Play Store, and sideload APK files… Read more 📱 How to Manually Install Windows Subsystem for Android (WSA) on Windows 11 in 2025
📢 Why Is Microsoft Ending WSA?
While Microsoft hasn’t shared every detail, several likely reasons explain the shutdown:
- Low adoption rates – Many Windows users simply didn’t use Android apps enough to justify ongoing development.
- Limited app ecosystem – The Amazon Appstore had far fewer apps than Google Play, making it less appealing.
- Maintenance and security costs – Keeping Android compatibility updated with Windows updates requires ongoing engineering resources.
- Focus shift – Microsoft appears to be prioritizing AI features and tighter integration with web-based applications over native Android app support.
📅 What’s Changing After March 5, 2025?
After the shutdown date:
- No more updates – WSA will not receive security patches or bug fixes from Microsoft.
- Amazon Appstore removal – It will disappear from the Microsoft Store.
- No native Android app installs – You won’t be able to install new Android apps without using unofficial methods.
- Existing apps – If you installed Android apps before March 5, 2024, they’ll continue working until March 5, 2025, but won’t receive updates.
🛠 How to Keep Running Android Apps on Windows 11
The most reliable workaround is to install a custom WSA package with Google Play Store support, maintained by the open-source community and available on GitHub.
⚠ Important Security Note:
Only download WSA builds from trusted, well-known GitHub repositories with an active contributor base. Avoid random file-sharing sites, as they may contain malware.
✅ Prerequisites
Before starting, make sure you have:
- Windows 11 (preferably version 23H2 or later)
- Virtualization enabled in BIOS/UEFI
- 8 GB RAM minimum (16 GB recommended for gaming)
- 7-Zip installed for extracting compressed files (Download here)
- At least 5 GB of free storage space
🔽 Step 1: Download WSA Build with Google Play Store
- Visit a reputable GitHub repository that provides Google Play-enabled WSA builds (example: WSA with Magisk and GApps GitHub).
- Look for the latest release marked as pre-release or stable with Play Store support and without Amazon Appstore.
- Download the ZIP file (usually ~600 MB).
- Extract it with 7-Zip to a folder like your Desktop.
💡 Tip: Keep the ZIP file until the installation is fully tested—this saves you from re-downloading in case of a reinstall.
🧰 Step 2: Enable Virtualization in BIOS/UEFI
Without virtualization, WSA won’t run.


- Restart your PC and press F2, DEL, or F9 to enter BIOS/UEFI (key depends on manufacturer).
- Find the CPU Configuration or Advanced tab.
- Enable Intel VT-x or AMD-V (Virtualization Technology).
- Save changes and reboot.
To verify:
- Open Task Manager → Performance tab → CPU → Look for Virtualization: Enabled.
⚙️ Step 3: Install WSA with Google Play Store
- Open the extracted WSA folder.
- Right-click
Run.bat→ Run as administrator. - Wait for the installation to complete, following on-screen prompts.
- Once done, Windows Subsystem for Android will be installed with Google Play Store integrated.
🌐 Step 4: Sign In to Google Play Store
- Open Windows Subsystem for Android from the Start Menu.
- Ensure Developer Mode is enabled (if required by your WSA build).
- Launch Google Play Store.
- Sign in with your Google account.
- Complete any 2-step verification prompts.
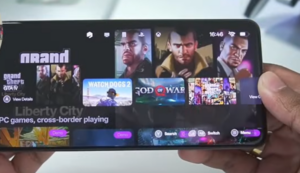
You can now install Android apps and games just as you would on a real Android device.
🎮 Step 5: Test the Setup
Try installing a few apps or games—many users report smooth performance, even on mid-range hardware.
If you face slow performance:
- Go to WSA Settings → Increase Memory Allocation (e.g., 6 GB or 16 GB).
- Under Graphics Settings, set GPU to High Performance.
⚠ Troubleshooting Common Issues
Problem: Installation fails.
- Solution: Ensure Virtual Machine Platform and Windows Hypervisor Platform are enabled in Windows Features.
Problem: Google Play Store won’t open.
- Solution: Restart the PC, then open WSA before launching Play Store.
Problem: Apps crash on launch.
- Solution: Update your graphics drivers (NVIDIA/AMD/Intel).
💡 Why You’re Getting “No Eligible Device for This App” in Google Play
When you go to the Google Play Store website (play.google.com) and click Install, Google checks your Google account’s device list to see if any of your devices are compatible.
Since WSA is not officially certified as an Android device by Google:
- It doesn’t register itself in your Google account’s device list.
- The Play Store web interface says “No eligible device for this app.”
- This happens even though the Play Store inside WSA works fine.
✅ How to Fix or Work Around This
There are three main options:
Option 1 — Install Directly from the Play Store App Inside WSA
This is the easiest and safest.
- Open WSA → Launch Google Play Store.
- Search for your app or game inside the Play Store app.
- Click Install from there — it bypasses the website check.
📌 This works for most apps, but not for ones that require official Google certification (e.g., Google Wallet).
Option 2 — Make WSA Show Up as a Certified Device
This involves editing WSA’s build properties to mimic a real Android phone or tablet.
- Navigate to your WSA installation folder.
- Locate the
build.propfile inside the/systemdirectory. - Open it in a text editor and change the following lines to match a known certified device (example: Pixel 6): iniCopyEdit
ro.product.model=Pixel 6 ro.product.brand=Google ro.product.device=oriole ro.product.manufacturer=Google - Save changes and restart WSA.
- Sign out of your Google account inside Play Store, then sign back in.
- Wait up to 24 hours — your “device” should now appear in your Google account.
⚠ Note: Modifying build.prop is an advanced step and can break things if done incorrectly. Always back up the file first.
Option 3 — Use APK Downloads Instead
If the app still won’t appear as installable, you can download its APK and install it manually in WSA.
To install:
- Download the APK file.
- In WSA settings, enable Developer mode.
- Use the
adb install appname.apkcommand (ADB must be installed) or just drag the APK into the WSA window.
🚫 Important Limitations
Even after the fix, some apps may never work in WSA because they:
- Require hardware not present in PCs (gyroscope, GPS, etc.).
- Use SafetyNet or Play Integrity checks (banking apps, Google Wallet, Netflix HD).
- Depend on ARM architecture only (WSA on Intel/AMD runs x86 and ARM via emulation, but not perfectly).
🧩 Bonus — Alternatives to WSA
If you’d rather not use unofficial builds, you can still run Android apps on Windows using:
- BlueStacks 5 – Popular Android emulator, optimized for gaming.
- LDPlayer – Lightweight emulator with good performance.
- NoxPlayer – Flexible emulator with macro support.
These won’t integrate as tightly with Windows as WSA, but they will remain supported after Microsoft’s shutdown.
🎯 Final Thoughts
Microsoft’s decision to end WSA might feel like a step backward for Android app fans on Windows. However, open-source solutions make it possible to keep the dream alive—with even more flexibility thanks to Google Play Store integration.
Whether you stick with a modified WSA build or switch to a full Android emulator, you can still run your favorite mobile apps and games on your PC long after March 2025.
Tags: windows 11 android apps, windows subsystem for android, wsa google play store, install android apps windows, microsoft android support ending, android on windows 11, run android games on pc, windows 11 wsa alternative, virtualization windows 11, google play store pc
Hashtags: #Windows11 #WSA #AndroidApps #GooglePlayStore #TechGuide #WindowsTips #Virtualization #OpenSource #WSASupport #MicrosoftUpdate #AndroidOnWindows


Please add this to the end of the Prerequisites
A trusted GitHub repository that maintains WSA builds with Google Play Store
LInk added .. plz chk.
Doesn’t work. Message is ‘No eligible device for this app’ when clicking ‘install’ on the Google Store website
Oh Sorry to hear that, i have updated the blog with possible solution to resolve this error. Check and reply back whethere it solved or not.
…When you go to the Google Play Store website (play.google.com) and click Install, Google checks your Google account’s device list to see if any of your devices are compatible.
Since WSA is not officially certified as an Android device by Google:
It doesn’t register itself in your Google account’s device list.
The Play Store web interface says “No eligible device for this app.”
This happens even though the Play Store inside WSA works fine.