When working with text in Adobe InDesign, you may often encounter documents with multiple spaces—double, triple, or even more—causing uneven formatting. Manually fixing these spaces can be time-consuming, especially in lengthy documents. Fortunately, Adobe InDesign’s Find and Change feature simplifies this task and helps you replace all multiple spaces with a single space in just a few steps.
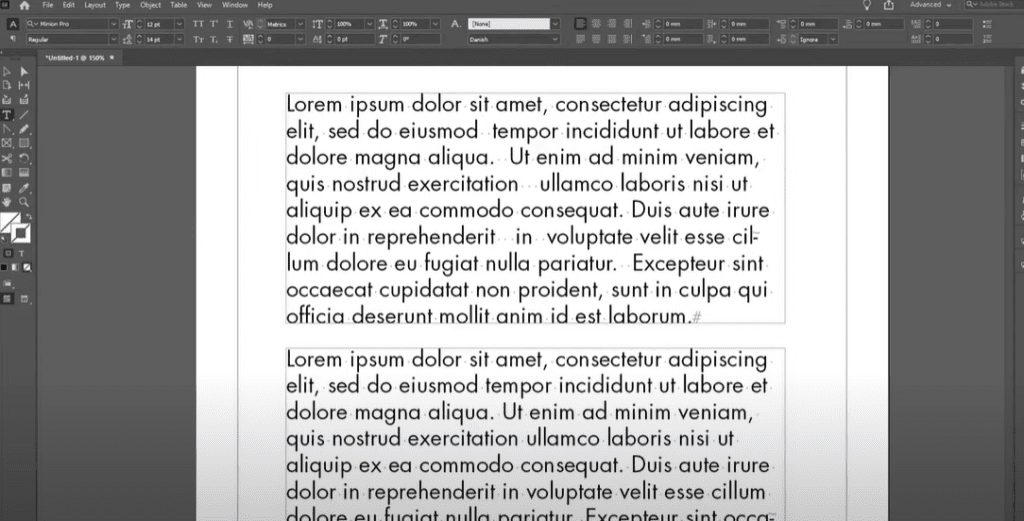
In this article, I’ll guide you through the process of fixing multiple spaces efficiently.
Step 1: Identify Multiple Spaces
Before replacing anything, it’s essential to visualize the spaces in your document.
- Open your Adobe InDesign document.
- Enable Hidden Characters by going to Type > Show Hidden Characters.
This will allow you to see all the spaces, paragraph breaks, and other hidden formatting symbols. Multiple spaces will appear as a series of dots between words.
Step 2: Access the Find and Change Tool
Adobe InDesign has a powerful Find and Change feature that allows you to search and replace text or formatting throughout a document. Here’s how to open it:
- Go to Edit > Find/Change in the top menu.
- Alternatively, you can use the keyboard shortcut Ctrl + F (Windows) or Cmd + F (Mac).
This will open the Find/Change dialog box.
Step 3: Configure the Find and Replace Settings
- In the Find/Change dialog box, set the following options:
- Find what: Type two spaces (or more, if necessary).
- Change to: Type a single space.
- Set the Search Scope:
- Ensure the search is set to Document so it applies to the entire file.
- If you’re working on a specific text frame or story, you can narrow the scope accordingly.
Step 4: Execute the Find and Change
Once the settings are ready:
- Click Find Next to locate the next instance of multiple spaces.
- Click Change to replace the selected multiple spaces with a single space.
- If you want to replace all occurrences at once, click Change All.
- After the process completes, a pop-up will show the total number of replacements made. Click OK to confirm.
Step 5: Verify the Changes
Go back to your document and review the text. You will notice that all double or triple spaces have been replaced by a single space. If your document has multiple pages, this tool will ensure consistency throughout.
Why Use Find and Change in Adobe InDesign?
- Saves Time: Instead of manually fixing spaces, you can clean up your entire document in seconds.
- Ensures Consistency: Helps maintain clean formatting, especially for large text-heavy projects.
- User-Friendly: The tool is easy to configure and requires no advanced skills.
Conclusion
Replacing multiple spaces with a single space in Adobe InDesign is a simple yet highly effective way to clean up your text and improve document formatting. By using the Find and Change feature, you can save time and ensure your text looks professional. Try these steps in your next project and experience how seamless the process can be.
#AdobeInDesign #InDesignTips #TextFormatting #CleanText #InDesignTutorial #DocumentFormatting #DesignTips
