If you’re looking for a simple way to record your computer or laptop screen without downloading any heavy software, you’re in the right place. In this article, you’ll learn how to record your screen using a free browser-based tool that works directly through Google Chrome.
Let’s explore how to do it step-by-step using Screencastify, a popular and lightweight screen recording extension.
✅ What Is Screencastify?
Screencastify is a free Chrome extension that allows users to record their screen online. Since it’s browser-based, you don’t need to install any large software on your computer. Just add the extension to your Chrome browser and you’re ready to start recording.
⚠️ Note: Screencastify works only when connected to the internet. It doesn’t support offline recording.
🧩 Step-by-Step Guide to Record Screen Using Screencastify
1. Open Google Chrome
Make sure you’re using the Chrome browser, as Screencastify is a Chrome extension and won’t work with other browsers.
2. Go to Chrome Web Store
- Click on the three vertical dots at the top-right corner of Chrome.
- Navigate to “Extensions”.
- Select “Visit Chrome Web Store.”
Or, go directly to: https://chrome.google.com/webstore
3. Search for Screencastify
In the Chrome Web Store search bar, type:
Screencastify
It should appear in the results. Click on it to view more details.
4. Add the Extension to Chrome
- Click on the “Add to Chrome” button.
- A popup will appear asking for confirmation. Click “Add Extension.”
- Once installed, you’ll see the Screencastify icon near the Chrome address bar.
5. Sign In to Screencastify
- Click the Screencastify icon.
- Sign in using your Google account to access its features.
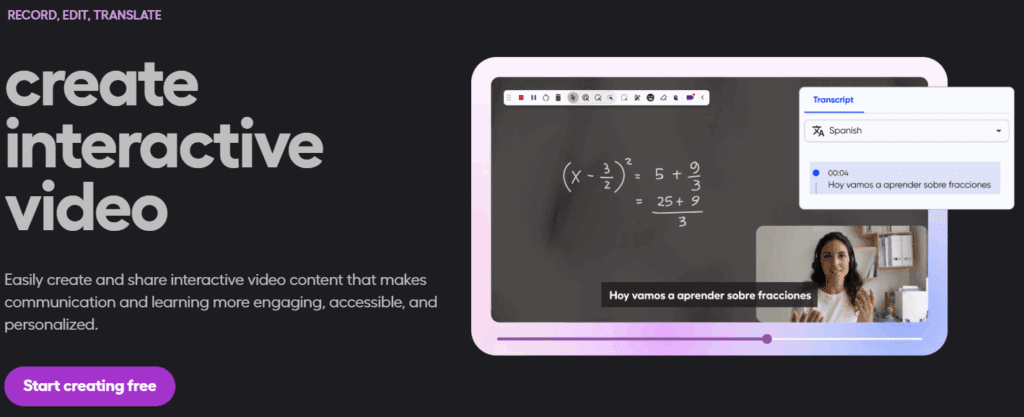
🎨 Screencastify Features
Once you’re signed in, here are some handy features you can access:
- Pencil Tool: Draw on the screen during recordings.
- Microphone Access: Record voiceover through your default microphone.
- Camera Access: Record your webcam along with your screen.
- Multiple Layouts: Record your entire screen, a specific window, or a Chrome tab.
- Countdown Timer: A “3-2-1” countdown before recording starts.
- Save & View Recordings: View all your recorded videos in one place, complete with date and time.
- Editing Tools: Trim or edit the videos within the app.
- Download Option: Save the recordings to your device with a single click.
🎥 How to Start Recording
Here’s how to start your screen recording using Screencastify:
- Click the Screencastify icon from the Chrome toolbar.
- Choose your recording source:
- Entire screen
- Specific application window
- A browser tab
- Set your microphone and camera preferences (enable if needed).
- Click “Record.”
- Choose what to share (entire screen or specific window).
- After the 3-second countdown, your recording will begin.
Once done, click on Stop, and the recording will automatically be saved. You can download, preview, or edit the video right from the extension interface.


📁 Where Are My Videos Saved?
After stopping the recording:
- The video is automatically saved to your Screencastify account.
- You can download the file to your computer.
- Videos are organized with date and time stamps, so you can easily track them.
📝 Final Thoughts
Screencastify is an excellent solution for anyone who needs to record their screen without installing any bulky software. It’s quick, efficient, and packed with useful features like drawing tools, webcam overlay, and editing options. Perfect for educators, content creators, and tech enthusiasts!
🔗 Useful Links
📌 Tags
screen recording, record PC screen, Chrome extension, Screencastify tutorial, free screen recorder, online screen recorder, how to record screen without software, screen capture tool
📢 Hashtags
#ScreenRecording #Screencastify #FreeTools #ChromeExtensions #RecordScreen #OnlineScreenRecorder #TechTips #ProductivityTools
⚠️ Disclaimer
Screencastify is a third-party Chrome extension, and while it is free to use, it may require account sign-in or have limitations for premium features. Always check the extension’s privacy policies and permissions before use.


